


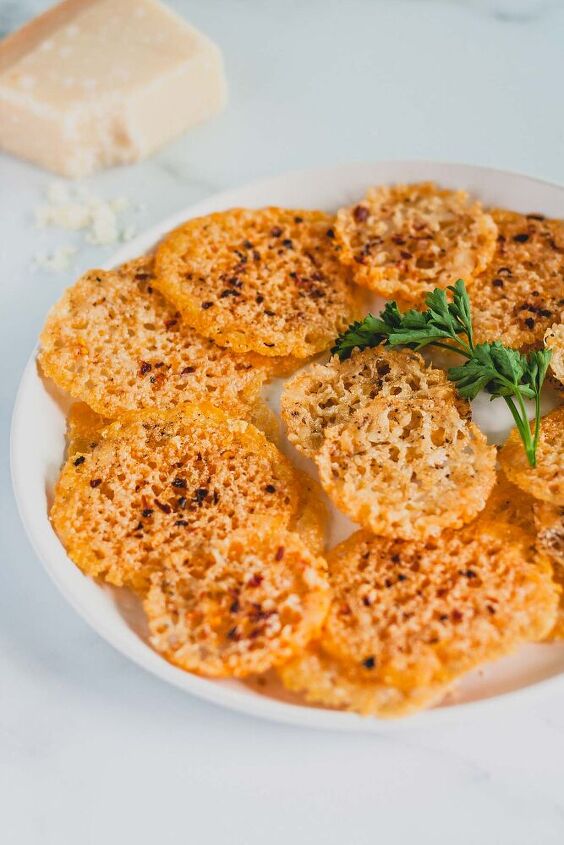
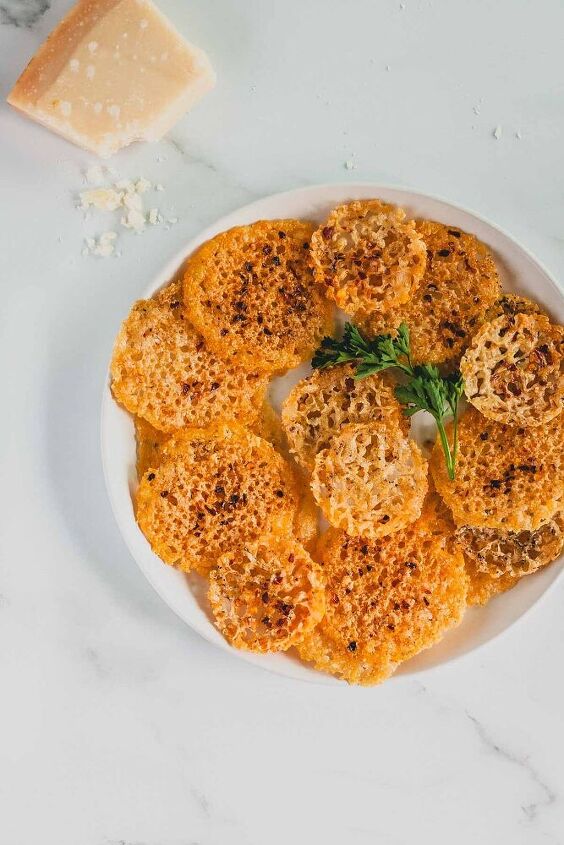
Baked Parmesan Crisps

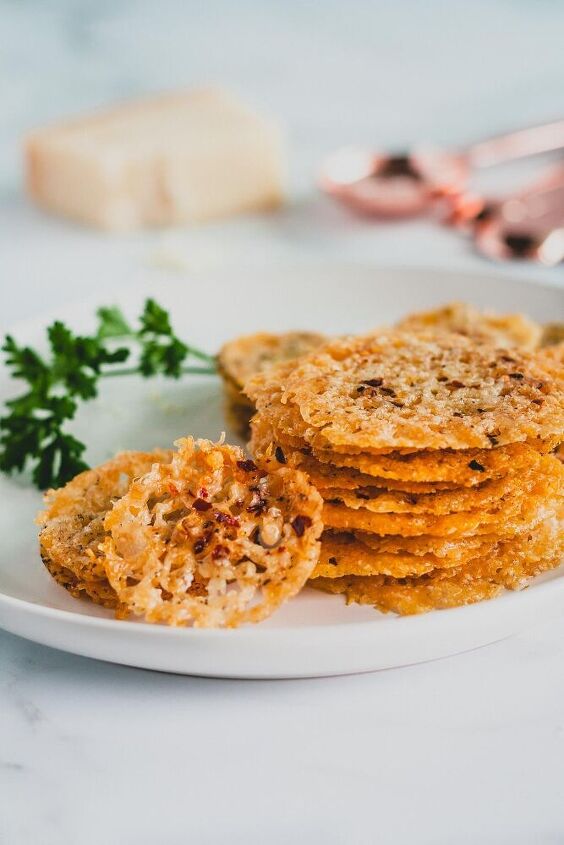
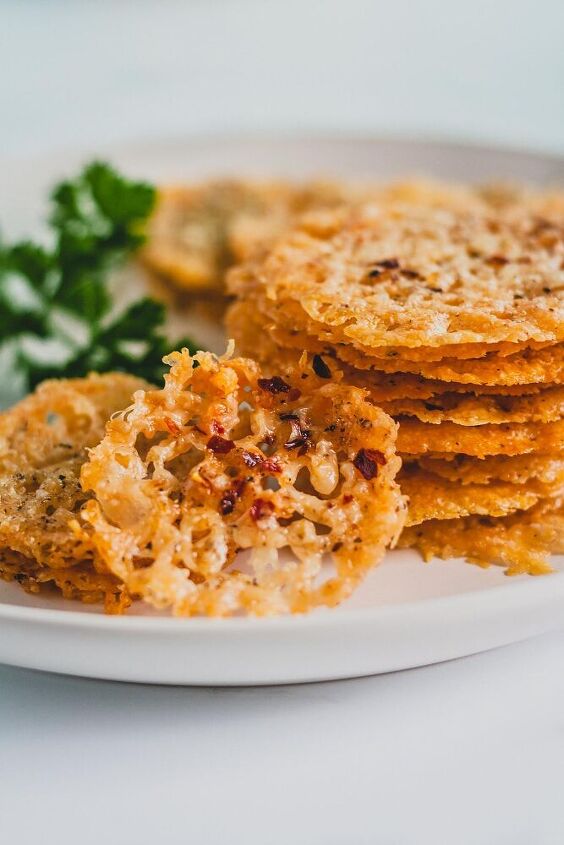
Calling all cheese lovers! Is your favourite thing about nachos those little pieces of chip-less cheese that fall onto the pan and turn perfectly crispy? Do you think the best piece of lasagna is the corner with the most crunch? If so, you’re going to love these Baked Parmesan Crisps!
All you need are two ingredients and eight minutes of time to make this keto, gluten-free snack. Half chip, half cracker, they make for a great addition to a charcuterie board, or in a bowl with a side of dip. Or, double the recipe and store them in your fridge for convenient, guilt-free snacking throughout the week!
Making parmesan crisps couldn’t be easier! All you need is fresh parmesan cheese, a bit of black pepper, and some spices or seasonings of your choosing.
Start by grating your fresh parmesan cheese into a bowl, until you have about 4 ounces. Using a 1 tablespoon measuring spoon, scoop the grated parmesan onto whatever baking tray or pan you’re using.
There are a few ways to bake these parmesan crisps. If you’re using a metal baking sheet, be sure to line it with parchment paper first. Another great option is to use a silicone baking sheet. If you’re using silicone, you can skip the parchment paper. Finally, you could use a metal muffin tray (sprayed) or a silicone muffin tray. Using a muffin pan ensures the parmesan crisps all bake to the exact same size and shape.
Whatever method you choose, make sure each circle of cheese is not spread too thin nor piled too thick. On a tray, the 1 tablespoon scoops of parmesan should be spread to about a 2 inch diameter circle, with at least an inch between each. In a muffin pan, the distribution and spacing is taken care of for you!
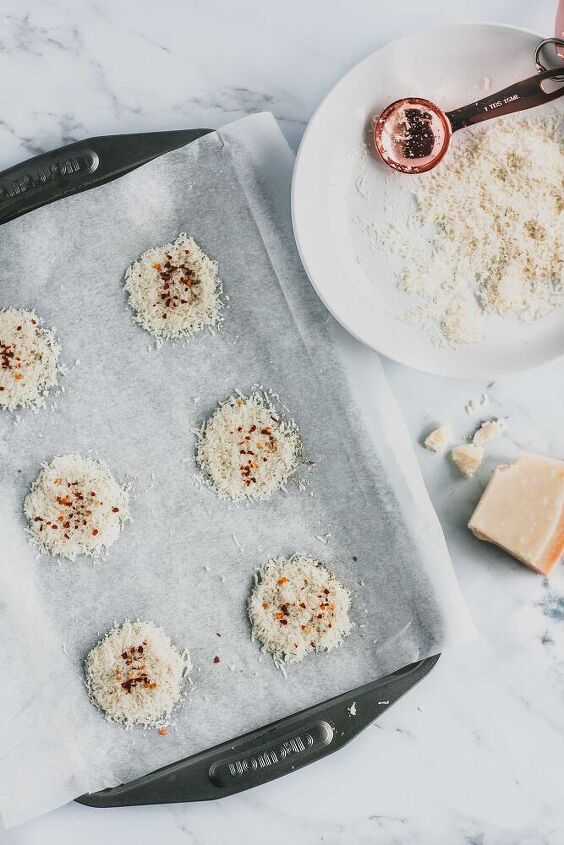
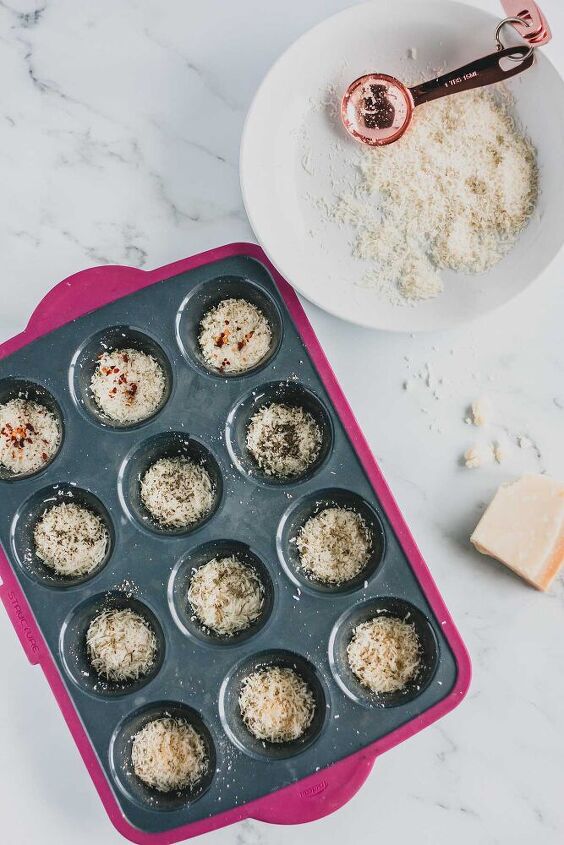
Top each pile with a dash of black pepper and whatever other seasoning you like. For the parmesan crisps in these photos, I sprinkled some with red pepper flakes for a little bit of kick, and others with basil for a more mild flavour.
Once you have your trays prepared, just stick them in your preheated oven for 5-6 minutes! Watch them closely! Depending on the strength of your oven, they can overcook and/or burn really quickly.
Once the parmesan crisps are perfectly baked, remove them from the oven and let them cool completely. They won’t really become fully crispy until you’ve given them a chance to cool. Trust me, it’s worth the wait!
It’s important to buy a block of parmesan cheese and freshly grate it yourself when making these crisps.
Pre-grated parmesan cheese won’t bake or crisp in the same way. You’ll essentially be left with a toasted pile of cheese dust. Gross. Pre-grated parmesan cheese also usually contains a filler called cellulose, which is an anti-clumping agent made from wood pulp. Pass!
For the best, most consistent results, stick to a fresh block of parmesan cheese and grate it right before you’re ready to bake these crisps.
Additions and modifications
There are endless possibilities one could create with these baked parmesan crisps. Whatever your favourite flavouring or seasoning is, it would probably taste great atop salty, crispy cheese.
Some other ideas I haven’t tried yet are sliced jalapeno, basil pesto, dried rosemary, garlic powder, and the addition of another cheese like shredded cheddar.
Parmesan crisps are a great snack option to make if you’re hosting because they’re super easy, take almost no time, and are a total crowd pleaser.
Serve them in a bowl like chips on their own, or with your favourite dip on the side. You could also serve them as crackers on a charcuterie board to appease your gluten-free and/or keto guests! Half Baked Harvest has some of the best tips for how to make a cheeseboard. Incorporate these crisps as one of the components!
These parmesan crisps also make for a delicious alternative to a crouton. Serve them on top of soups, like my Creamy Keto Tomato Soup, or on salads for a crunchy, salty treat.
If you’re simply making these baked parmesan crisps for your own snacking (no judgment!), I recommend doubling or tripling the recipe so you have a big batch of chip/crackers conveniently on hand.
If you aren’t serving or eating these crisps right away, store them in an airtight container for up to 3 days in your cupboard. Alternatively, store them in an airtight container and place them in the fridge, where they will stay fresh for weeks.
If you make these parmesan crisps, let me know in the comments below what flavours you came up with!
Looking for other cheesy ideas? Check out these recipes:
- Creamy Keto Tomato Soup
- Parmesan Roasted Broccoli
- Perfect Winter Salad
Baked Parmesan Crisps
Recipe details
- 24 servings
- Prep time: 2 Minutes Cook time: 6 Minutes Total time: 8 min


Comments
Share your thoughts, or ask a question!
these would be great with everything bagel seasoning!!!
Sounds wonderful! I would like to have a directions for stove-top preparation of Parmesan Chips - especially with addition of a pesto!
Thanks!