


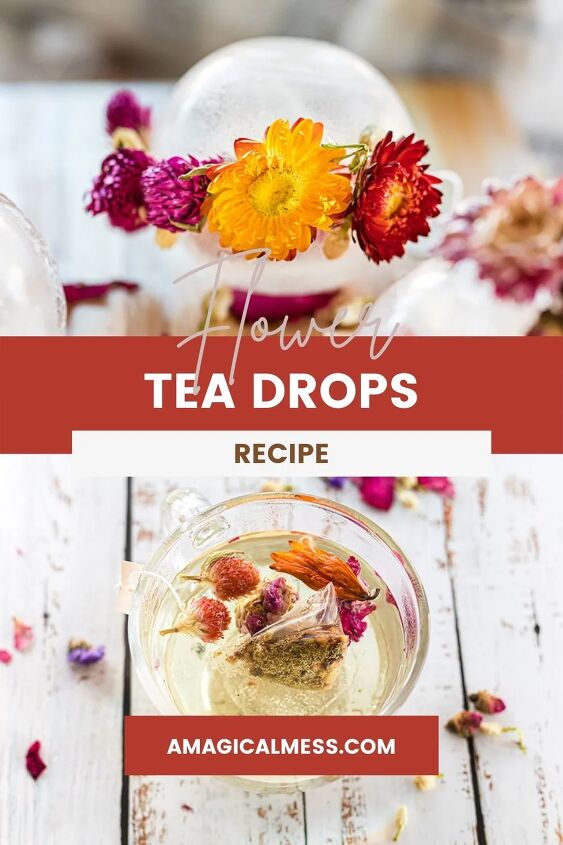
DIY Floral Tea Globes for Blooming Flower Tea
Blooming tea lovers, get ready! These DIY floral tea globes are for you. Make homemade hot blooming tea balls for yourself or to give as gifts this holiday season.
Like hot tea drops but a bit more magical, these flower tea orbs melt into a delicious hot tea blend of your choice. Don’t let this DIY intimidate you. There are quite a few steps, but take them one by one and you’ll be on your way to making these beauties with all your favorite flavor blends.

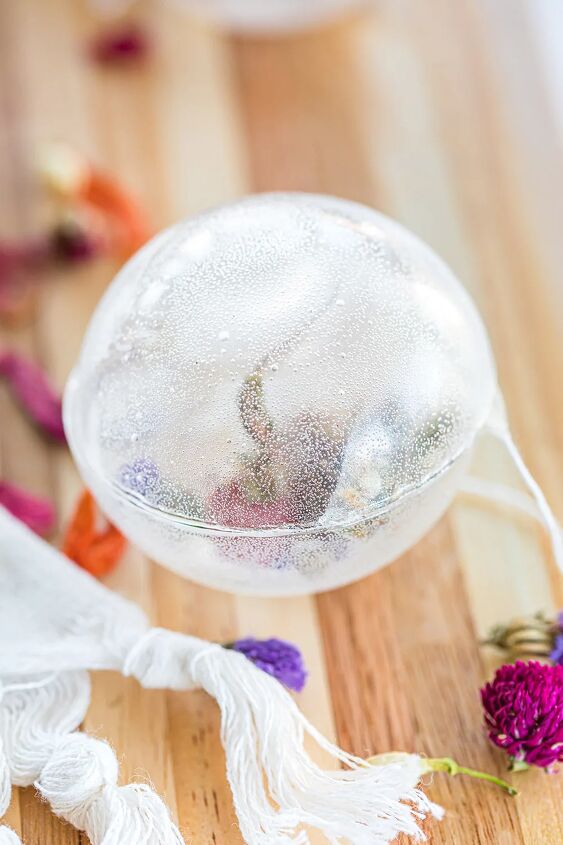
For everyone hopping on the drink melt train, add these flower balls to your list. Clear spheres that contain edible flowers and your favorite tea are gorgeous before and after they melt.
I’ve only had blooming tea a few times and it’s a whole experience! Use a clear mug to get the full vibe. Watching your own creation melt is even more fun.
Get creative and start making these orbs for your fall and winter cozy drink time or to give as unique homemade gifts for tea lovers.
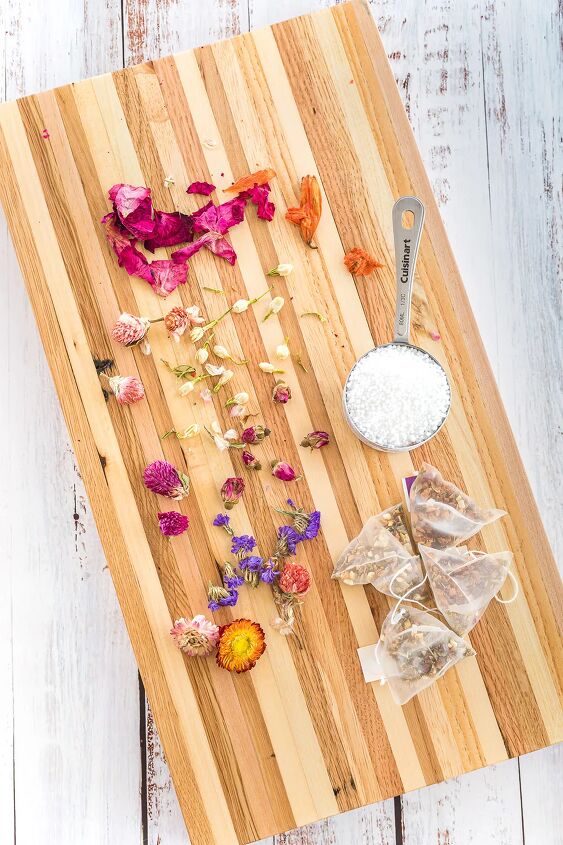
Flower Tea Melts Ingredients
Here’s what you need to make this recipe. The exact measurements are in the printable recipe card below.
- Isomalt crystals
- Tea bags or loose-leaf tea
- Dried edible flowers
- Small saucepan
- Large cavity semi-sphere silicone mold
- Sugar gloves
In a small saucepan, melt isomalt crystals over medium-high heat.
Do not stir the isomalt while it is melting. Just allow the crystals to melt on their own. Shake the pan to help shift the crystals if needed, but do not stir until all the crystals are liquid.
Once completely melted, stir the mixture until the bubbles have disappeared and the liquid is clear.
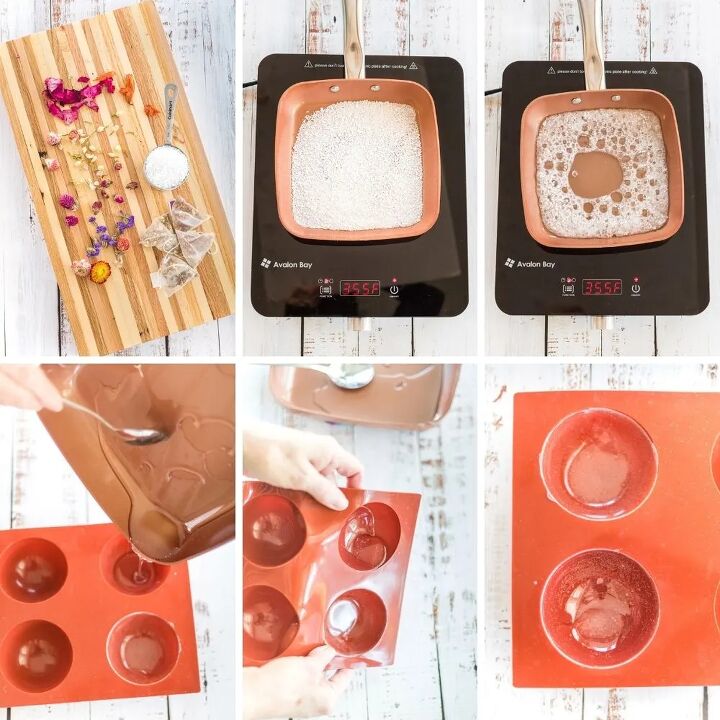
Quickly pour or spoon a couple of tablespoons of the melted isomalt into the mold cavities. Be careful to avoid contact with the skin as the mixture will be extremely hot and will burn your skin.
Rotate to coat the inside of the molds evenly. Make sure to cover the entire mold cavity. This method produces a smooth translucent shell.
Allow the orbs to cool about 20-30 minutes before moving to the next step.
Repeat the above process until all the mold cavities are filled. Isomalt can be reheated multiple times as long as you are careful not to burn it.
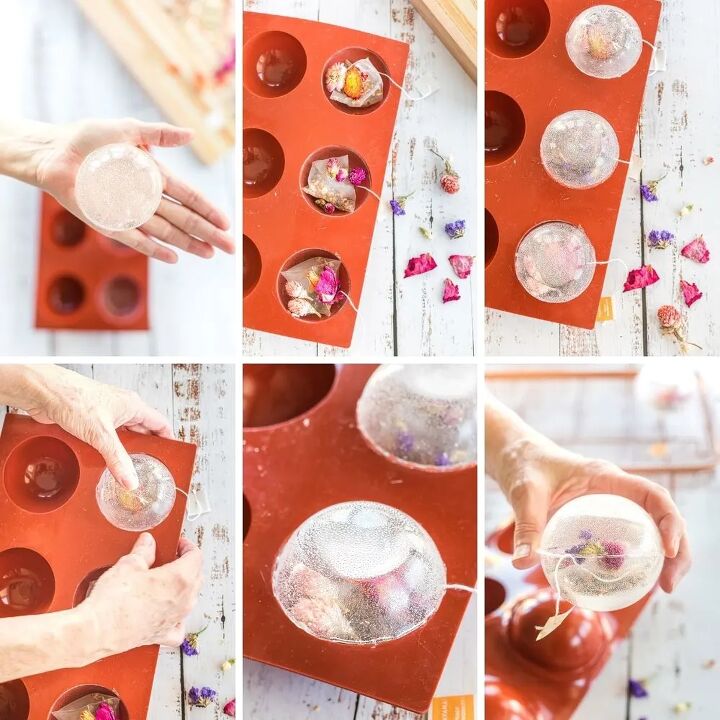
When all the spheres are cool, remove the top halves from the mold by pushing up from the bottom. Leave the bottom halves in the mold. This makes assembly easier.
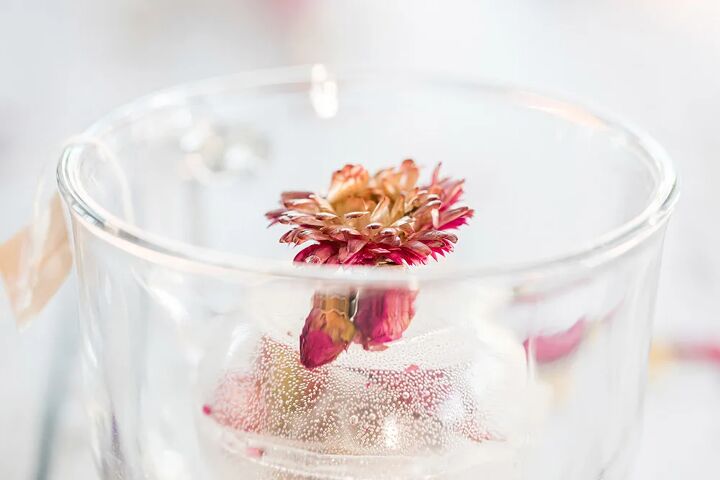
Place tea bags or loose-leaf tea into the bottom half of the globe (the ones still in the mold) along with any edible flowers or herbs you are using. You can leave the tea bag string out of the mold if you’d like.
Place a small skillet over low heat. This is used to smooth the orb edges and to help fuse the bottoms and tops together.
Once the skillet is heated, place one globe top onto the hot skillet for a few seconds to smooth and melt the edge.
Quickly place it on top of the bottom half that is still in the mold filled with the tea and flowers. The melted edges will dry and join the halves together.
Repeat the above step for the other globes.
Allow the orbs to set for about 5-10 minutes. Carefully press up on the bottom of the mold to release the orbs. The globes are fragile, so be gentle.

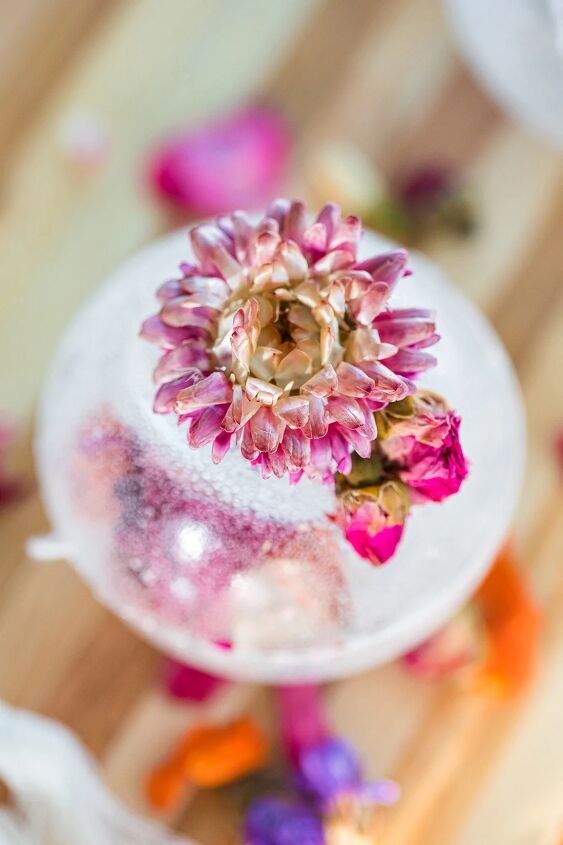
If you’d like, you can place extra edible flowers to the tops or the sides of the globes using a bit of melted isomalt.
To do this, melt a tiny amount of isomalt in the pan. Carefully dip one end of the flower into the melted isomalt and attach it to the globe. This step is optional and it is best to use the protective gloves.
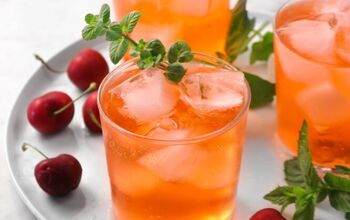
To use your beautiful creation, carefully place one orb into a mug.
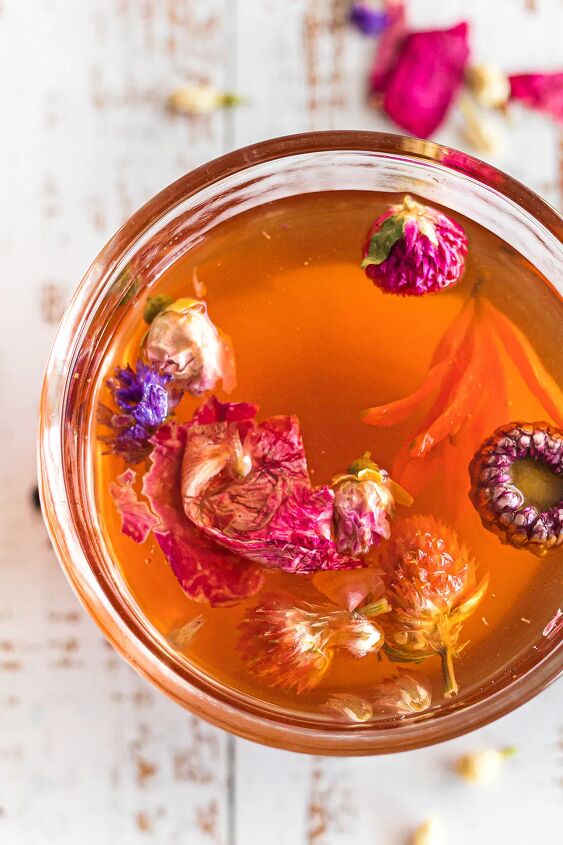
Pour hot water over the ball and watch it bloom into a delicious hot tea!
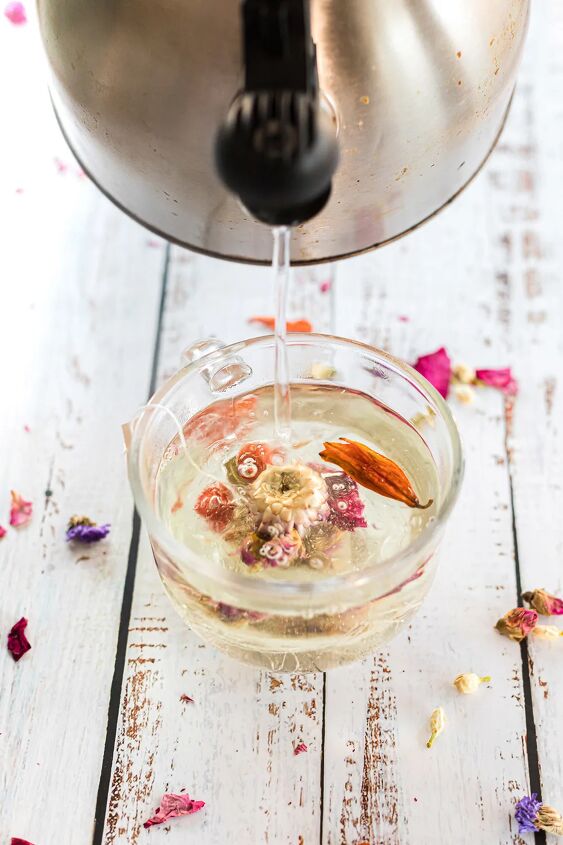
Use a clear mug to get the full view.
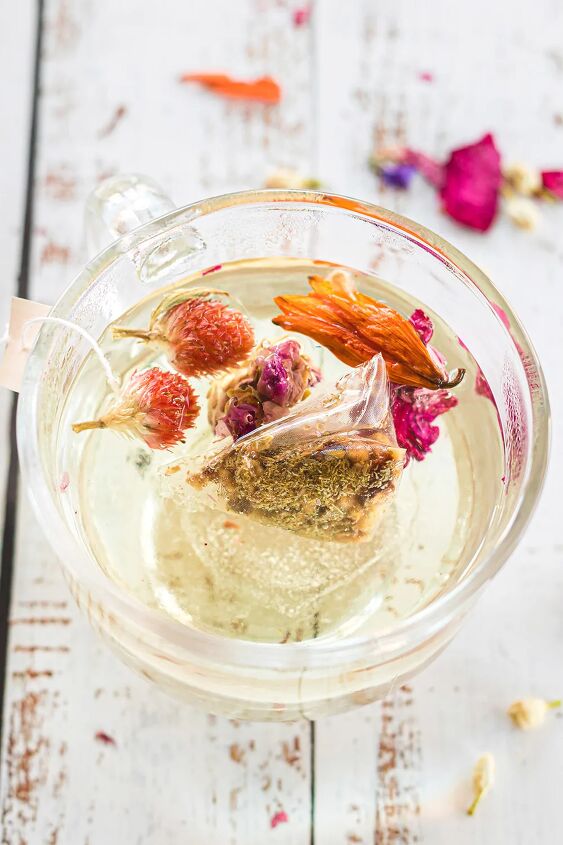
The color of the drink will depend on the type of tea and flowers that you used.
Blooming Tea Bombs Recipe Notes and FAQ
Please wear protective gloves while using isomalt. The mixture gets extremely hot and it’s easy to burn yourself in an instant.
Depending on the size of your molds, the tea bags may need to be folded to fit inside. This is fine, just be sure that the bags are fully inside before sealing the two halves together. Use a large cavity mold.
Is it easy to make hot tea bombs?
Tea bomb creation is a bit of a learned art. They aren’t as easy to make as hot chocolate bombs, but it’s easy to improve with practice. Make a few test rounds before creating some for homemade gifts.
Hot tea drops are fragile and will shatter if not handled with the utmost of care.
Isomalt crystals are a tad sweet. If you prefer your tea sweetened, you may want to add sugar or another sweetener either to the globes or to the tea after making it.
Flowering tea bombs can be stored in a cool, dry place. No need to refrigerate unless you live in a hot, humid climate.
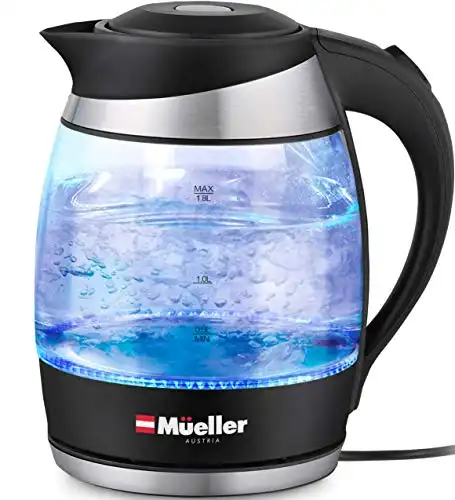
Oh, who ordered the light show in the kitchen? That's just the way we boil water now! Quickly and easily bring water to a rolling boil with an electric kettle. Watching water boil is no longer boring.
- Unicorn hot cocoa bombs
- Mocha coffee melts
- Glittery green hot chocolate drops
Pin to save and share!
If you make these floral tea globes I’d love to see them! Please tag me on social media.
DIY Floral Tea Globes for Blooming Flower Tea
Recipe details
- 3 Orbs
- Prep time: 5 Minutes Cook time: 55 Minutes Total time: 1 hr


Comments
Share your thoughts, or ask a question!