


HOW TO MAKE EASTER SMASH EGGS IN FOUR EASY STEPS!
Easter smash eggs are easy to make and a great surprise in any basket or tablescape! We show you how to create them step-by-step!
I have to admit, I stumbled across this idea on Facebook.

A couple of weeks ago, an ad popped up in my feed from Dylan’s Candy bar for their “Easter surprise bash egg.”
It was really a cute candy egg and a clever concept …
So I clicked.
And then I gasp.
The price tag for these Easter delights was around $45 per egg.
Yikes.
That’s a lot of jelly beans.
And then I took a closer look at it.
Wait … this is basically a hot cocoa bomb!
I’ve covered how to make those before.
So the wheels began to spin in my creative little head.
Just a little bit later, I was joyously smashing eggs in my very own kitchen for a mere fraction of the cost.
It was all of the fun, without any of the financial pain.
And it was definitely a moment to celebrate.
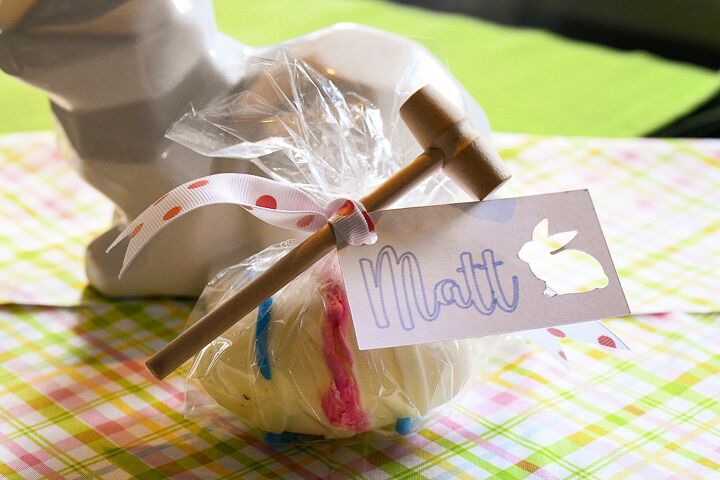
Because, I think the perfect spot for these darling smash eggs is to put one at everyone’s place setting on my Easter table.
Imagine the excitement on Easter as you sit down to your meal.
Everyone grabs their very own mallet and bashes their individual smash Easter egg to discover the variety of candies in each of these beautifully decorated eggs.
Posts on Make Every Day an Event may contain affiliate links which means we may earn a small commission on purchases at no extra cost to you. To learn more, please read our full disclosure here.
I’ll show you how you can create that memorable moment, step by step …
HOW TO MAKE CHOCOLATE EASTER SMASH EGGS
Here are the supplies you’ll need:
White chocolate morsels, one bag
Dark chocolate morsels, one bag
Cookie icing (a variety of colors)
Small Easter candies (I used multi colored jelly beans and pastel M & Ms)
Large silicone egg molds
Small wooden mallets
Note: you don’t want to use milk chocolate morsels. They won’t set properly, be sure to use dark chocolate!
STEP ONE: MELT THE CHOCOLATE
For my chocolate Easter smash eggs, I wanted to use both dark chocolate and white chocolate. I thought the variety would be interesting.
So the first step was to melt the chocolate.
To do this (and to keep it from burning), I melted the chocolate in a metal bowl, placed over a sauce pan of hot water.
It’s best to melt the chocolate slowly, over medium heat.
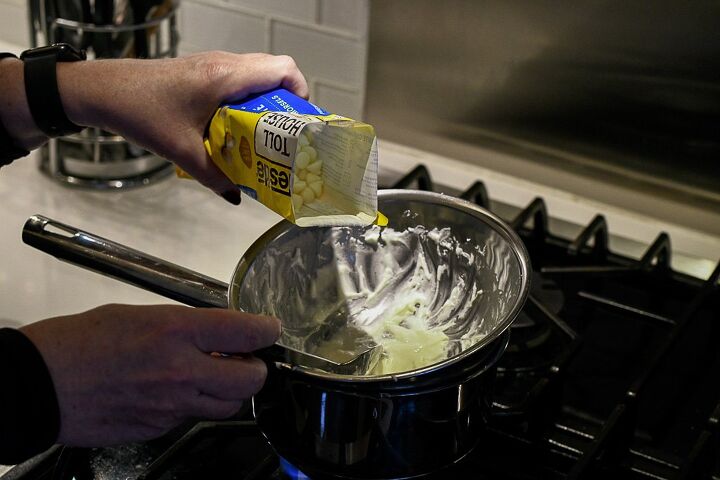
If you have a double boiler handy, that is the perfect pot for this job. If you do not, this make shift double boiler will certainly do the trick.
Just be careful when you are stirring the chocolate as it melts.
The top bowl may be a bit wobbly.
STEP TWO: PLACE THE MELTED CHOCOLATE IN THE SILCONE MOLDS
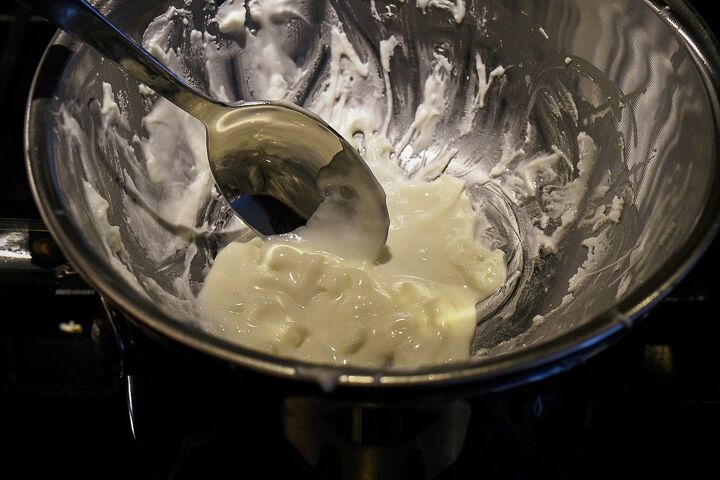
After the chocolate is fully melted, remove it from the heat.
Next, you’ll want to let it cool for a few minutes.
When you first take it off the stove, the chocolate will be runny.
But before you place it in the molds, it needs to thicken a bit.

I’ve found the best tool to use to fill the molds is a tablespoon. The curve of the spoon works well with the curve of the mold.
Ensuring the chocolate is fully covering the mold, without any gaps or holes, is the key to all of this.
If there are holes, you’ll run into problems later.
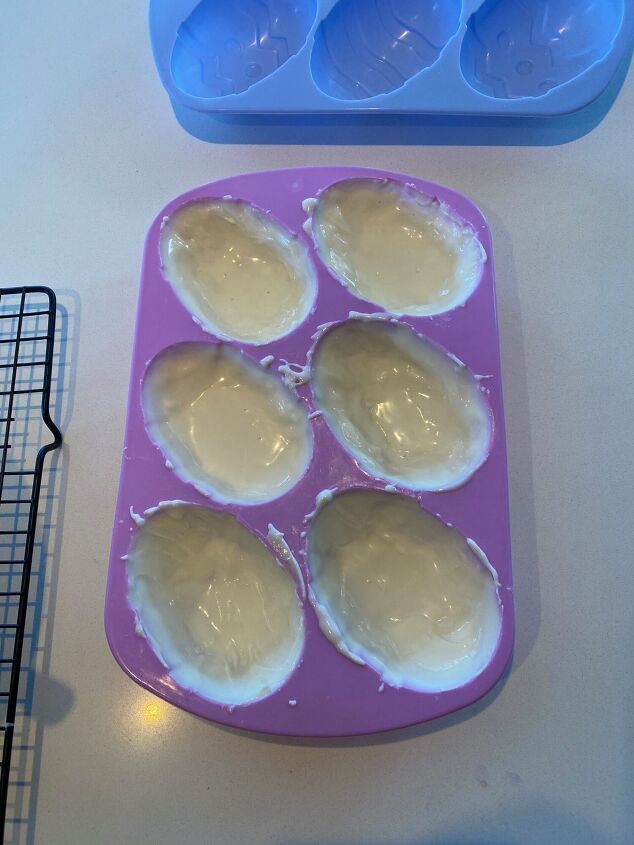
After your molds are fully covered, place them in the freezer for about about two hours to fully set.
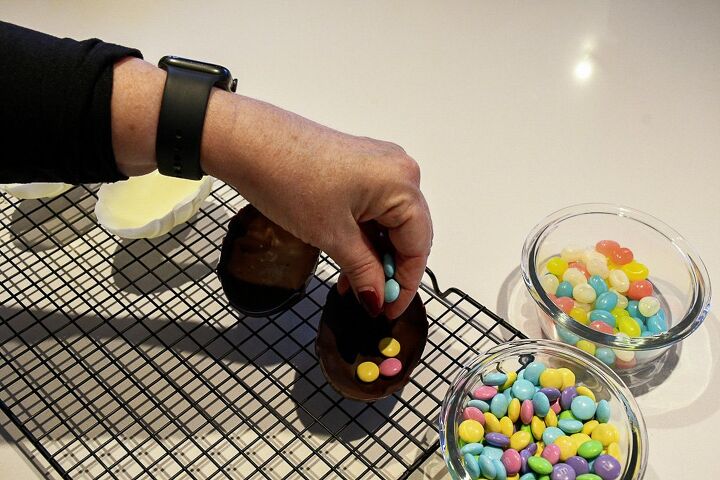
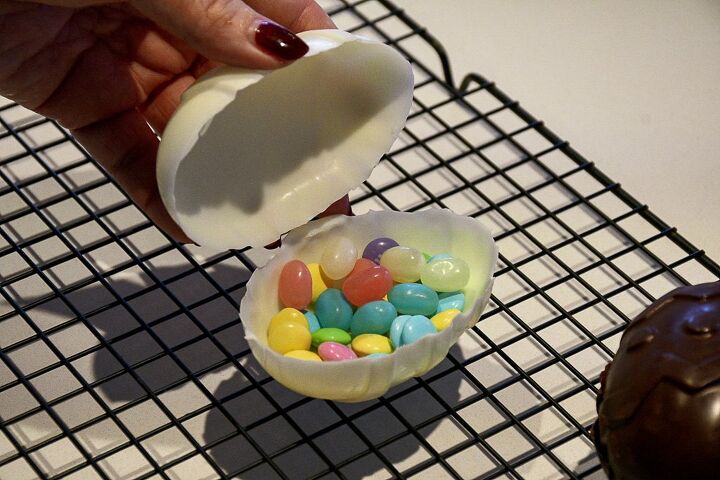
STEP THREE: ASSEMBLE YOUR SMASH EASTER EGGS

The silicone molds make it easy to pop out the hardened chocolate egg shells.
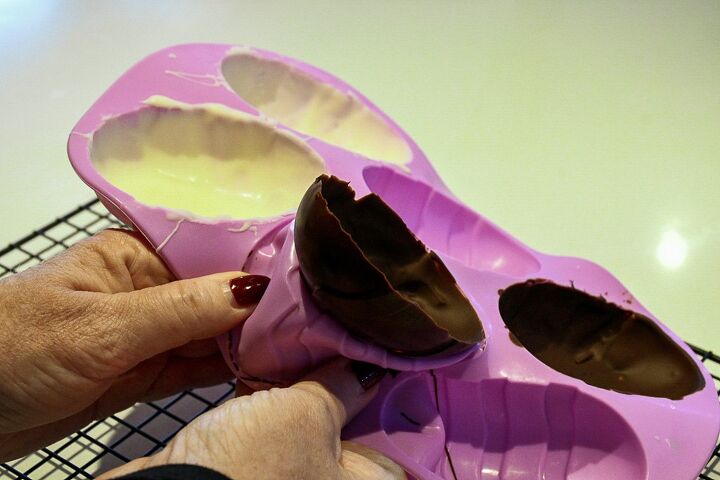
To make the finished egg, you’ll need two halves.
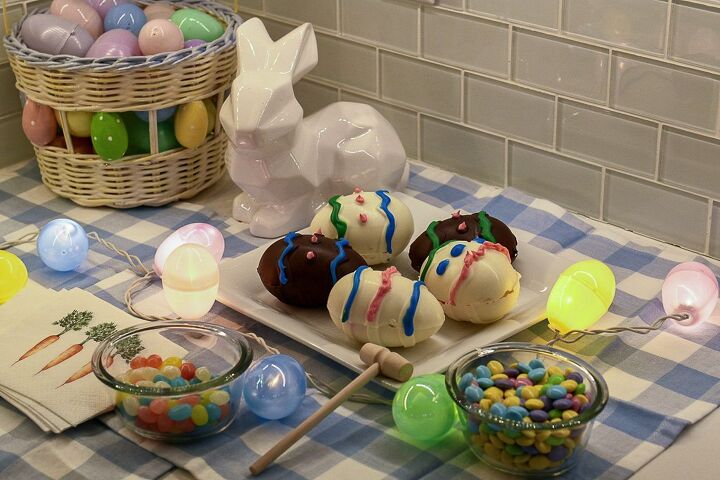
Fill one of the halves with your favorite small Easter candies. I used pastel jelly beans and pastel chocolate M&Ms.
Don’t you love how the colors look so bright and cheerful against the chocolate?
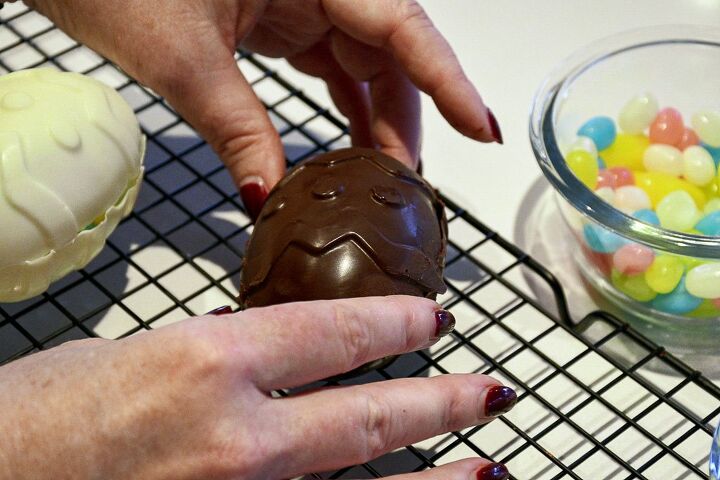
Place one half on top of the other.
Next, firmly press the two halved together to create a seal.
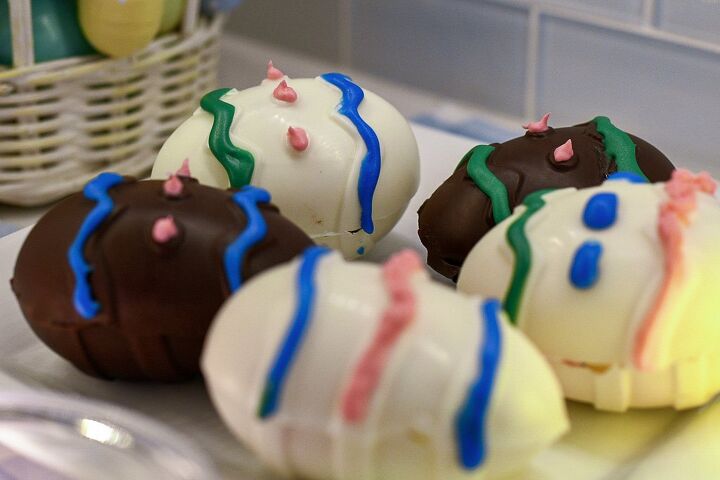
STEP FOUR: DECORATE YOUR EASTER SMASH EGGS
This is my favorite part!
Well … my second favorite.
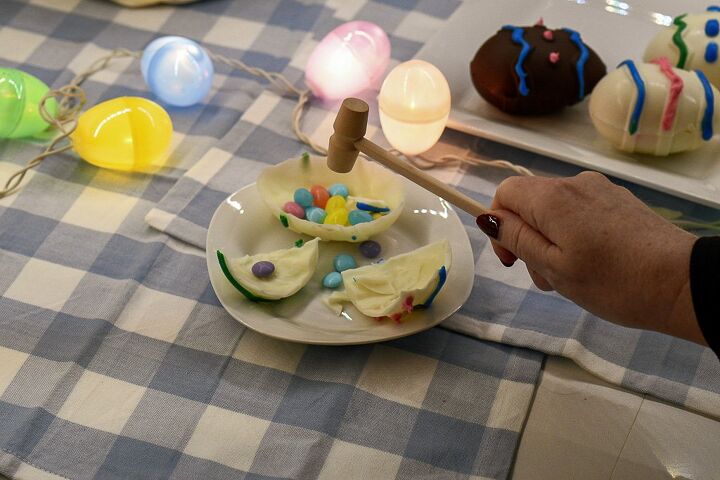
Smashing the eggs is obviously the most fun!
I used pre-packaged cookie icing to decorate my Easter smash eggs.
This was one of the tricks I learned when creating hot cocoa bombs.
You can’t use anything warm on top of the chocolate.
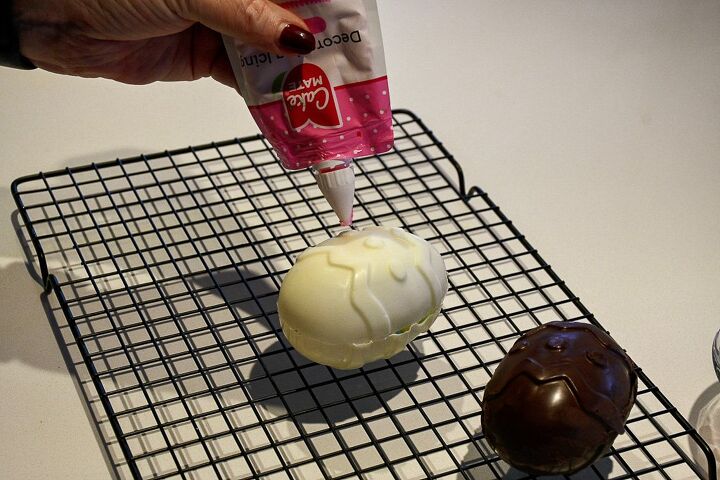
If you do, it will melt.
And you want to avoid creating any holes.
Also, I prefer the taste of cookie icing to fondant, which could also be used on the outside of the eggs.
But the flavor of fondant is not nearly as good as cookie icing! Plus I like the thinner lines you can create with the icing!
After you’re finished decorating your eggs, you’ll want to store them in a cool spot.
The refrigerator is actually ideal.
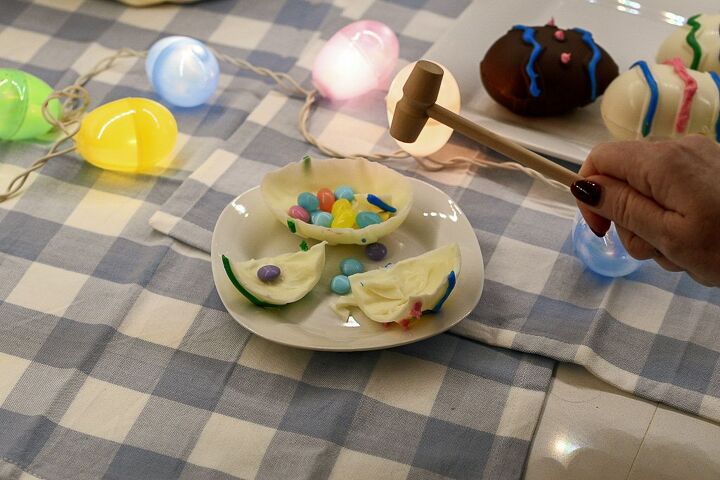
That’s it! You’re now ready to smash your creation!
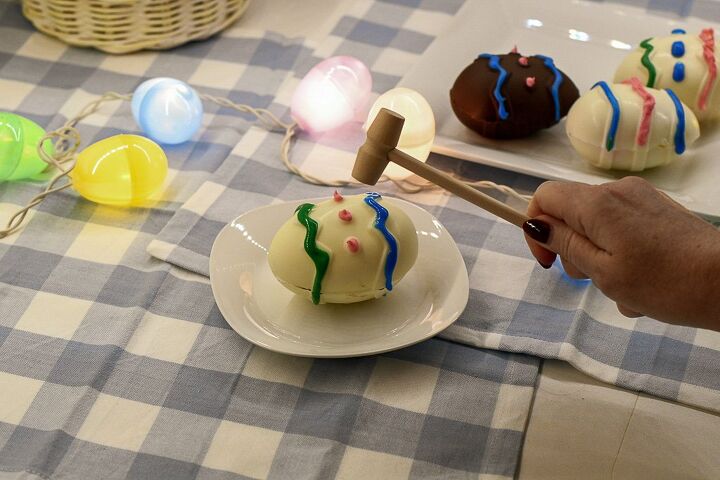
One quick smack and presto …
A treasure trove of Easter candies await!
I’m planning on making individual bash Easter eggs for each of our guests. I love how these placeholders turned out. Here’s what I used to make them:

Did you try any of these Easter table ideas? Share them on Instagram with the hashtag and tag @makeeverydayanevent!
Looking for some other great Easter ideas? Check out these blogs:
Five Simple Easter Tabletop Decor Trends You’ll Love
This Easy DIY Easter Wreath Idea Will Look Adorable on Your Front Door
Four Simple Easter Table Ideas to Help You Create the Perfect Setting
If you have any questions or suggestions, contact us or leave a comment!
Follow us on social media! You can find us on Instagram, Pinterest, and Facebook.
HOW TO MAKE EASTER SMASH EGGS IN FOUR EASY STEPS!
Recipe details
- 6 Eggs
- Prep time: 5 Minutes Cook time: 15 Minutes Total time: 20 min


Comments
Share your thoughts, or ask a question!
Where do you get the wooden mallets from???