


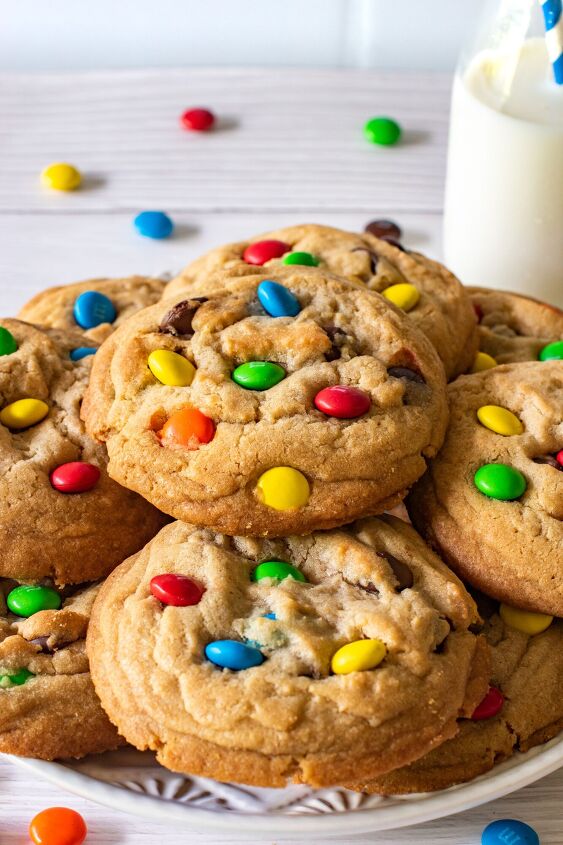
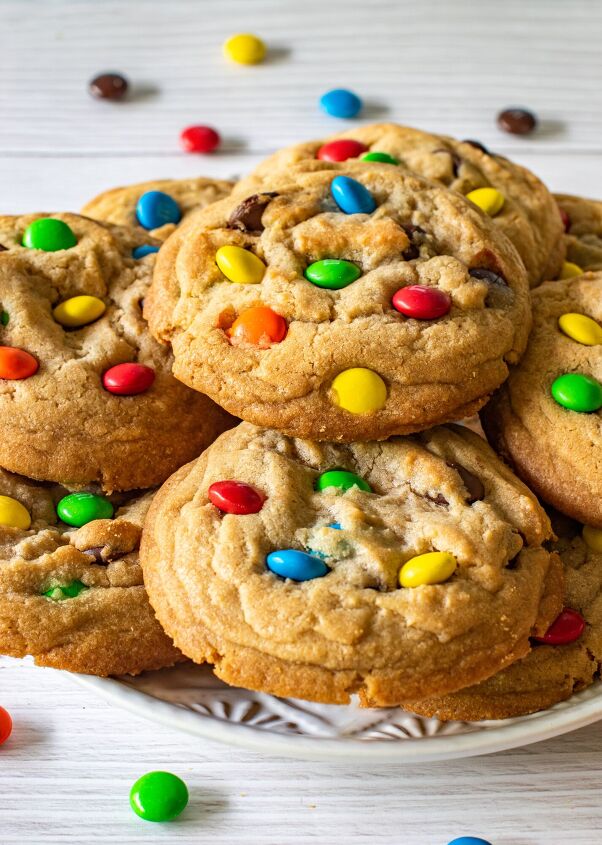
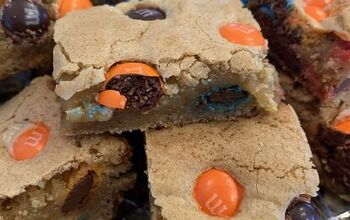
BIG M&M COOKIES
All the kids in your life will go crazy over these extra-large, M&M-filled cookies…I haven’t heard any adults complain either! I mean, who wouldn’t like an extra-large, super delicious, chocolate candy-filled cookie?

Best shortening!
Our local cookie shop sells HUGE M&M cookies, and my youngest child’s eyes would light up at the prospect of me buying one for him. Finally, I decided to do better than just buy him a huge M&M cookie, I’d make him a whole batch!
I started with my chocolate chip cookie recipe, made a few minor ingredient tweaks, added loads of M&Ms, used a much bigger cookie scoop, and adjusted the baking time. And just like that my son can have, not just one huge M&M cookie but an entire cookie jar full of these large, scrumptious homemade cookies! The only downside is trying to keep him from eating them all in a day!
Tips and Tricks for Soft, Plump Cookies:
- Shortening vs. butter: This recipe calls for shortening, and for good reason. Shortening is 100% fat, containing no water. Butter has both water and milk, and because of this, it will melt more quickly than shortening. Because butter melts quicker, using butter will result in a cookie that spreads out more, and is flatter and crispier. Cookies made with shortening will tend to be softer and plumper.
- Sugar: White granulated sugar yields a flatter, crispier cookie. While on the other hand, brown sugar tends to yield softer, chewier cookies. This is because the molasses in the brown sugar adds moisture, and it adds a richer flavor. So for a softer cookie, it’s best to use more brown sugar than white sugar in your recipe.
- Cornstarch: Yes, you read that correctly! I only learned this recently – but it works! Cornstarch is a thickening agent and will give your cookies an extra lift, and leave them extra soft. And don’t worry, you don’t use enough to alter the taste.
- Scooping Method: I use a cookie scoop to form my cookie balls. This helps you to have round, uniform cookies. I scoop the cookie dough and press the scoop against the side of the bowl to press the cookie dough into the scoop, packing the dough. This helps to keep them from collapsing while they bake.
- Baking Sheets: After you have baked a batch of cookies and removed them from the pan, the tendency is to put another batch on the pan right away, especially if you are short on time. For plump, soft cookies, it is important to allow your baking pan to come to room temperature before adding more cookie dough. Adding cookie dough to a hot pan – or even a warm pan – will start the dough softening and melting before it even gets into the oven. This will contribute to a cookie that spreads out too much in the oven. For a quick method of cooling your pans, run them under cool water for 20 to 30 seconds (or longer if needed, until cool), dry, and continue with your baking.
- Cooling your Cookie: When you take your finished cookies out of the oven, let them rest for 2 to 3 minutes before attempting to remove them from the baking sheet. The cookies are way too soft to transfer right out of the oven. But don’t allow them to sit on the hot baking sheet longer than a couple of minutes. The heat from the cookie sheet will cause your cookies to flatten out even more. After 2 to 3 minutes, use a spatula to move the cookies to a cooling rack, which allows air to circulate around the cookie, and cool it quickly and evenly.
For This Recipe:
The recipe comes together like most cookie recipes. Cream together the shortening, sugars, egg, and vanilla. Separately, mix together the dry ingredients – flour, baking soda, cornstarch, and salt. Add the dry ingredients to the wet ingredients, and stir only until you no longer see any dry flour. If you over-mix at this point, you will have a tougher, flatter cookie. The more you mix the flour with wet ingredients, the more you activate the gluten in the flour. Since gluten acts as a binder, the more you work the dough, the denser your cookie dough becomes. We want FLUFFY cookies!
With a spatula or wooden spoon, stir in the chocolate chips and M&Ms. There is no need to chill this cookie dough, it is ready to go!
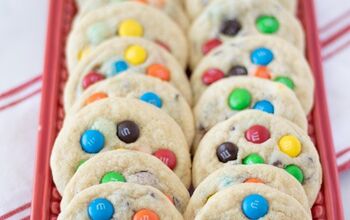
I use a 1/4 cup cookie scoop. It gives you a nice, large cookie. Because these cookies are larger than a standard cookie, don’t put too many on the baking sheet. I usually put about 5, giving them room to spread out.
**Tip for a perfectly shaped cookie** When you use a cookie scoop, the bottom of the cookie ball will be flat and have an edge around it. I like to very gently shape the dough into a perfect ball, once I take it out of the scoop. Don’t pack the dough or roll it, just gently round out the bottom of the cookie. This is totally optional and completely unnecessary, and probably only matters if you are taking pictures for a blog post that you are putting out there for the world to see! LOL.
Bake your cookies according to the directions. When you take your cookies out of the oven, immediately add more M&Ms to the top of the cookies for that “loaded with M&Ms” look. Allow them to rest for 2 to 3 minutes, then move them to a cooling rack to finish cooling.
Now the hard part – keeping your family from finishing them off in one day. Store them in an airtight container for 4 to 5 days – but trust me, they won’t last that long!
These cookies also freeze well. If you freeze them, it is best to eat them within 6 months.
Enjoy!!

Related recipes: CHOCOLATE CRINKLE COOKIES PEANUT BUTTER BLOSSOMSCANDY CANE KISS COOKIESTHE BEST CHOCOLATE CHIP COOKIESMOLASSES CRINKLESCHEWY CHOCOLATE GINGERBREAD COOKIES
BIG M&M COOKIES
Recipe details
- 20 cookies
- Prep time: 20 Minutes Cook time: 1 Hours Total time: 1 hr 20 min


Comments
Share your thoughts, or ask a question!
This recipe calls for both shortening and butter in the ingredient list, but the instructions and notes make it sound like I should just use shortening… is that right? Thanks in advance!