NO-BAKE COOKIES

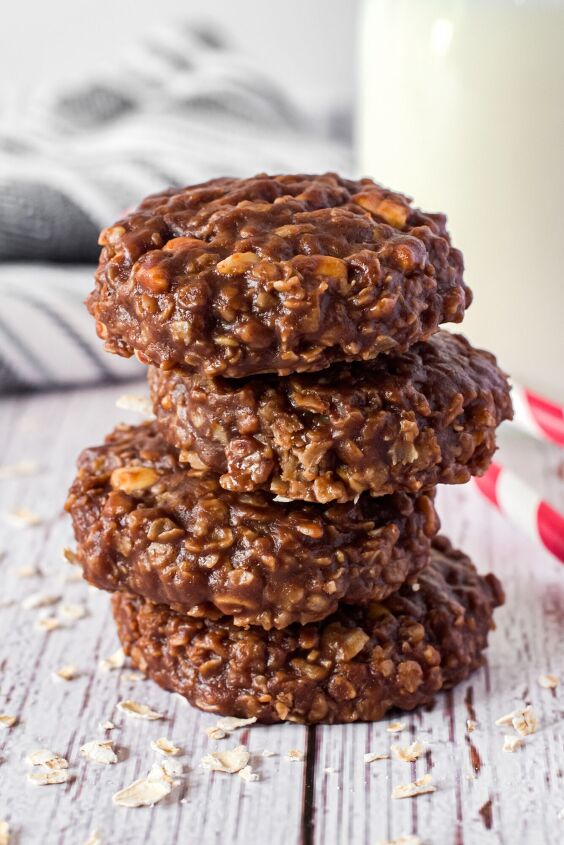
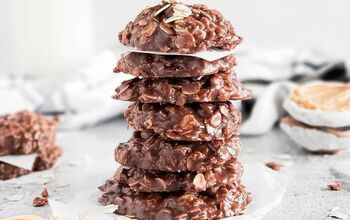
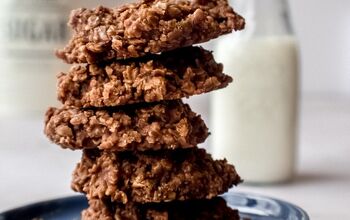
These delicious classic no-bake cookies are incredibly easy to make with only a few ingredients. Loaded with the perfect combination of cocoa powder, peanut butter, and oats, you’ll find yourself reaching for seconds…or thirds.
These classic no-bake cookies are amazing! Something about the combination of chocolate, peanut butter, and oatmeal makes these hard to resist. This is definitely one of those cookies that you can’t have just one of, which makes them dangerous! They are also my husband’s favorite cookie. I know this because he tells me that a lot. I think it’s his way of hinting that he is craving them. But I am happy to oblige because they are so easy to make!
One of the best parts about these cookies is how easy they are to make. You likely have all the ingredients on hand; if not, they are easy to find. All you need is about 20 minutes to whip up a batch, and then the hard part…waiting for them to cool. Nobody will judge you if you sneak one before they are completely cool though.
- Butter: I prefer butter in this recipe because it tastes better than margarine. Also, margarine has water in it that could affect the cookie’s ability to set up correctly.
- Milk: Any milk will work in this recipe! I typically use 2%, but whole milk, 1%, skim, or even non-dairy milk like almond milk will work.
- Granulated Sugar: This sweetens the cookies and helps them set up.
- Salt: In small amounts, salt reduces bitterness but increases sweetness, which is desirable for sweet recipes.
- Unsweetened Cocoa Powder: This adds a delicious chocolate flavor to these cookies. Natural unsweetened or Dutch-process cocoa powder both work great.
- Peanut Butter: I recommend using a no-stir peanut butter like Jif or Skippy. My personal preference is to use crunchy peanut butter; I love the crunch of the peanut chunks, but creamy peanut butter is fine too!
- Vanilla Extract: For a bit of flavor.
- Oats: I find that quick-cooking or old-fashioned oats work just fine. Many of the recipes will tell you not to use old-fashioned whole oats, but I have used both, and either work for this recipe (more on this below).
So many of the recipes for No-Bake Cookies tell you that you can not use Old-Fashioned oats for this recipe. But you’ll occasionally come across a recipe that tells you that you can use old-fashioned oats and that the cookies are better if you do. It can get confusing! I have used both, and I like both, but I decided to break down the difference for you, and then you can decide.
First, what is the difference between the two types of oats? Old-fashioned oats, sometimes called rolled oats, have been steamed and then rolled flat. They require a longer cooking/baking time and create a chewier texture in baking. Quick oats are rolled oats that have been steamed, rolled flat, and then cut into smaller pieces. They’re more uniform in size than large flake oats, and as the name suggests, they cook more quickly because they’re smaller. However, they provide less texture than large flake oats.
I have made these No-Bakes using both types of oats. With the old-fashioned oats, you will get a slightly chewier cookie with more texture, but not so much that they are unenjoyable. They do take a little longer to set up as the oats take longer to soften and absorb the moisture in the mixture. But you will still have a delicious cookie that’s hard to resist.
Using the quick-cooking oats will yield a less chewy cookie. The oats soften more quickly, which creates a softer cookie with less texture. The cookies also set up a little quicker as the quick-cooking oats absorb the moister more readily.
Overall, either type of oats works well and yields a delicious cookie. I lean a little more towards the quick-cooking oats because of the softer, less chewy texture, but if all I had on hand were old-fashioned oats, I would use those and still be happy with the fantastic results.
-
Line two baking sheets with parchment paper and set them aside. -
In a medium saucepan, over medium heat, combine sugar, milk, butter, salt, and cocoa. Stir until the butter has melted.
-
Bring the mixture to a full boil and allow it to boil for 1½ minutes, stirring constantly. This step is what causes the cookies to set up as they cool, so make sure it comes to a full boil and boils for the entire 1½ minutes. Immediately remove the pan from the heat when the time is up.
-
Add the peanut butter and vanilla and stir until the peanut butter is melted and fully incorporated. -
Add the oats and stir to combine. Allow the mixture to cool for 10 to 15 minutes, stirring a couple of times. This allows the oats to absorb some moisture and prevents the cookies from spreading too much on the pan.
-
Drop cookies onto the prepared baking sheets using a 1.5 tablespoon cookie scoop or a spoon. If desired, flatten the cookies slightly with the bottom of a glass or measuring cup.
-
Allow to cool completely. The cookies will firm up as they cool.
*To cool quicker, place the pan of cookies in the refrigerator for 30 minutes. -
Store in an air-tight container in the refrigerator for up to one week.
NO-BAKE COOKIES
Recipe details
Ingredients
- 1 1/2 cups sugar
- 1/2 cup milk
- 1/2 cup butter
- 1/4 cup unsweetened cocoa powder
- 1/8 teaspoon salt
- 3/4 cup chunky peanut butter
- 2 teaspoons vanilla
- 3 cups quick-cooking oats or old-fashioned whole oats **See notes
Instructions
- Line two baking sheets with parchment paper and set them aside.
- In a medium saucepan, over medium heat, combine sugar, milk, butter, salt, and cocoa. Stir until the butter has melted. Bring the mixture to a full boil and allow to boil for 1½ minutes, stirring constantly. Immediately remove the pan from the heat.
- Add the peanut butter and vanilla and stir until the peanut butter is melted and fully incorporated.
- Add the oats and stir to combine. Allow the mixture to cool for 10 to 15 minutes, stirring a few times. This allows the oats to absorb some of the moisture so the cookies don't spread out too much.
- Using a 1.5 tablespoon cookie scoop or a spoon, drop cookies onto the prepared baking sheets. If desired, flatten the cookies slightly with the bottom of a glass or measuring cup.
- Allow to cool completely. The cookies will firm up as they cool. *To cool quicker, place the pan of cookies in the refrigerator for 30 minutes.
- Store in an air-tight container in the refrigerator for up to one week.
Tips
- Freezing Instructions: Once the cookies have cooled completely, store them in a large freezer bag or freezer-friendly storage container in the freezer for up to 3 months. Thaw the cookies to room temperature before serving. After they have thawed, keep them in the refrigerator for up to 1 week.
- Quick-Cooking Oats Vs. Old-Fashioned oats:
- I have made these No-Bakes using both types of oats. With the old-fashioned oats, you will get a slightly chewier cookie, but not so much that they are unenjoyable. They take a little longer to set up as the oats take longer to soften and absorb the moisture in the no-bake mixture. But you will still have a delicious cookie that’s hard to resist.
- Using the quick-cooking oats will yield a less chewy cookie. The oats soften more quickly, which creates a softer cookie. The cookies also set up a little quicker as the quick-cooking oats absorb the moister more readily.
- Overall, either type of oats works well and yields a delicious cookie. I lean a little more to the quick-cooking oats because of the softer, less chewy texture, but if all I had on hand were old-fashioned oats, I would use those and still be happy with the results.










Comments
Share your thoughts, or ask a question!
I don't use butter or sugar. What to use instead butter to keep the delicious cookies on the healthier side?
Doesn't everyone remember these from their elementary school cafeteria lunches? (I'm 66.) These are the BEST! Thanks for sharing!