


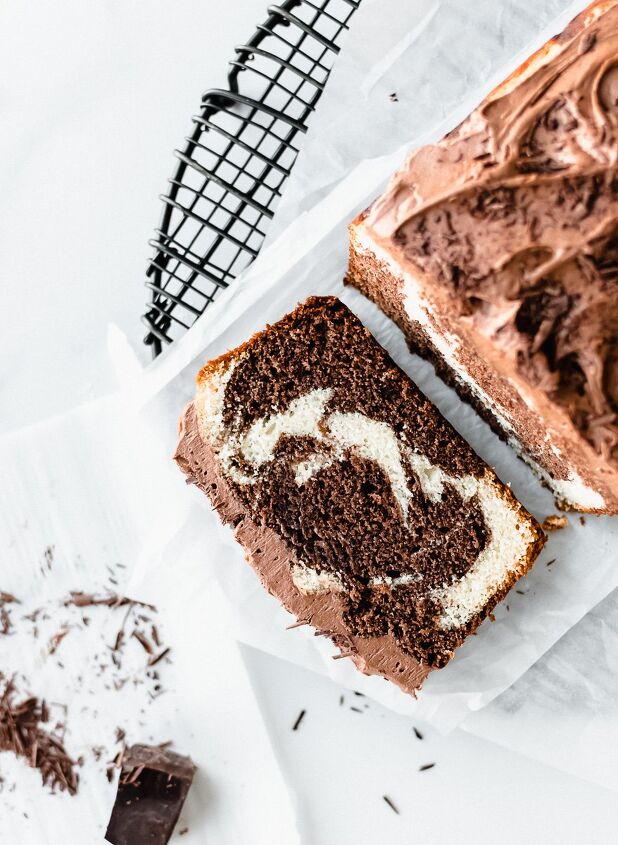
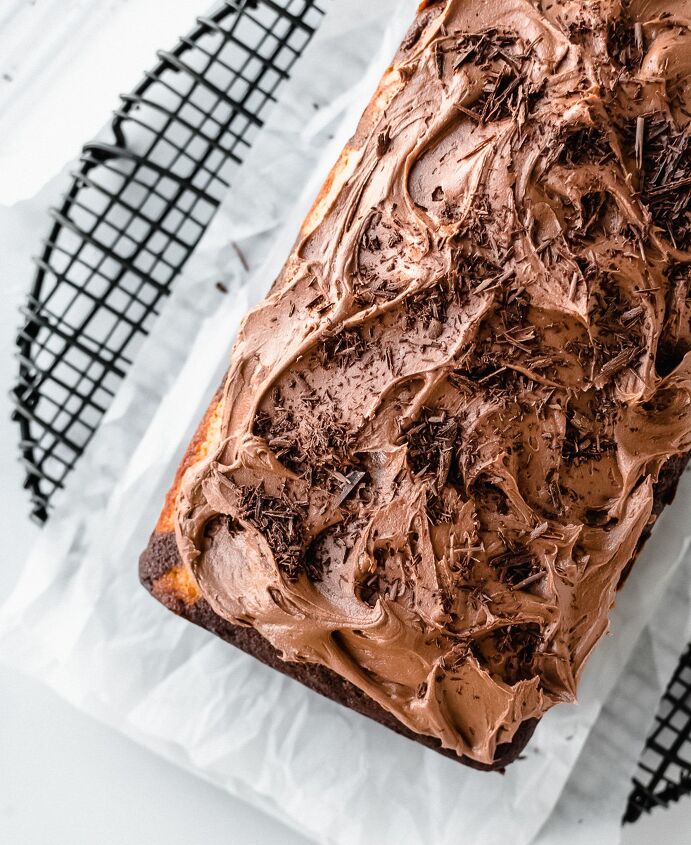
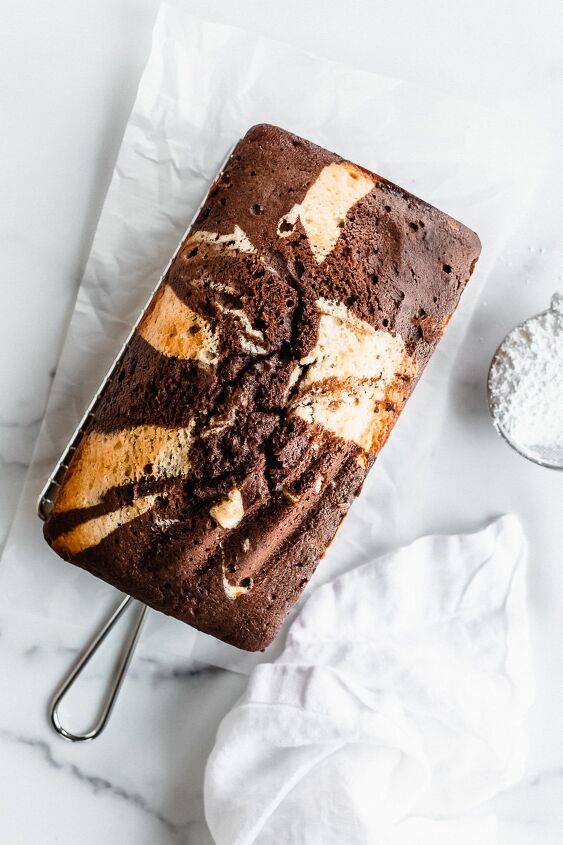
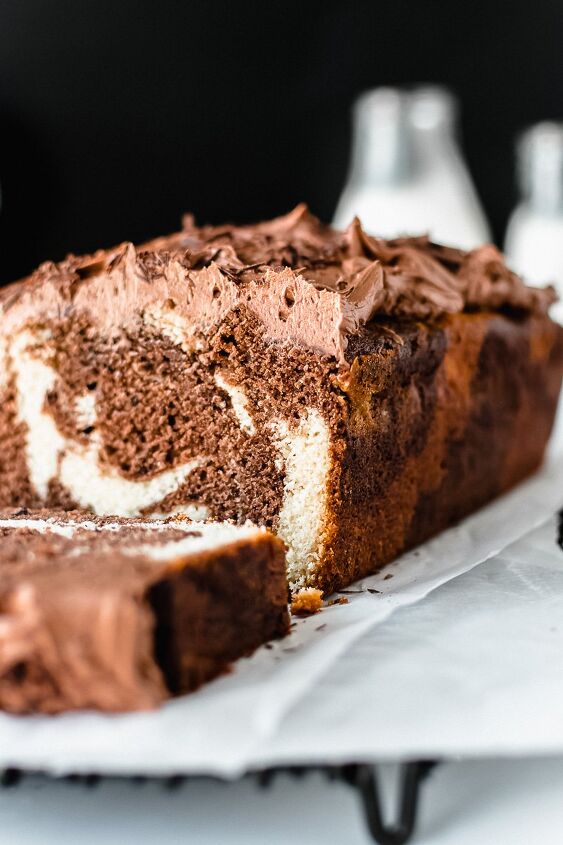
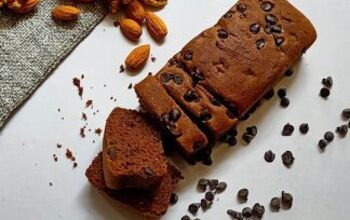
Marble Loaf Cake With Chocolate Buttercream

I love a good slice of marble cake – it’s the best of both worlds! There’s nothing like being able to have vanilla AND chocolate cake in one delicious dessert! This loaf cake is the perfect-sized treat if you’re in the mood for some classic marble cake, but don’t want to make a full cake. It’s buttery, full of yummy flavor, and is topped with decadent chocolate buttercream. You can even leave the buttercream off for a delicious breakfast treat! Or leave it on, I”m not judging! Chocolate is great any time of day in my opinion. If you’re crazy about cake, you’ll love this marble loaf cake!
This post contains affiliate links. This means I may earn a commission should you choose to make a purchase using my link. It’s okay – I love and use all of these products, and you will too!
I really do love cake. It has always been one of my favorite desserts! But sometimes, a whole sheet cake or layer cake can just be too much. But what if you could turn your favorite cake into a loaf cake instead? Well, that’s what I’ve done with one of my favorite cakes – marble cake!
This marble loaf cake is pretty easy to assemble and is topped with one of my favorite chocolate buttercream recipes. You’re going to love it!
Ingredients for Marble Loaf Cake
Most of what you’ll need for this easy take on a marble cake will likely already be in your pantry, but here are a few ingredients that you might want to be sure you grab next time you’re out!
- A Good Quality Dutch-Processed Cocoa Powder – This one from Rodelle has, and will always be, my very favorite! Make sure it’s a Dutch-processed cocoa powder, not a normal cocoa powder (like Hershey’s). This recipe uses baking powder which interacts much better with Dutch-processed cocoa powder vs. regular cocoa powder.
- Full Fat Buttermilk – Be sure to use full-fat buttermilk here! It will make the cake much more moist. If you don’t have buttermilk on hand, simply measure out 1/2 tablespoon of lemon juice or vinegar and then enough whole milk to create 1/2 cup total. Let sit for a few minutes and it will begin to curdle. There you have it! Buttermilk.
- Chocolate Extract – This is TOTALLY optional, but it really makes the frosting taste super yummy! I’ve never used chocolate extract before but decided to give it a try in this recipe. And oh my. It is delicious! You can substitute this in any chocolate recipes that call for vanilla extract. If you don’t want to use the chocolate extract in this recipe, simply omit it! In this recipe, I used both vanilla and chocolate extract, which you can definitely do as well. It’s just a really great addition to, or substitution for, vanilla! Here is my favorite chocolate extract.
Tips for Making Marble Loaf Cake
Making this marble loaf cake really is pretty simple! It comes together in no time at all. But here are a few tips to make it even easier for you!
- If you have them, use two cookie scoops! One for scooping each batter into the pan. This makes it so much easier and cleaner plus, you get very uniform amounts of each batter into the pan. This makes the swirl that much prettier! This is a great set of cookie scoops to have on hand for baking. It comes with a 1, 2, and 3 tablespoon scoop. For this recipe, I used the 2-tablespoon scoop.
- Use full-fat buttermilk! I do not recommend substituting low fat. This will make your cake very dry. Cakes need fats to stay moist! Don’t be afraid of the fats. Just enjoy!
- Once you are ready to swirl, do not overmix your batters! Just swirl ever so slightly to get the prettiest marble cake ever!

High Altitude Instructions for Marble Loaf Cake
For reference, I live at 5,800 feet. These adjustments would likely give you the result that you are looking for if you live within a few hundred feet of where I am at. But high altitude baking can be a lot of trial and error! I would also recommend checking out this guide here.
- Flour – increase by 2 tbsp. Additional flour helps to strengthen the structure of the baked good so that it will rise correctly.
- Baking Powder – decrease to 1 1/4 tsp. You can see this table on King Arthur’s website for how to adjust leavening agents for higher elevations (scroll down a ways to the “Leavening” section on their site). For my elevation, I typically cut all leavening agents in half. This allows for the right chemical reactions to happen between the other ingredients for the perfect rise. If there is too much leavening within the batter, not all of it gets used up (not all of it reacts with the other ingredients). You are then left over with a soapy bitter-tasting baked good due to the excess baking soda or baking powder in the batter.
- Eggs – use 4 eggs instead of 3. This will keep the baked good from drying out at a higher baking temperature and evaporation rate. If I am baking a cake or cupcakes, I like to add one more egg to increase the liquids in the recipe. This should hold true at most higher elevations, but experiment with it, of course!
- Increase oven temperature to 360° F. Since rising and evaporation proceed more quickly at higher elevations, you will want to use a higher baking temperature to set the structure of the baked goods so that they don’t sink in the middle and dry out on the edges. I recommend starting with increasing the baking temperature stated in the recipe by 10° F – 15° F and go up from there in small increments (all the way up to 25° F increase if needed).
- Decrease baking time by 5 or more minutes. This is because you will be baking at a higher temperature. You don’t want your cake to burn! I usually decrease by 5-8 minutes per 30 minutes of baking time and adjust from there. Keep a close eye on your dessert in the oven while you are experimenting with time and baking temps.
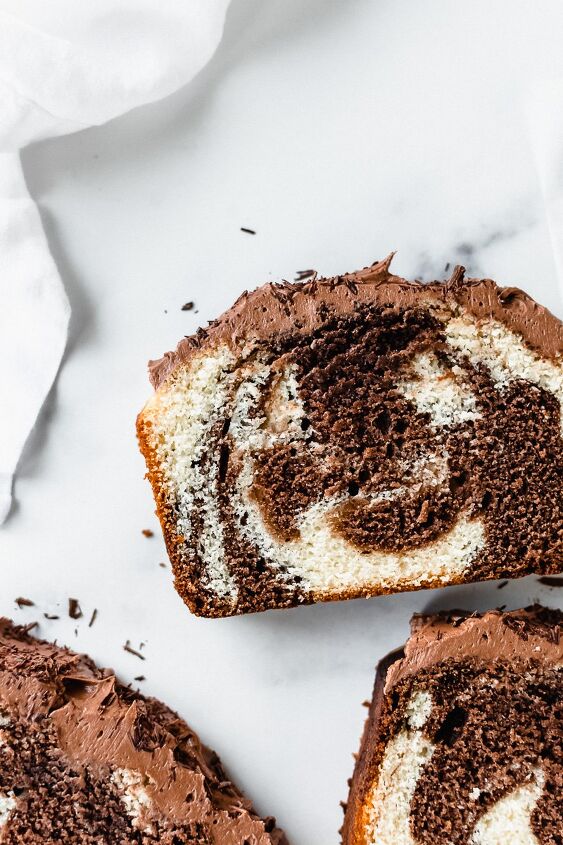
I hope that all of you cake lovers enjoy this marble loaf cake recipe! Be sure to top it with the chocolate buttercream too. You can totally eat it without, but I think it’s the best part of the whole dessert!
As always, be sure to tag me in your photos on Instagram if you make my recipe or use in your photos! I love to see what you are baking.
Marble Loaf Cake With Chocolate Buttercream
Recipe details
- 16 slices
- Prep time: 20 Minutes Cook time: 70 Minutes Total time: 1 hr 30 min


Comments
Share your thoughts, or ask a question!