


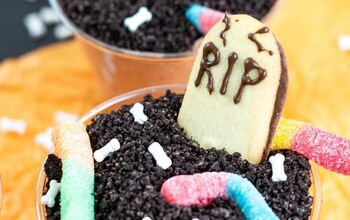
Graveyard Dirt Cups
Today, we’re making Graveyard Dirt Cups!
This is a very special weekend, everyone. It’s my birthday weekend! AND, the weekend kicks off on Friday the 13th. So of course, we have to make a spooky treat to celebrate both occasions.
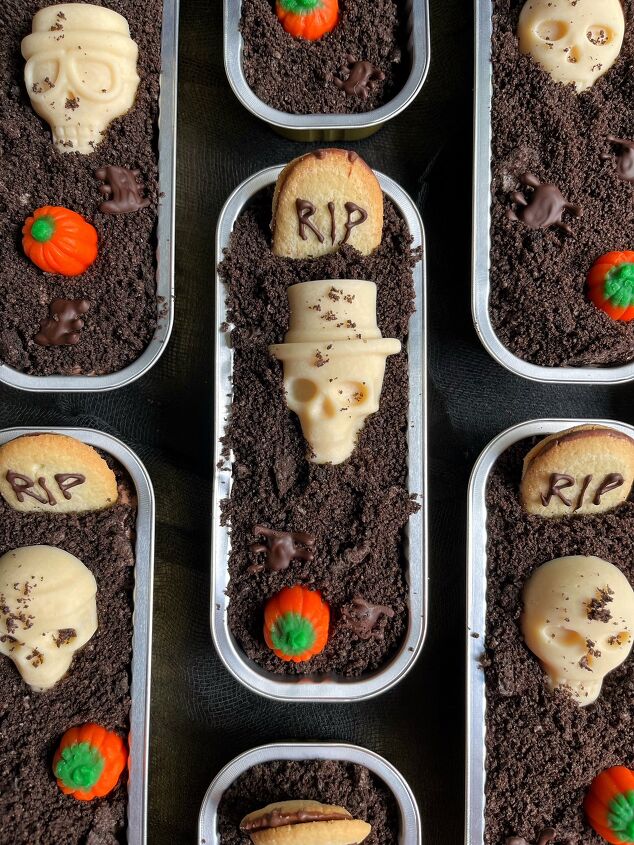
These little personal sized walking desserts have everything from chocolate mousse to Oreo dirt to cookie tombstones to chocolate creepy crawlies. But don’t you worry. They’re as incredibly delicious as they are adorable!
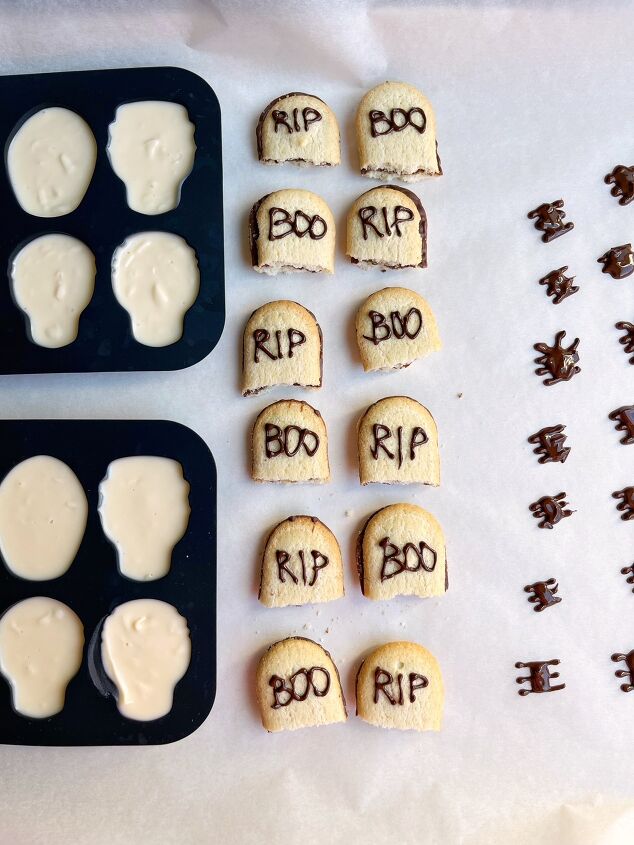
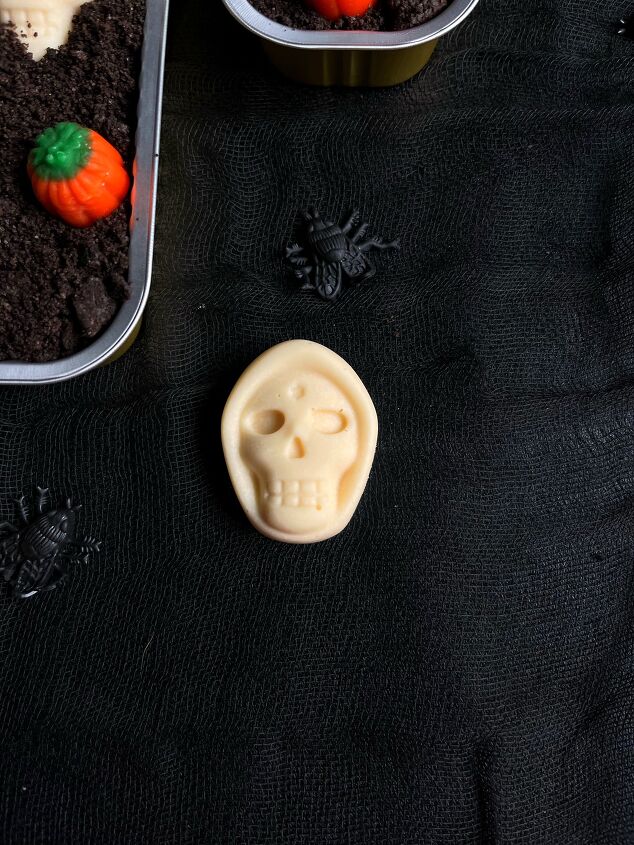
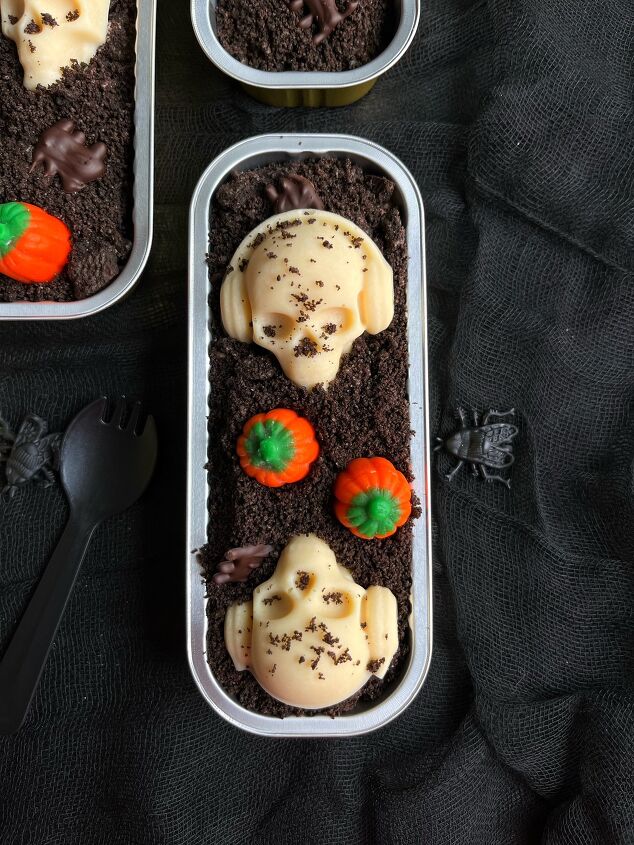
We’re going to make our decorations first. They all involve chocolate, so they’re going to need a little time to set. We’ll start with our candy skulls. We’ll take a silicone candy skull mold, melt some white chocolate or white candy melts, fill in the molds, and that’s basically it. When you’re filling the candy molds, there are a few things to consider. First, you want to use fresh chocolate or candy melts. If they’re not fresh, they won’t melt to a pourable consistency. All is not lost if the candy doesn’t melt properly though. Add about 1 tsp of vegetable oil for every 6 oz of candy melts, and stir it in vigorously until the mixture loosens up a bit. The next tip is not to fill the molds all the way. We don’t want them spilling over the top or our candy will have weird edges. I actually like to use a piping bag to add the chocolate candy to molds so I have a little more control over the filling. Give the molds a couple good taps on the counter to even out the candy and tap out any air, and set the molds on a large parchment or wax paper lined baking sheet to keep them even.
We’re also going to make some headstones and some candy bugs with some melted chocolate. I prefer dark chocolate for this, but any chocolate chips will really work here. For the headstones, take a couple Milano cookies, break them in half, and arrange them on the same baking sheet with the skull molds. Next, we’ll melt some dark chocolate chips, add the melted chocolate to a clean piping bag, snip a tiny little edge off of the piping bag, and pipe spooky words like “RIP” and “BOO” on each cookie half. Then snip a little extra off of the same piping bag to open up the tip a little more, and pipe little bugs or spiders on the same baking sheet next to the cookies. Then, the whole tray goes into the fridge for about an hour so all of the chocolate can set.
After the garnishes are ready, we can work on the dirt. We’ll start by taking a family sized pack of Oreos, tossing them in the food processor, and grinding them up to fine crumbs that resemble dirt. Depending on the size of your food processor bowl, you may need to do this in two batches like I did to really get a good grind on those cookies.
For our filling, we’ll start with a couple boxes of chocolate pudding mix and some cold milk. Whisk them together, give the pudding a couple minutes to thicken up, then fold in some Cool Whip to lighten up the pudding.
In a separate bowl, we’ll take a stick of butter and a block of cream cheese then blend them til smooth. We’ll add in a little powdered sugar and vanilla, and blend them again until smooth. Finally, we’ll take our pudding mix and fold it into our cream cheese mix. Make sure you have a big bowl for this! Once everything is all mixed together, we’re ready to assemble.
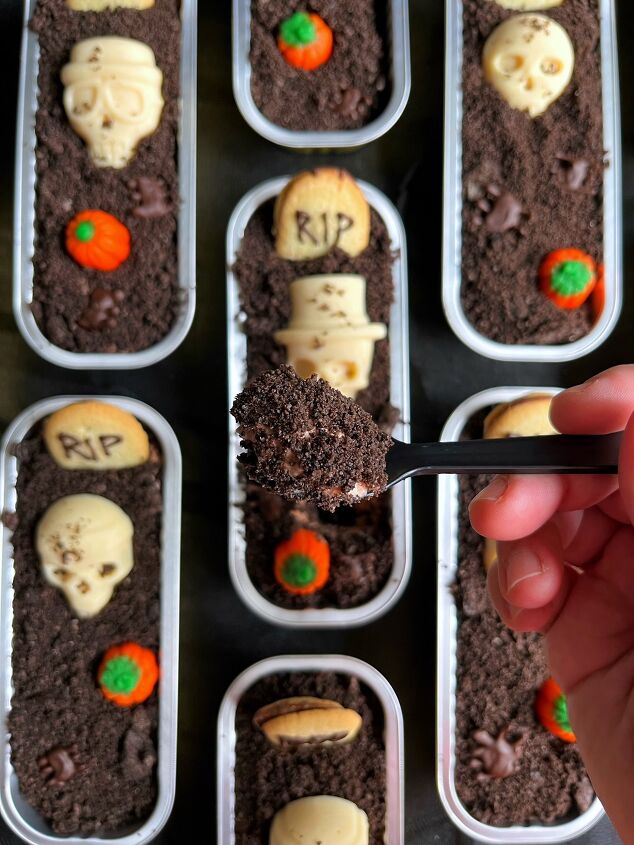
To build our little graveyards, I used these little 6 oz disposable loaf pans that I found on Amazon. (I actually have all the special things I used for these little cups linked in my Amazon Storefront for easy access.) We’ll sprinkle some cookie dirt on the bottom, fill the cups with mousse…and I like to use a piping bag to do this too to make things nice and easy, add a little more cookie dirt on top, then finish our graveyards with our headstones, a skull, some chocolate bugs, and a candy pumpkin. They’re really super easy to put together!
Now for the sake of all things spooky, the serving size on these cups is lucky number 13. However, you will have a little mousse leftover if you want to grind up a couple more cookies and make another 2 or 3 graves. You also can totally serve these in a larger dish as one big dessert instead of single serving desserts. But honestly, how cute are these individuals though?!?!
These little treats are as delicious as they are adorable. The mousse is light and fluffy. The cookie dirt adds another chocolate dimension that’s the same but different. The decorations are not just for looks. These are just the perfect little spooky dessert!
Alright, everyone. I can’t wait to see you guys recreate these. So, make sure you tag me on socials when you make them!
I hope you guys enjoy, and let’s eat!
Graveyard Dirt Cups
Recipe details
- 13 servings
- Prep time: 3 Hours Cook time: 0 Minutes Total time: 3 hr


Comments
Share your thoughts, or ask a question!