


Japanese Chicken Tempura With Light And Crispy Batter
Tender juicy chicken pieces coated in a super light and crispy batter. Discover the secrets to creating the ultimate homemade Japanese Chicken Tempura with this easy-to-follow recipe.
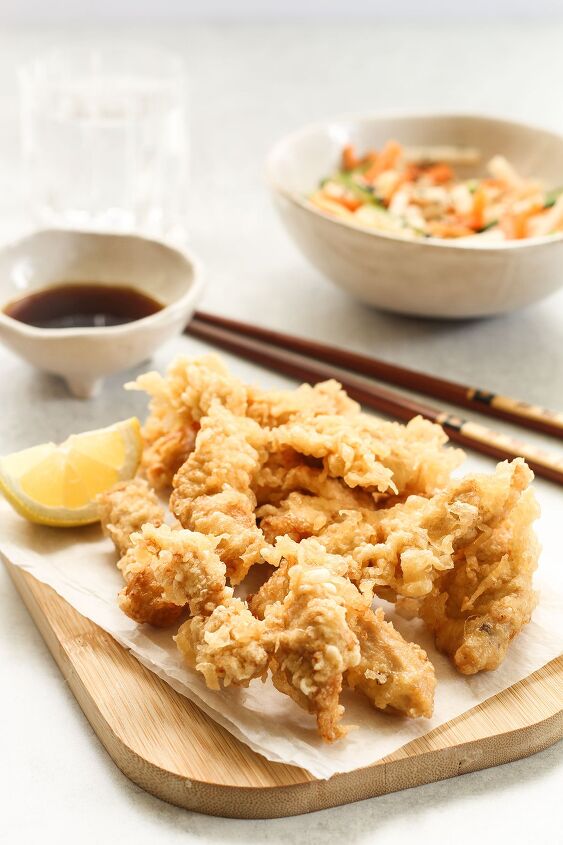
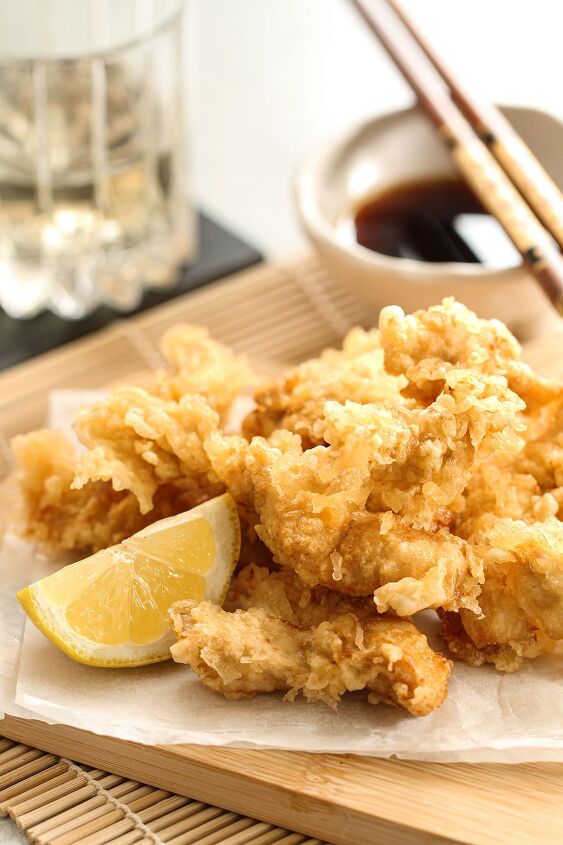
Perfectly light and crispy on the outside, and juicy on the inside, Chicken tempura (known as Tortiten in Japan) is a traditional Japanese dish of the Kyushu region in Japan.
Unlike other types of tempura, it's served with a citrusy ponzu dipping sauce that contrasts the savoury flavours in the chicken. This recipe includes all the information, hints and tips you need to enjoy authentic Japanese Chicken Tempura at home.
I used to avoid making fried food but once I started I was surprised at how easy it was to cook up some of my favourite dishes like Salted Chilli Chicken, Chilli Honey Chicken and Crispy Buttermilk Chicken Sandwich.
The post contains additional information and helpful tips to ensure the recipe turns out great the first time. Please use the link above to jump to the recipe card at the end if you are in a hurry!
- The best tempura batter that's been thoroughly tested to ensure it's as light and crispy as can be.
- Packed with tips for making the best batter and frying to perfection.
- Authentic Japanese texture and flavour with a tasty chicken marinade and citrusy soy dipping sauce.
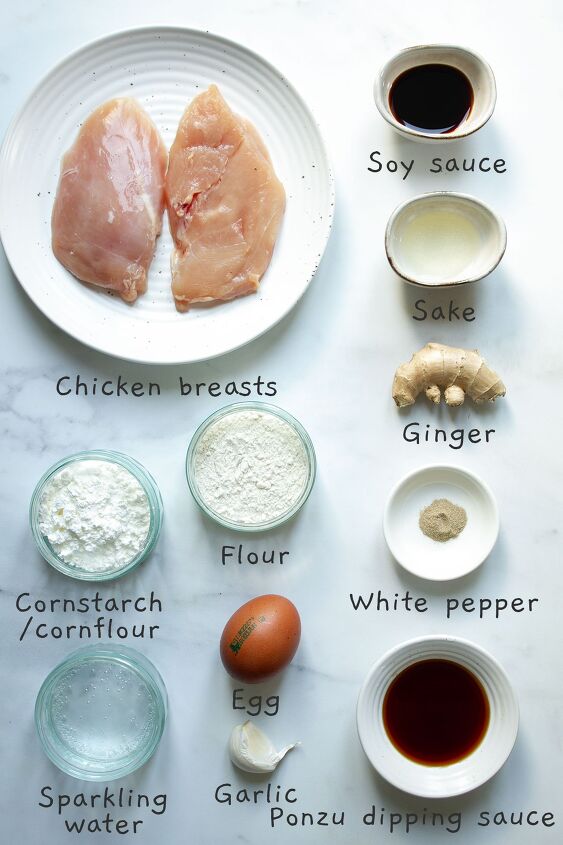
Chicken breast is my go-to for tempura. Its leanness allows it to cook more quickly than fattier cuts like thighs and its neutral flavour complements the light batter and dipping sauces.
Marinade: the chicken is marinated in a mixture of soy sauce, garlic, ginger, and pepper. This marinade is crucial as the batter itself is plain, so we rely on the marinade to infuse the chicken with flavour.
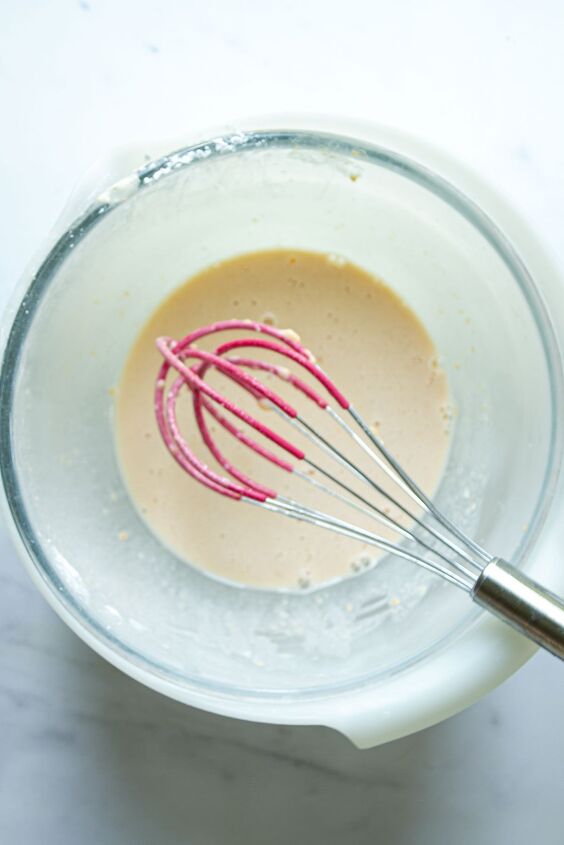
Batter: The tempura batter requires just 4 ingredients: cornstarch/cornflour, all-purpose/plain flour, egg, and sparkling water. Each plays an important role and should not be changed or substituted.
- Using both cornstarch/cornflour and all-purpose/plain flour. Cornstarch/cornflour to get the batter nice and light and all-purpose/plain to bind the ingredients together.
- Sifting the two types of flour to get the batter nice and smooth.
- Using sparkling water instead of still.
- Keeping the batter cool by using fridge temperature egg and chilled sparkling water.
- Two-bowl technique: keeps the batter chilled throughout the process by filling a bowl with ice water and placing the mixing bowl for the batter on top.
Dipping sauce:
Chicken tempura is traditionally dipped in ponzu, a Japanese sauce made from a citrus juice (such as yuzu or lemon), soy sauce, and other ingredients like vinegar, mirin, and dashi that have a tangy and refreshing flavour.
Chicken tempura dipping sauce differs from the dipping sauce typically used for shrimp or vegetable tempura, which is made with soy sauce, mirin, sugar and dashi (Japanese Stock Powder). This is because the acidic citrusy taste of ponzu offsets the richer savoury flavour of the chicken.
You might not find ponzu in your local store, but most Asian grocery stores will have it or you can order online.
Note that the recipe has not been tested with the substitutions and variations below, so the results cannot be guaranteed.
- Chicken breast: you can use chicken thighs instead of breast. They may need to cook for a little longer, and their richer fattier flavour won't complement the light batter as well as breast but you'll still get good results. Ensure you cut off the fat first.
- All-purpose flour/plain flour: switch for the same volume of gluten-free flour for gluten-free tempura.
- Ponzu: can be replicated by combining equal parts of lemon juice and soy sauce, creating a similar tangy and savoury flavour profile.
The perfectly light and crispy tempura batter can be used to make other types of tempura besides chicken:
- Shrimp tempura
- Mushroom
- Zucchini
- Squash
- Bell peppers
*Be sure to see the recipe card below for the full ingredients list & instructions!*
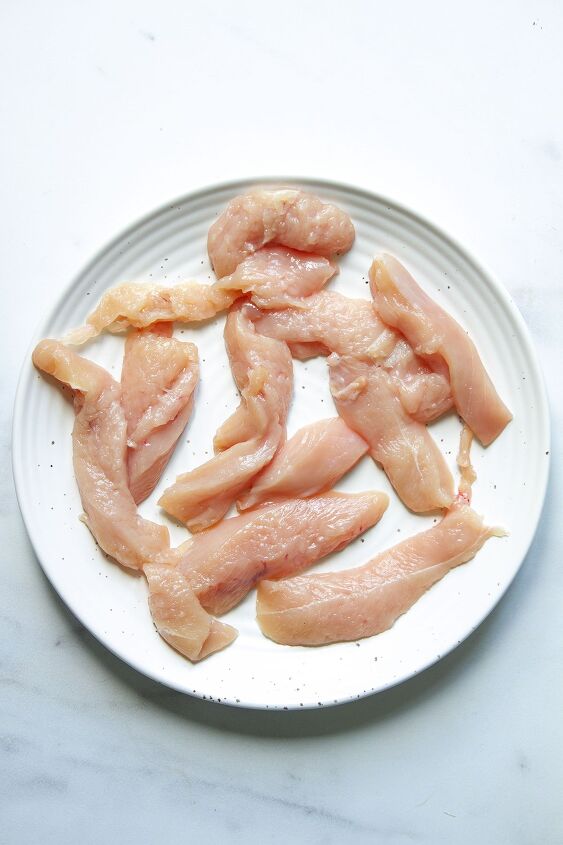
Step 1: Pound the chicken breasts with a meat tenderiser or the back of a knife until ¼-1/3 inch thick (5-7mm). Then cut into pieces (roughly 1x3 inch or 2 x 5cm)
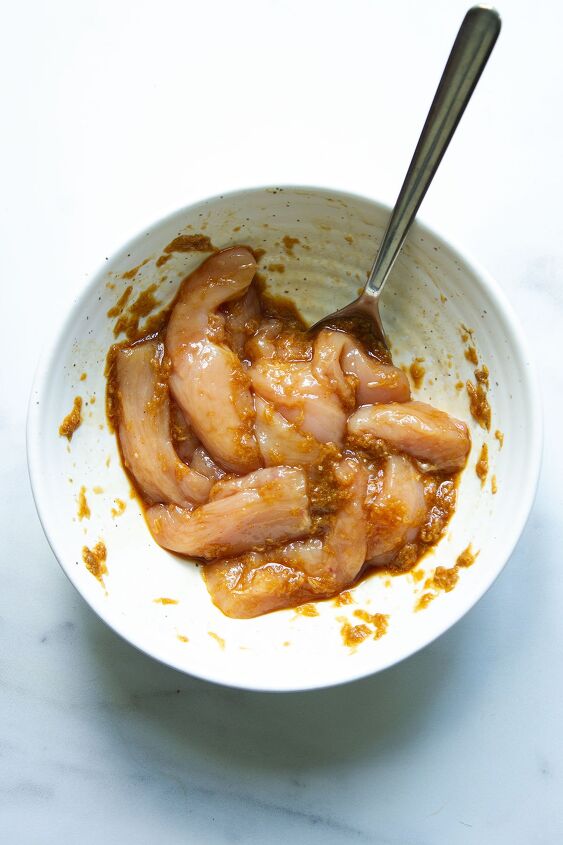
Step 2: Mix the garlic, ginger, soy sauce, sake, and white/black pepper in a bowl. Add the chicken pieces and leave to marinate while you prepare the batter.
Step 3: Take two mixing bowls. Fill one with ice and water and place the other on top. Sieve the cornstarch and all-purpose flour into the bowl and mix. Then whisk in the egg followed by the chilled sparkling water.
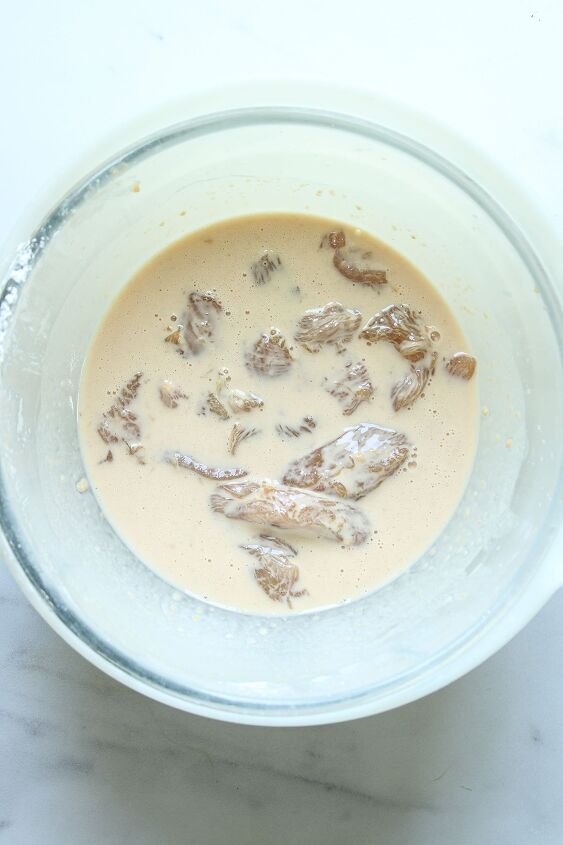
Step 4: Remove the chicken pieces from the marinade, use kitchen paper to wipe off any excess moisture, and add them to the batter.
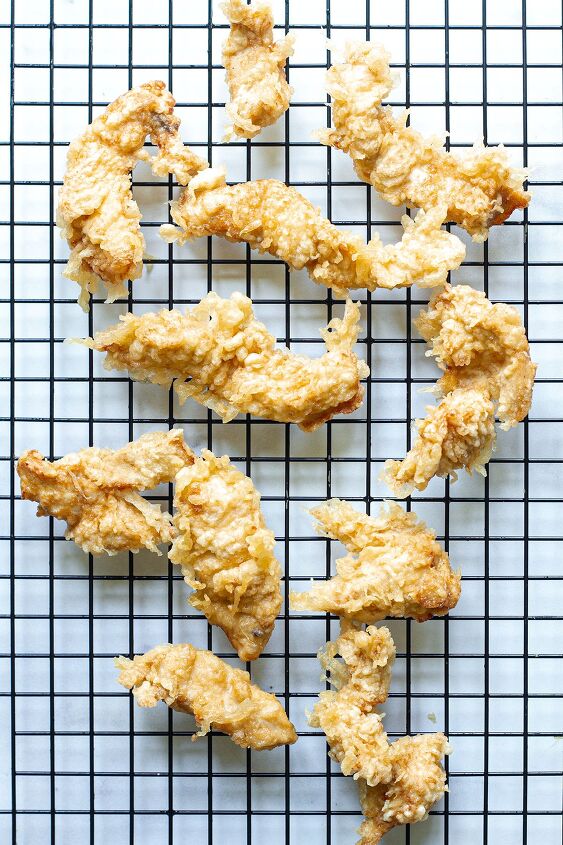
Step 5: Heat the oil to 350°F or 180°C in a large pan or deep-fat fryer. Add 3-4 battered chicken pieces to the pan and fry for 3-4 minutes until very slightly brown and crispy. Set aside on a wire rack and repeat the process with the remaining chicken.
- Use the two-bowl method. Keep the bowl containing the batter inside a bowl of iced water throughout the cooking process, so it stays chilled.
- Remove excess marinade from the chicken using kitchen paper to prevent additional liquid from entering the batter.
- Ensure the oil has reached 350°F or 180°C before you start frying. You'll need a deep-fry thermometer to check this.
- Monitor the temperature of the oil throughout the frying process. You want to ensure it stays at 350°F or 180°C so the tempura crisps up nicely without burning.
- Use tongs to place the pieces of battered chicken into the oil one-by-one. Glide each chicken piece through the oil a few times before letting go. This significantly improves the texture of the batter and makes it extra crispy.
- Don't overcrowd the pan. Fry no more than 3-4 pieces of chicken at a time.
- Place the cooked chicken tempura on a wire rack to allow excess oil to drip off and evaporate.
- Serve immediately. Perfect crispy tempura is freshly cooked. Don't leave it hanging around.
- Heavy-bottomed pan or Dutch oven that will maintain a consistent heat and allow the tempura to cook evenly.
- A deep-fry thermometer. The oil needs to stay at 350°F or 180°C throughout the cooking process to get a light and crispy batter. A thermometer is needed to check when the pan has reached the right temperature and to monitor the temperature throughout the cooking process.
- A deep-fat fryer is a good investment if you cook fried food regularly. It heats up faster than a pan of oil and is better at maintaining a consistent temperature.
- Tongs for safe handling of the chicken.
- A wire rack enables the chicken to stay nice and crispy when you remove it from the oil.
Enjoy chicken tempura as a main meal or alongside other Japanese-inspired dishes like this Crunchy Sushi Roll, Crispy Rice With Spicy Salmon or Easy Chicken Miso Ramen.
I often decide to keep things simple and serve with sushi rice and my Carrot, Cucumber and Mooli (Daikon) Salad.
The recipe hasn't been tested with ready-made tempura flour but it should be fine, just switch it for the same amount of cornstarch and all-purpose flour combined.
Can I use still water instead of sparkling and does it have to be chilled?You can use still water instead of sparkling but the batter may not be as crispy. Chilling first is important for getting super crispy batter. If you have forgotten to chill the water you can place the amount needed for the recipe in the freezer for 10 minutes to chill it quickly.
How long do I need to marinate the chicken for?Marinating the chicken for 15-20 minutes while you prep the other ingredients is sufficient. There is no need to marinade for hours or overnight like there is for other recipes.
What's the best way to store chicken tempura or make ahead?Light and crispy tempura is best eaten fresh. It loses its delicious crisp texture very quickly when it starts to cool and when chilled in the fridge. That said, it's safe to store leftover chicken tempura in the fridge for 2-3 days. The best way to revive it is using an air fryer or in the oven, but it will lose most of its crispy texture, so it's best to only cook what you plan to eat.
Can I make chicken tempura in the air fryer?While there are many fried dishes that can be recreated in the air fryer and oven, tempura isn't one of them. The distinct light and crispy batter can only be achieved by deep-frying in oil at a specific temperature.
Why isn't my chicken tempura crispy?There are several reasons why tempura batter might not crisp up nicely. These include not chilling the batter ingredients and keeping them cool during the cooking process, frying at lower temperatures, and cooling on a board or plate instead of a wire rack.
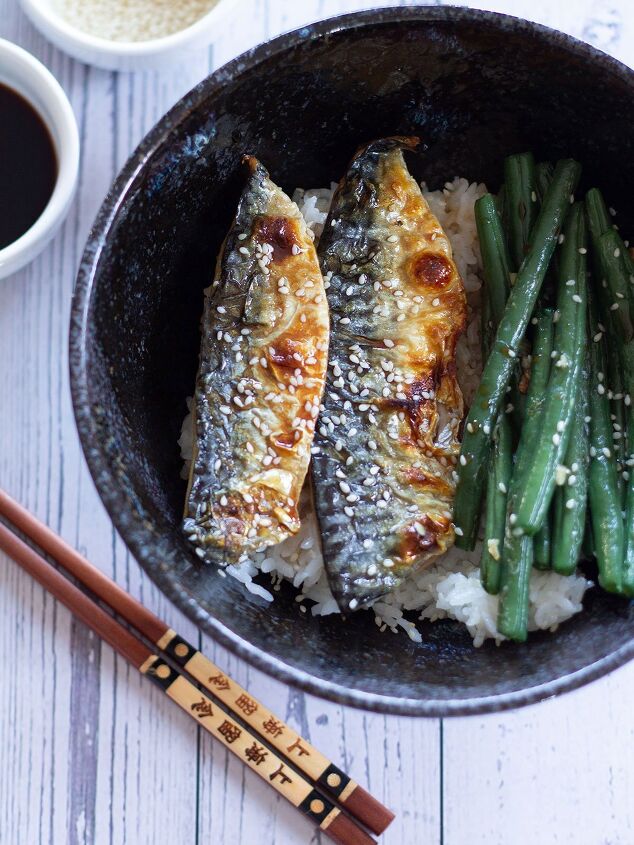
Grilled Mackerel Rice Bowls With Soy & Mirin Sauce
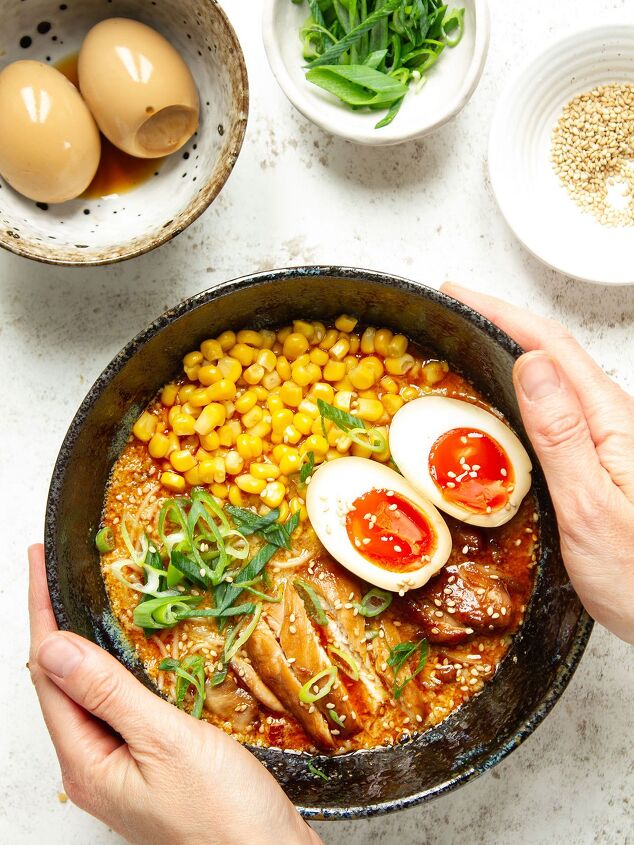
Easy Spicy Chicken Miso Ramen
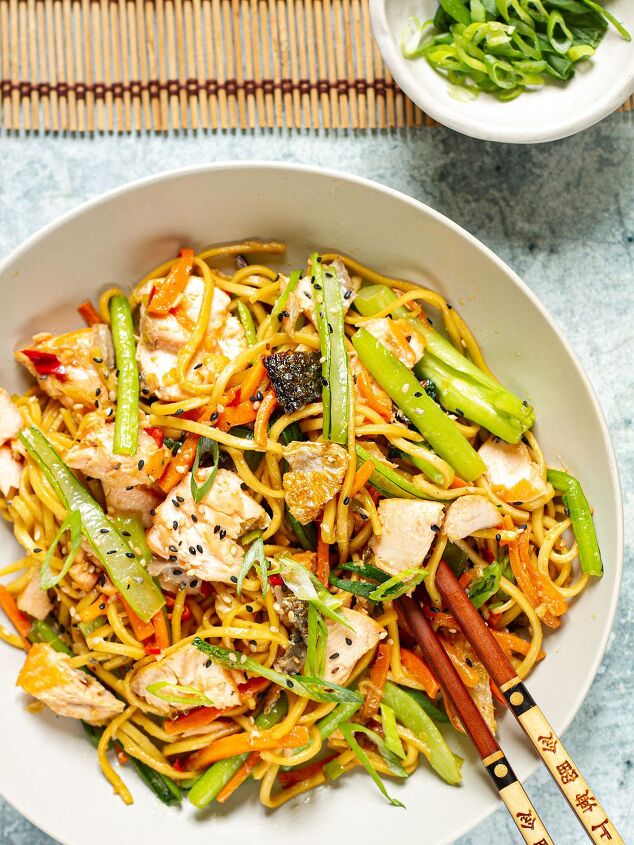
Teriyaki Salmon Noodles Stir Fry
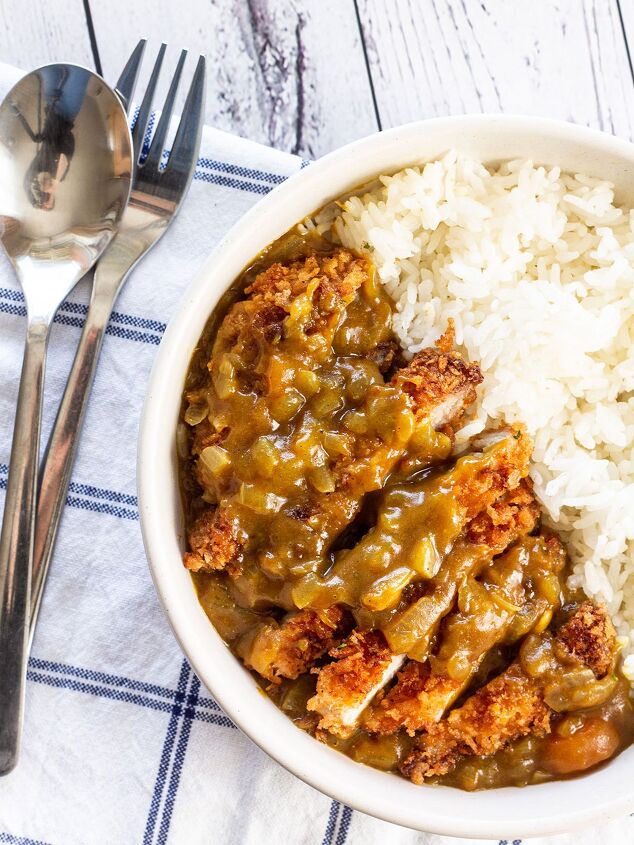
Pork Katsu Curry
Did you try this recipe?
Japanese Chicken Tempura With Light And Crispy Batter
Recipe details
- 4 servings
- Prep time: 15 minutes Minutes Cook time: 15 minutes Minutes Total time: 30 min


Comments
Share your thoughts, or ask a question!