


The Best Roasted Garlic Hummus - Eat Mediterranean Food
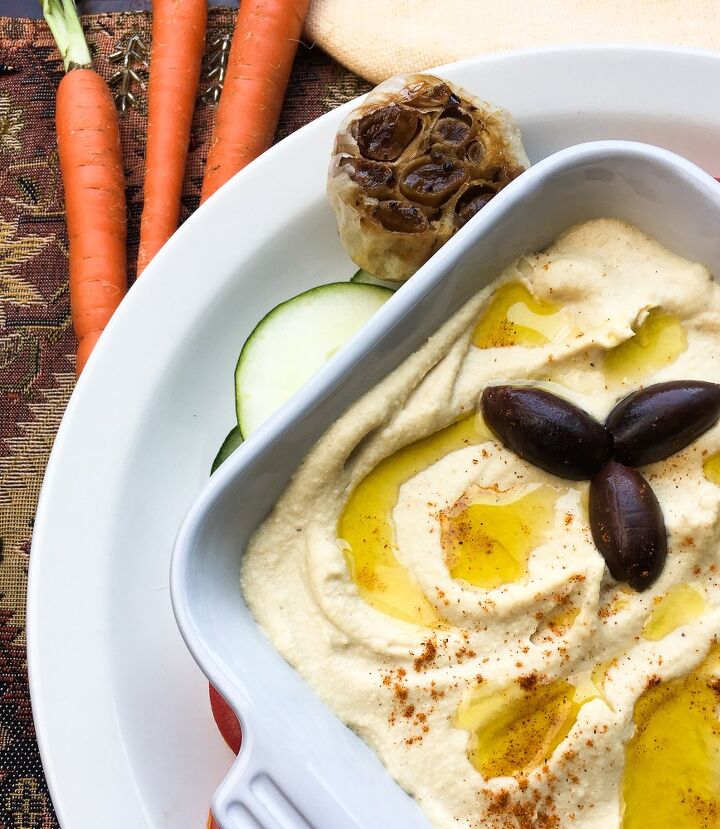
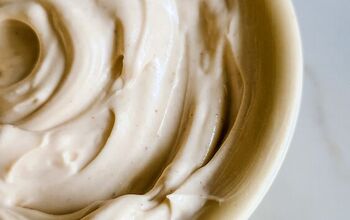
This Roaster Garlic Hummus is a smooth spread, dip, or appetizer made from chickpeas (also called garbanzo beans in the US), tahini (sesame seed paste), olive oil, lemon juice, and garlic.
This post may contain Amazon or other affiliate links. As an Amazon Associate, I earn from qualifying purchases.
Its creamy smooth texture makes it very versatile to use. You can serve it as a dip for any party or a snack (with toasted pita bread wedges or crudites). You can also use it as a spread for sandwiches, wraps, or make a Hummus Toast (same as the avocado toast; replace the smashed avocado with hummus).
Hummus is a popular dish in Middle Eastern cuisine. A lot of countries claim its origins. However, according to Wikipedia, “evidence is insufficient to determine the precise location or time of the invention of hummus. Its basic ingredients—chickpeas, sesame, lemon, and garlic—have been combined and eaten in Egypt and the Levant over centuries… Puréed chickpeas eaten cold with tahini do not appear in records before the Abbasid period in Egypt and the Levant.”
As the title of this recipe gives away, I use roasted garlic for this version of the well-known hummus dip. Well, not just a bit of garlic; I use the whole garlic head (bulb)! Hey! Don’t let this fact turn you away. Once the garlic is roasted, its irritating intense flavor and aroma turn to a rich, sweet, caramelized, earthy, and smoky flavor. This elevates the flavor of the other ingredients and adds complexity, earthiness, and umami to the dip. And then you taste it, and you have fallen in love with roasted garlic hummus!
- Chickpeas – Also called garbanzo beans
- Garlic
- Tahini
- Extra Virgin Olive Oil
- Ground Cumin
- Cayenne Pepper
- Lemon juice
- Water
- Salt
One of the fundamental ingredients of any hummus recipe is cooked chickpeas. To keep it simple and save time, I always use canned chickpeas.
Add the chickpeas from the can into a strainer and rinse well.
Place the strained chickpeas in the bowl of a food processor.
Add the tahini, lemon juice, and salt, and squeeze the garlic cloves from the skin right into the food processor.
Pulse the ingredients several times until the resulting paste is smooth.
If it is too thick, gradually add some water and pulse again to incorporate it with the rest of the ingredients.
When you have reached the desired consistency, serve in a bowl and enjoy with pita bread wedges or crudités.
I like to use canned chickpeas to keep it simple and save time. So in the recipe below, I use canned chickpeas.
You can always start from scratch, soak the chickpeas overnight and then cook them in a pot with fresh water until tender.
Cooking the chickpeas from scratch:
In a large bowl, add 1 cup dried chickpeas, 2 teaspoons baking soda, and enough water to cover them at least two inches (about 2-3 cups). Stir so that the baking soda gets dissolved and let them soak at room temperature overnight (or for at least 8 hours).
Rinse and drain the chickpeas.
Add 1 tablespoon baking soda, mix well and let them rest for 15 minutes.
Working in batches, place some chickpeas on a kitchen towel, fold the towel to cover them, and rub them with force until the skins are separated.
Next, transfer the chickpeas to a bowl and add plenty of water. The skins will be floating, and it will be easy to remove them.
Rinse well.
Then, transfer the chickpeas to a pot, add water to cover them by a couple of inches, add a pinch of baking soda and bring to a boil.
Skim the foam with a slotted spoon as the chickpeas start to boil. After that, cover the pot and reduce heat to a low simmer. Simmer for 50-60 minutes or until tender.
Using canned chickpeas
For smooth hummus, there is no need to remove the skins. I don’t do it because I like to keep all the fiber, vitamins, and other nutrients that the skins contain.
Now, if you want to make an extra smooth, silky hummus using chickpeas without the skins is recommended.
In this case, after rinsing the chickpeas, follow the procedure below:
First, place the chickpeas in a microwave-safe bowl and sprinkle them with 1 1/2 teaspoons of baking soda.
Heat them for about a minute and a half (90 seconds).
Transfer the chickpeas into a large bowl and cover with cold water. Remove the skins by gently rubbing the chickpeas using your hands. Drain the water with the skins.
Repeat this step 4-5 times until all chickpea skins have been removed. Then, add the chickpeas to the bowl of a food processor and continue with the remaining steps of the recipe.
Tahini is just the sesame seed paste. It is essential for hummus as it gives the earthy, signature flavor. Just make sure you get excellent quality tahini. It should be runny, and the only ingredient listed on the label should be sesame seeds. The sesame oil tends to separate from the rest of the sesame paste, so stir well before using the tahini. It is essential to taste it before using it. If it has stayed on the shelf exposed to heat and light for too long, it might have started going rancid and have a bitter taste. Instead, it should taste pleasantly nutty.
Garlic is the crown jewel of roasted garlic hummus! It adds a rich, sweet, caramelized, earthy, and smoky flavor. It elevates the rest of the ingredients and adds complexity, earthiness, and umami to the dip.
Always use freshly squeezed lemon juice as it brightens up the hummus flavor.
Some recipes call for chickpea liquid (aquafaba). This is liquid from the can or the water you cooked them in. I prefer to use just some water as the aquafaba may be difficult for some people to digest.
Ground Cumin – adds a warm earthy flavor.
Cayenne Pepper is an optional ingredient but adds a bit of a spicy kick to the roasted garlic hummus.
Tahini is rich in sesame oil, and there is no need to add any other oil to the dip. Only a little olive oil is needed for drizzling onto the garlic bulb before roasting it.
This recipe makes balanced, smooth, fluffy hummus. If you prefer a tangier taste, you can gradually replace some water with lemon juice.
You can roast a few heads (bulbs) of garlic in advance and store them if you plan to use roasted garlic for other recipes (salads, dips, sandwiches, grilled meat, chicken or fish, etc.). (for details, check the recipe How to Roast a Whole Head of Garlic).
You can store the roasted garlic hummus in an airtight glass container in the refrigerator for up to 5 days.
Greek Roasted Eggplant Dip – Melitzanosalata
Spicy Red Pepper Feta Dip – Htipiti

I hope you love this delicious and easy roasted garlic hummus recipe – be sure to rate it and give it a review below! Also, don’t forget to follow Eat Mediterranean Food on Facebook, Instagram, and Pinterest!
Please share this post with family and friends. Your shares are how Eat Mediterranean Food Blog grows, and I am sincerely grateful every time you share something.
In this post, some links are affiliate links, which pay me a small commission for my referral at no extra cost to you! Thank you for supporting my website.
The Best Roasted Garlic Hummus - Eat Mediterranean Food
Recipe details
- 6 servings
- Prep time: 10 Minutes Cook time: 40 Minutes Total time: 50 min


Comments
Share your thoughts, or ask a question!