


Keto Japanese Nama Chocolate
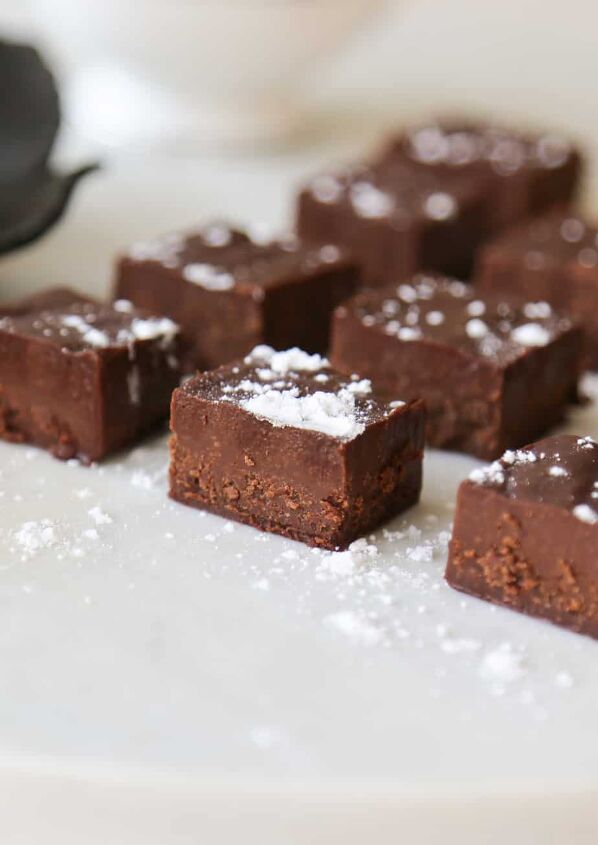
Decadent, smooth, rich, creamy are the first words that come to mind when a piece of nama chocolate is melting in my mouth. Nama chocolate is one of the most popular gifts in Japan. It’s so professional and beautiful no one will ever believe you made it yourself.
I’m going to show you how to make the most impressive homemade nama chocolate. Best part is that even though this recipe is inspired by Royce. It’s healthier. This nama chocolate recipe is keto friendly, vegan optional, sugar free and more.
This post may contain affiliate links. As an Amazon Associate I earn from qualifying purchases at no cost to you. See my Affiliate Disclosure to read my policy and more about affiliate links.
Nama chocolate is a popular dessert in Japan. You’ll see it in gift shops and in the airports all over Japan. It’s a rich creamy chocolate square similar to chocolate ganache used to make chocolate truffles.
Nama chocolate is made up by mostly chocolate, some cream and a hint of moisture. It’s pillowy, smooth, rich and creamy. Unlike regular chocolate ganache that’s rolled up into truffles, nama chocolate is set into squares by pouring the chocolate into a tiny baking dish. This makes it much easier to make at home.
In Japanese the word, “nama” means raw. So nama chocolate essentially means raw chocolate. Even though the chocolate isn’t entirely raw the word refers to the fresh cream used to make it.
The freshness of this chocolate desert means that it needs to be consumed shortly after it’s made. Unless you freeze it. For more information on how long nama chocolate lasts check the bottom of this post!
Nama chocolate was developed in Japan in the late 1980’s and has since been popularized by different companies, including Royce.
The reasons you’ll love this Japanese nama chocolate recipe are endless. I’m obsessed with it and plan on making nama chocolate for all of my holiday parties.
- Easy to make
- Only 3 Ingredients
- Low Sugar
- Vegan Optional
- Vegetarian
- Zero Cream Used
- Nut Free
- Paleo Friendly
- Keto and Low Carb Friendly
- Gluten Free
- Fast Recipe
- Zero Mess
You barely need any ingredients to make this keto nama chocolate at home.
- Canned Coconut Milk
- Keto Chocolate Chips
- Butter
- Refrigerate a can of full fat coconut milk for at least 2 hours. This will cause the coconut cream to separate from the water. The cream will settle at the top of the can while the water will sink to the bottom. Take the can out of the fridge and do not shake it. Carefully open the coconut milk with a can opener. Using a spoon scoop out the heavy cream into a measuring cup. Measure out exactly 1/2 of a cup. Place the cream in the microwave and microwave for 1 minute or until the cream just starts to boil.
- Remove the cream from the microwave and pour it over the chocolate chips and add 1 tablespoon of butter. Using an offset spatula stir the chocolate until it’s completely melted.
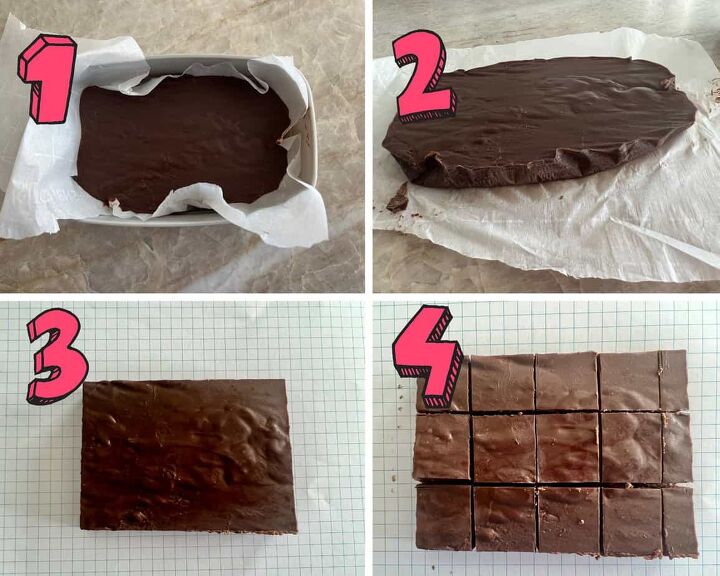
- Place a sheet of parchment paper into a 6 by 4 inch container. Pour the chocolate mixture into the container. Lightly bang the container onto the counter to release any trapped air bubbles.
- Place the container in the fridge for 2-5 hours to let the chocolate set.
- Remove the chocolate from the fridge and peel the parchment paper away from the sides. Use a knife dipped in warm water to slice the chocolate into squares. Wipe the knife between cuts to ensure clean edges.
- Dust the top of the chocolate with cocoa powder or powdered sugar for a decorative garnish.
If you don’t want to use the microwave you can make nama chocolate on the stovetop by adjusting steps 1 and 2.
- Heat the coconut cream in a small sauce pan on the stove until it’s simmering.
- Hold the chocolate over a double boiler to help melt the chocolate after you pour the cream over the chocolate chips.
A double boiler is a cooking technique used to help soften or melt delicate ingredients like chocolate, cream and eggs. You can make a double boiler by pouring 1 inch of water into a small pot. Boil the water.
Place another bowl directly onto of the pot so that it rests on the top but doesn’t touch the bottom. Mix the chocolate in the pot. The heat from the steaming water will slowly melt the chocolate.
It’s easy to make Japanese and keto friendly nama chocolate. But if you follow these tips you’ll avoid common mistakes and ensure that you have perfect bites every time.
When making nama chocolate it’s important that the measuring cup, spoons, offset spatula and mixing bowls that you use are 100% completely dry. If there is any moisture on the utensils that touches the chocolate your entire recipe will be ruined. Chocolate tends to seize when it touches water when it’s being tempered (melted).
Since chocolate has no moisture in it, when water hit it it disturbs the melting process. The chocolate will ball up and get tight instead of melting into a smooth syrup that’s useable to make Japanese nama chocolate.
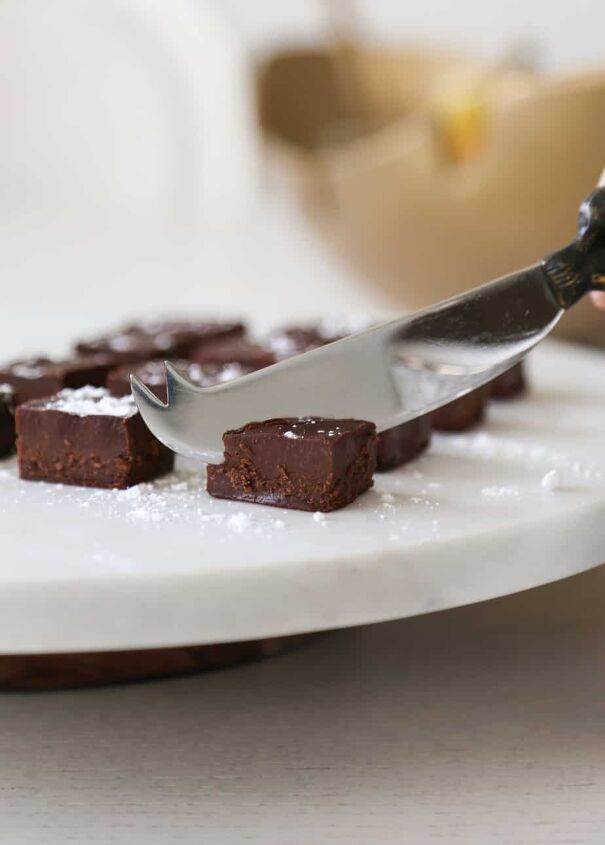
The most satisfying part of making nama chocolate is slicing through it’s buttery flesh to make perfect squares of chocolate.
The best way to ensure that you get clean cuts is to dip your knife into a cup of hot water and wipe it clean in between each cut. Use a paper towel to wipe down your knife to avoid unnecessary laundry.
Do not pour the chocolate directly into a mold. You absolutely must use parchment paper! Parchment paper will make it easy to get the chocolate out of the mold.
On the other hand if you would like to avoid parchment paper you could use a silicone mold. The silicone can be peeled away and the nama chocolate will not stick to it.
If you don’t have a tiny baking sheet or pyrex don’t worry. You can use any small square container you have available. I just used a Tupperware container, any material will work: glass or plastic.
The quality of your Japanese nama chocolate will depend not only on your cooking skills, but also the quality of your ingredients. If you want high quality nama chocolate start with a good quality chocolate.
- Coconut Cream – Instead of coconut cream you can use half and half or heavy cream.
- Butter – Make it vegan by swapping out traditional cow’s butter for vegan butter or coconut oil.
- Chocolate Chips – I used Lakanto sugar free chocolate chips sweetened with monk fruit. If you don’t want to make this recipe keto you can use regular chocolate chips.
The key to making keto friendly nama chocolate is to use a clean sugar free. chocolate chip. My favorite sugar free chocolate chips are made by Lakanto. I love Lakanto products because they use monk fruit crystals instead of stevia or aspartame.
Stevia leaves a nasty after taste while aspartame is associated with many health problems.
On the back of every box there is a warning label that says Phenylketonurics: Contains Phenylalanine. While it’s scary that there is a warning on sugar free jello, the warning has to do with people who have PKU a genetic disorder formally called phenylketonuria. People with PKU have to avoid aspartame because it causes brain damage, seizures and mental disabilities.
Even if you don’t have PKU, aspartame is associated with bloating and diarrhea just like maltodextrin. There are plenty of other alternative sweeteners you can use that don’t cause symptoms. Some people believe aspartame causes cancer.
“A large 2022 cohort study in PLOS Medicine, involving 102,865 French adults, found that artificial sweeteners — especially aspartame and acesulfame-K — were associated with increased cancer risk.”
Aspartame has also been linked to obesity, mood disorders and migraines. I can tell you that from personal experience I had bad migraines when I used to chew a lot of sugar free gum with aspartame.
For more information on healthy and unhealthy keto friendly sweeteners read this post.
Yes, nama chocolate is gluten free! Luckily even store bought nama chocolate is likely gluten free since the ingredients used to make it are naturally free from gluten. Butter is gluten free since it comes from animals along with dairy cream and vegan coconut cream. Cocoa itself is also naturally gluten free.
Most nama chocolate is made with a lot of sugar so it isn’t keto friendly even though it’s low in carbs. However, I used keto friendly chocolate chips made with monk fruit. Monk fruit is a natural zero glycemic and calorie free sweetener. It’s good for making sweet treats that are sugar free.
Since I used sugar free chocolate chips this particular homemade nama chocolate recipe is keto friendly and low in carbohydrates.
Traditional nama chocolate isn’t vegan because heavy cream and butter are used to make it. However, you can make vegan nama chocolate by substituting out the heavy cream for coconut cream and the butter for vegan butter or coconut oil.
Decadent, smooth, rich, creamy are the first words that come to mind when a piece of nama chocolate is melting in my mouth. Nama chocolate is velvety, buttery and slightly sweet. It tastes like the inside of a chocolate truffle.
Different flavors of nama chocolate have slightly different flavors. While chocolate flavor with velvet texture is the base nama chocolate can have hints of liquor or matcha.
Some liquor used in flavored nama chocolate include champagne pierre mignon and hennessy V.S.O.P.
Some liquor used in flavored nama chocolate include champagne pierre mignon and hennessy V.S.O.P.
Store bought nama chocolate doesn’t need to be refrigerated. But it will only last one month. On the other hand homemade nama chocolate will last outside the fridge for a few hours. But you should always store your homemade nama chocolate in the fridge so that it doesn’t go bad.
You can expect homemade nama chocolate to last in the fridge for four days.
If you live in a hot environment the chocolate may melt a little outside of the fridge. You can combat this natural melting by including a few tablespoons of gelatin or agar powder in the chocolate mixture. Both gelatin and agar agar powder stabilize the chocolate.
The best way to store nama chocolate is in a single layer in a wide flat container. That way the pieces wont get messed up. You could layer the chocolate but the tops may get ruined.
Store bought nama chocolate will last for one month. While homemade nama chocolate will last for up to 4 days in the fridge and for 3 months in the freezer.
Chocolate itself is allowed on keto. It’s all the sugar and dairy added into a lot of chocolate that makes many chocolate desserts not keto friendly. Any kind of dark chocolate that’s low in sugar is keto friendly. Including this nama chocolate recipe!
Some of my favorite store bought keto chocolate desserts are:
- Evolved Keto Cups
- Dark Chocolate
- Hail Merry’s Treats
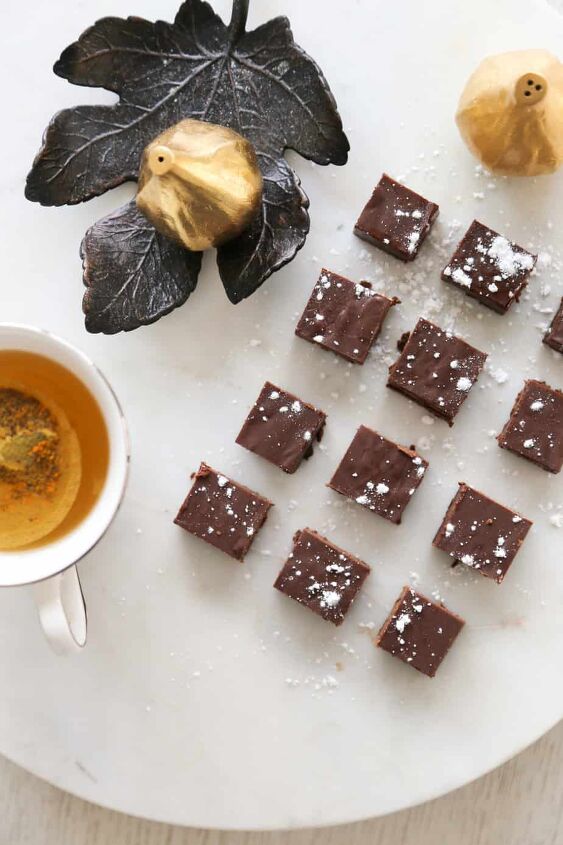
I personally enjoy eating a piece of nama chocolate with a cup of unsweetened turmeric tea. The nama chocolate is so decadent that the bitter tea helps wash it down and clear your palate for the next bite.
Some people recommend taking the chocolate out of the fridge ten minutes before you eat it to give the cream time to soften.
I think that homemade nama chocolate is best but if you want to buy it from the store I recommend Royce brand.
You can buy nama chocolate from any gourmet chocolate store in the United States or in Japan. If you want to buy nama chocolate online you can do so on amazon. I recommend Royce’s nama chocolate.
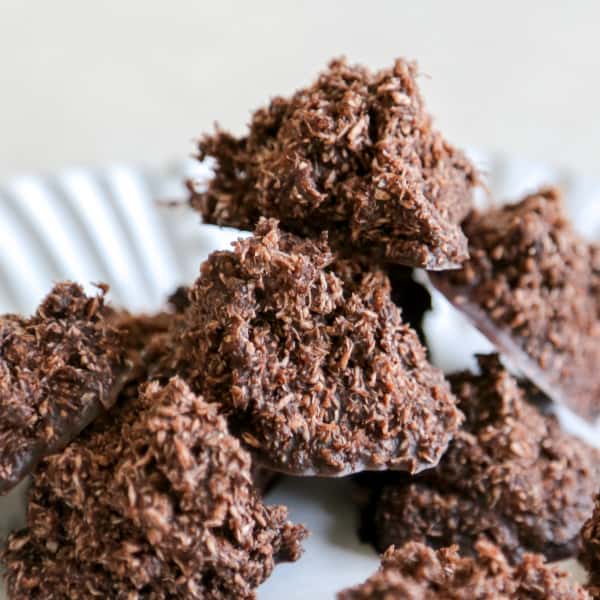 keto chocolate haystackVegan Tahini Cookies
  Italian lemon sorbet recipe on a cutting board with mint leaves
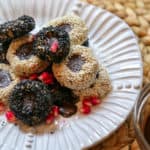 vegan tahini cookies on a plate
Keto Japanese Nama Chocolate
Recipe details
- 16 pieces
- Prep time: 5 Minutes Cook time: 5 Minutes Total time: 10 min


Comments
Share your thoughts, or ask a question!