


Birthday Grazing Board
Today, we’re making a Birthday Grazing Board!

This is the treat board of any birthday guy or gal’s dreams. It’s loaded with sweets, treats, and all the sprinkles. And honestly, what more could anyone want on their birthday. And bonus, as with any good grazing board, you can store buy or home make the components of the board making the assembly of this board as easy or as complex as you so choose.
So, let’s get to it!
In the name of simplicity, I went 90% store bought for this board. There’s one decorative component that I made and one food component that I made. But otherwise, I went grocery shopping with one thing in mind: ALL THE SPRINKLES!
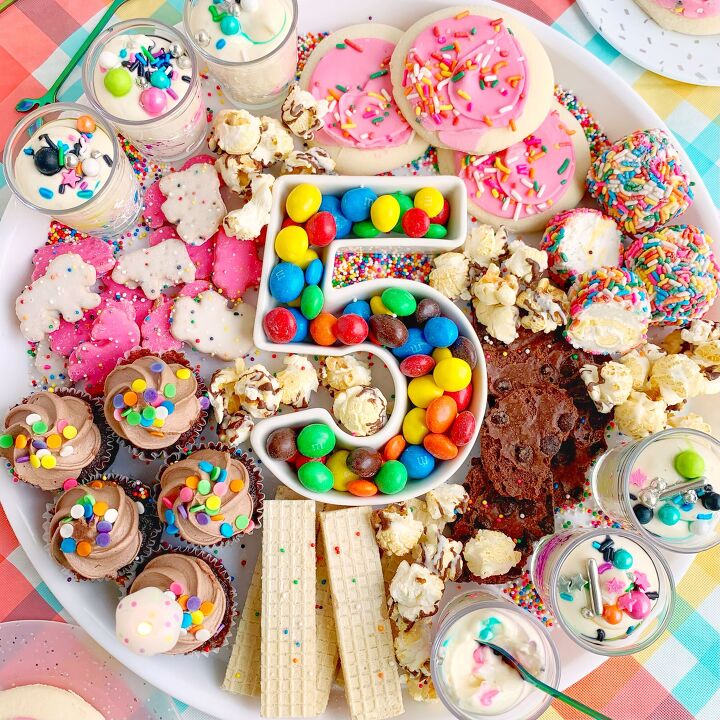
I wanted the bright colors to really pop on this board, so I opted for a white serving platter. Hot tip…I used cafeteria lunch style serving trays that I got on Amazon for just a couple of bucks. They’re sturdy, they’re huge, and they’re easy to clean. Check, check, and check.
Another Amazon find that I used to make this board extra special was the number shaped ceramic dish in the centerpiece of the board. It adds a nice depth component to the board while highlighting what’s special about the occasion. And the cool thing is that the Amazon seller sells every number and letter of the alphabet, so you can customize this board however you like!
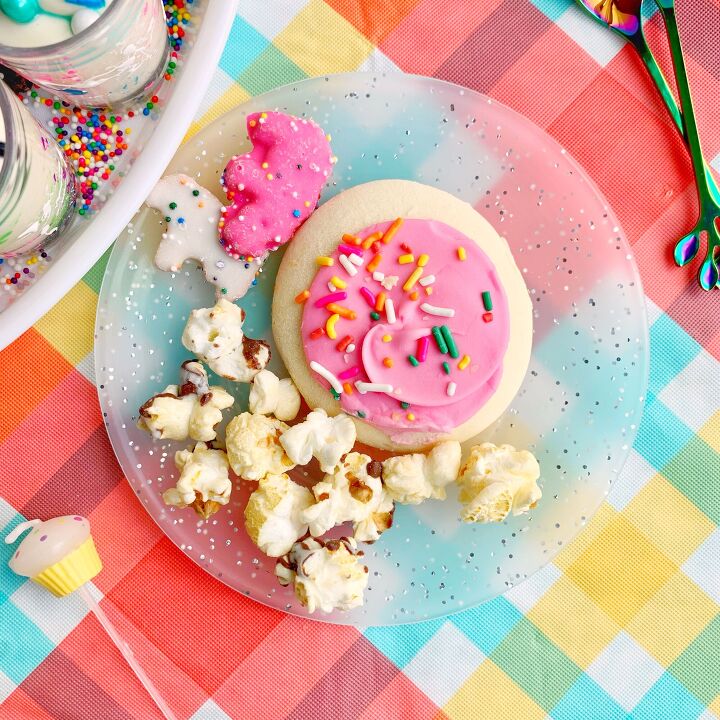
To fill the board, I knew I wanted to stick to primarily sweet treats with subtle hints of savory. For our sweets, we have cookies, cupcakes, candy, brownie brittle, and birthday cake flavored stuffed marshmallows. To add a slightly savory but still sweet contrast to the board, I added some chocolate drizzled kettle corn and some peanut butter wafers. All of those components were store bought, so my life was extremely easy with this one!
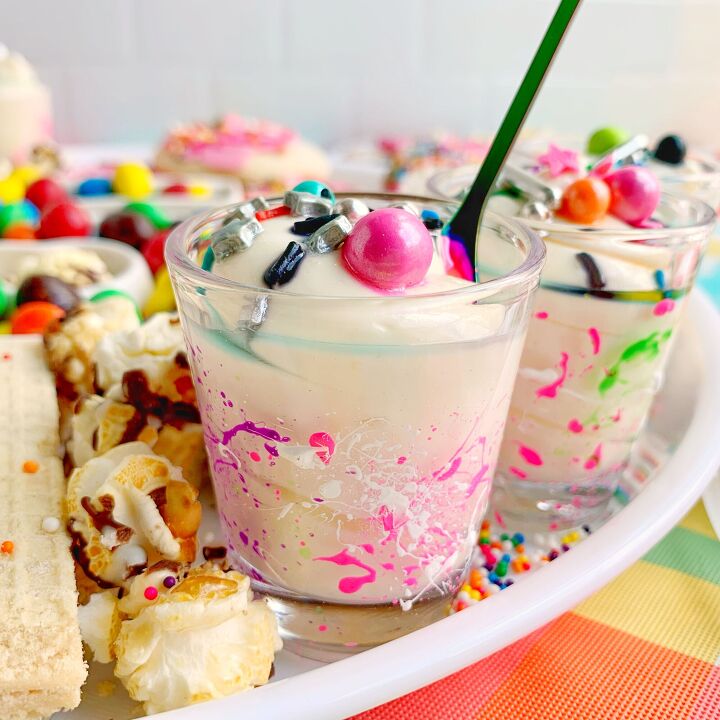
I wanted a little bit of a homemade component, so I made a semi-homemade treat to add to the board…mousse! You can make a crazy simple mousse dessert in any flavor (I used cheesecake flavor for this one) by whipping instant pudding mix with a little less milk than called for on the box then folding in some nondairy whipped topping. That’s it…let it chill and set, and you have mousse! I served the mousse in shot glasses which was the perfect treat size for this board. And, I even decorated the shot glasses with a little neon splatter paint to tie in with the birthday sprinkle theme. (Make sure you follow me on Instagram to see the tutorial video I made for the DIY shot glasses!)

To fill in any blank spots on the board and to add one last pop of pizazz, I added…you guessed it…more sprinkles! The multicolored nonpareils, to be exact. I bought a big ol’ jar of them, and basically poured it around the perimeter of the board. Those little stinkers can be bouncy, but that just means we’re spreading the sprinkle joy around the house too!
As with any board, this treat board is totally customizable. You could add mini glazed donuts, dip them in colored candy melts, and give them a touch of sprinkles. You could add chocolate dipped Oreos with a pinch of sprinkles. You could add all the cookies in the universe. Really, the most important ingredient here is the sprinkles.
Ok, everyone! I just want to say another HUGE thank you for being here to support The Yummy Muffin and for making it so that we even get to celebrate blog birthdays. I love you all, I love creating for you, and I hope I we get many more years to do that together.
And there’s going to be some special things happening on Instagram to celebrate, so definitely make sure you’re following along!
As always, ENJOY! And, let’s eat!
Birthday Grazing Board
Recipe details
- 1 board
- Prep time: 10 Minutes Cook time: 0 Minutes Total time: 10 min


Comments
Share your thoughts, or ask a question!