


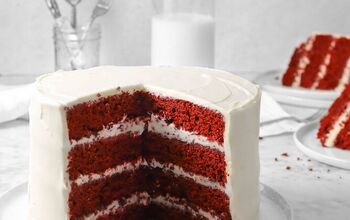
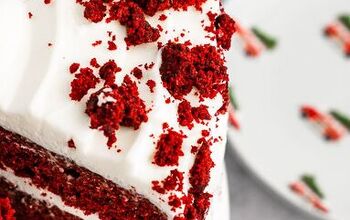
Vegan Red Velvet Layer Cake With Vanilla Cream Cheese Frosting
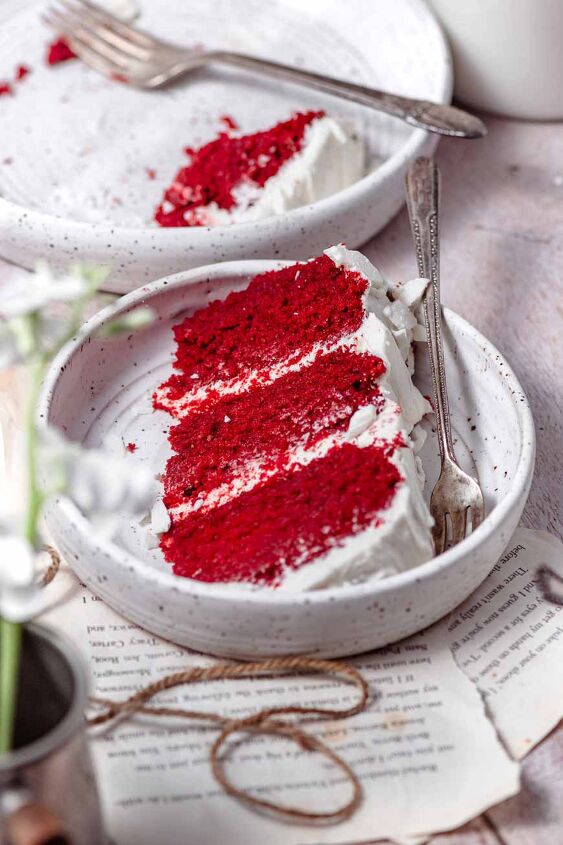
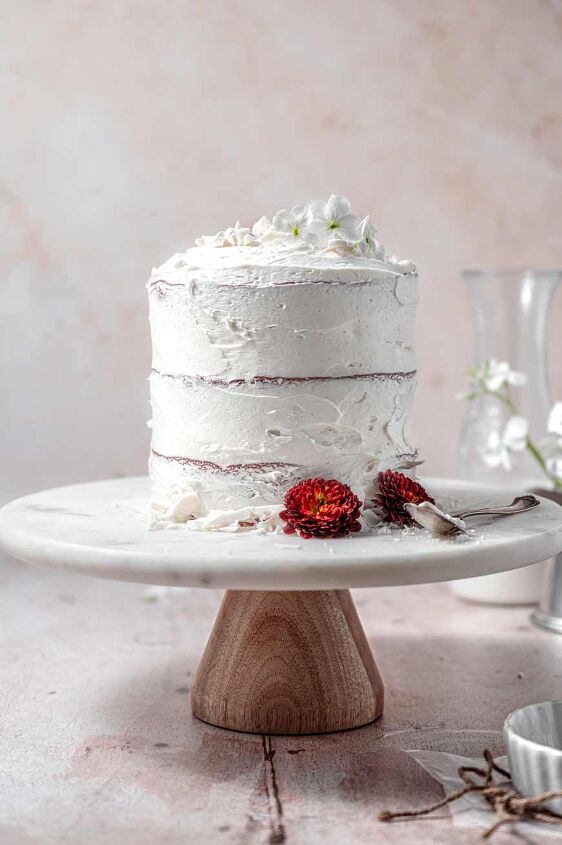
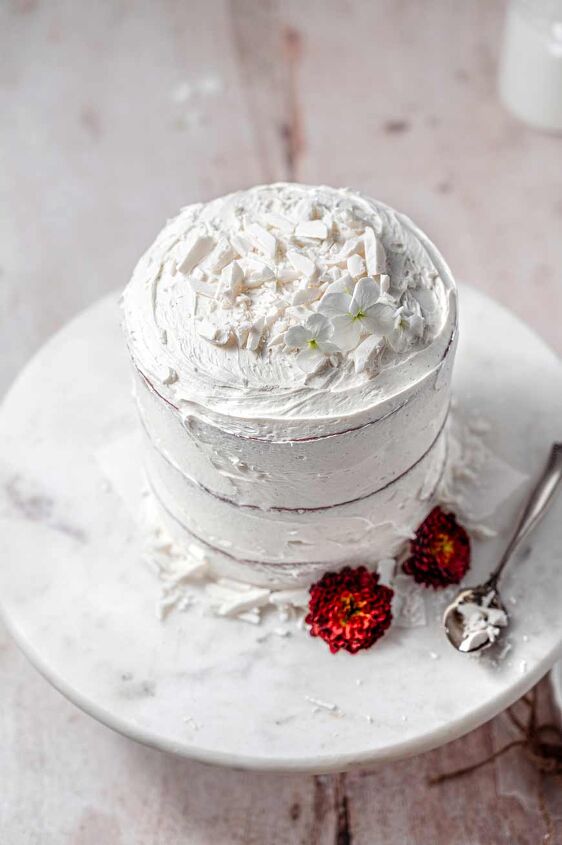
This easy vegan red velvet cake has a tender, moist crumb, a rich flavor, and beautiful vibrant red color. It’s topped with a sweet yet tangy whipped vegan vanilla bean cream cheese frosting. The cake can be made in one bowl!

For the full recipe, step by step photos, and a video tutorial, visit:
Why You’ll Love This Vegan Red Velvet Cake
- Tender, Moist & Velvety Texture: dairy free yogurt replaces the eggs in this recipe, giving the cake a super moist texture that slices and holds together beautifully
- Rich Flavor and Intense Color: a mild cocoa flavor runs through this cake and it has a rich crimson color
- One Bowl: fewer dishes are always better- no need to use separate bowls for the wet and dry ingredients
- Easy to Follow Recipe: follow along with the step-by-step photos and video tutorial
The Ingredients
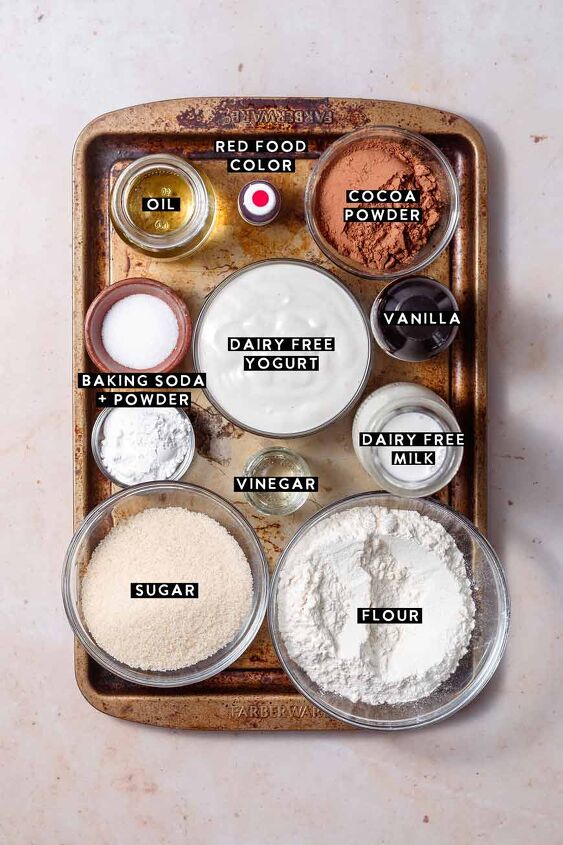
This vegan red velvet cake uses a handful of ingredients, most of which are pantry staples that can be found at your local grocery store. You may need to order red food coloring online if you’re not able to find it in stores.
- Vegetable Oil: to keep the cake extra moist
- Granulated Cane Sugar: for sweetness
- Unsweetened Dairy Free Yogurt: to help hold together the cake & replace the eggs in traditional cake recipes
- Dairy Free Milk: like almond milk, oat milk, or coconut milk
- Pure Vanilla Extract: vanilla essence gives the cake an aromatic flavor
- Vinegar: to help give the cake its characteristic tangy flavor, and to help the cake rise in the oven
- All Purpose Flour: or you can use cake flour
- Unsweetened Cocoa Powder: to give the cake its characteristic subtle cocoa flavor
- Baking Powder & Baking Soda: to help leaven the cake
- Cream of Tartar: this is optional, but it helps give the cake a subtle tang and helps the red color stay vibrant even after baking
- Red Food Coloring: if making this cake completely vegan, be sure to order a vegan-friendly red food coloring
- Sea Salt: to help balance the sweetness
For the vanilla bean cream cheese frosting:
- Softened Salted Vegan Butter
- Softened Vegan Cream Cheese: I like to use Follow Your Heart or Trader Joe’s dairy-free cream cheese. They’re not too tangy and have a good texture.
- Vanilla Bean Paste: or you can sub vanilla extract
- Powdered Sugar or Icing Sugar
Substitutions
- Oil: the vegetable oil can be substituted for melted dairy-free butter or for another oil, like coconut oil.
- Dairy Free Yogurt & Milk: the dairy-free yogurt and milk can be subbed 1 for 1 with dairy based products.
- Sugar: while I haven’t tried this substitution, you could try substituting the cane sugar for a sugar free alternative like Swerve Granulated Substitute. If substituting the sugar, make sure to use a granulated replacement- not a liquid sweetener.
- Food Coloring: you can opt for natural food coloring like beet powder instead of gel food color. Note: the color won’t be as intense as in the photos.
Helpful Equipment
- 3 6” Round Cake Pans or 2 8-9” Round Cake Pans
- Parchment Paper
- Large Mixing Bowl
- Electric Hand Mixer or Stand Mixer: to make the frosting
Step by Step Instructions
🎥 *Video Tutorial is at the link listed above!*
Storage
Fridge: The cake can be stored in the fridge, wrapped loosely in plastic wrap or in an airtight container for 1-2 days.
Freezer: After 1-2 days, I recommend freezing slices of the cake to help it retain its moisture. Wrap the cake with plastic wrap and place the slices in a freezer-proof baggie. Store in the freezer for 2-3 months.
Vegan Red Velvet Layer Cake With Vanilla Cream Cheese Frosting
Recipe details
- 10 Slices
- Prep time: 35 Minutes Cook time: 30 Minutes Total time: 1 hr 5 min


Comments
Share your thoughts, or ask a question!