


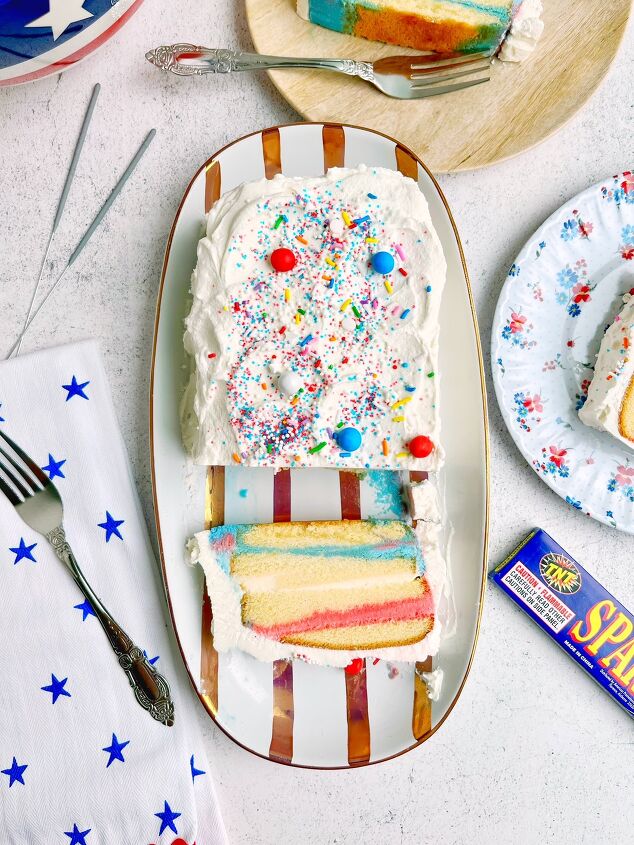
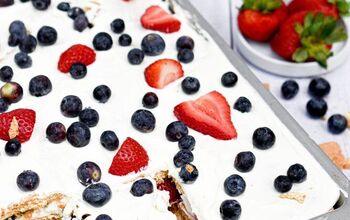
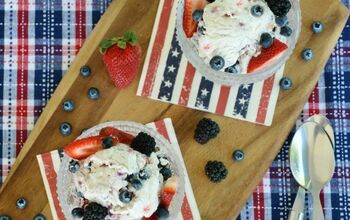
Red, White, and Blue Ice Cream Pound Cake
Today, we’re making Red, White, and Blue Ice Cream Pound Cake!
I’m not going to lie to you guys. This recipe almost didn’t make it to you. I hit roadblock after roadblock after roadblock with this one. But I knew it was a winner, so I refused to give up on it. And, the final result is a colorful treat just in time for July 4th celebrations.
This recipe doesn’t take much skill. This recipe doesn’t use a lot of ingredients. But, this recipe does require some time. The grocery store is doing most of the heavy lifting for us as far as the base ingredients go. However, we’re going to melt and refreeze some ice cream a couple times, so the biggest ingredient in this recipe is patience.
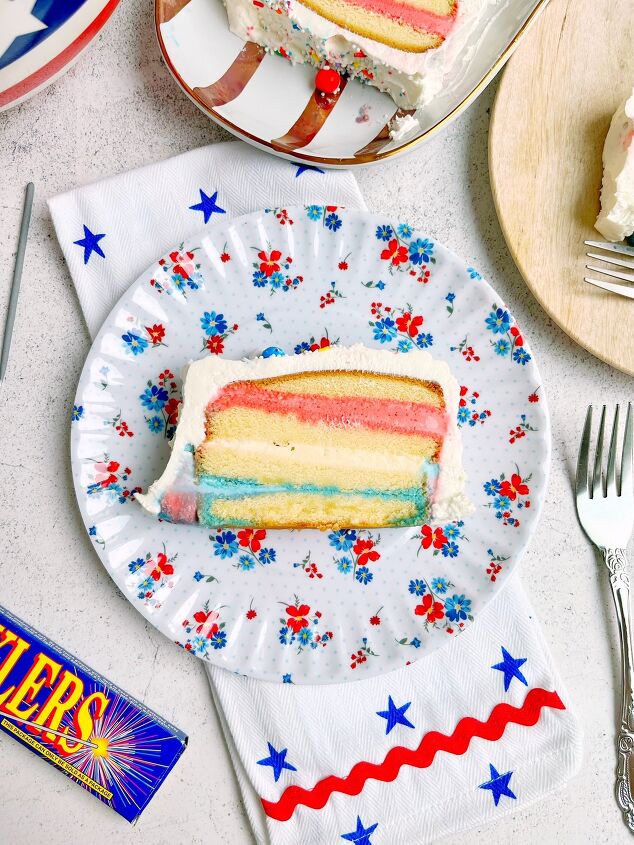
We’ll start with a store bought pound frozen pound cake. We want to use a Sara Lee family sized pound cake, and we’re going to slice it lengthwise into 4 equal slices. It helps to do this when the cake is straight from the freezer and is still firm. And, it also helps to use a serrated knife. I like to take the cake, rest it on its side, slice through the center, then slice each half through the center again. If you go crooked or break any pieces, that’s ok. We can hide it with ice cream in the pan. But, do your best to carefully and evenly slice the cake as well as you can.
For our ice cream, we’ll start with some softened vanilla ice cream. You can either let the whole carton of ice cream sit on the counter for about 30 mins before scooping it, or you can scoop your ice cream into bowl and microwave each bowl for a few seconds. Both work, but ultimately we’re looking for ice cream that we can mix and spread.
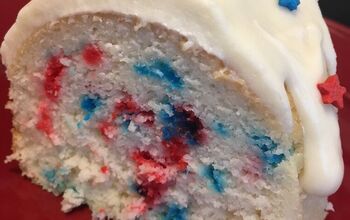
We’re going to use a special ingredient to give our ice cream both a little color and a little flavor. Jello! Never would I ever think I’d voluntarily buy a box of Jello mix. But, you know what? It was the perfect thing to get red and blue coloring with subtle berry undertones into our cake. We’ll beat the Jello mix into our ice cream which is going to completely melt the ice cream. Then, we’ll pop the ice cream back in the freezer for a few minutes to thicken back up. Now, the Jello adds beautiful, bright coloring to the ice cream. But if you want to deepen or enhance the color even more, add a drop of food coloring to the bowl before you mix it.
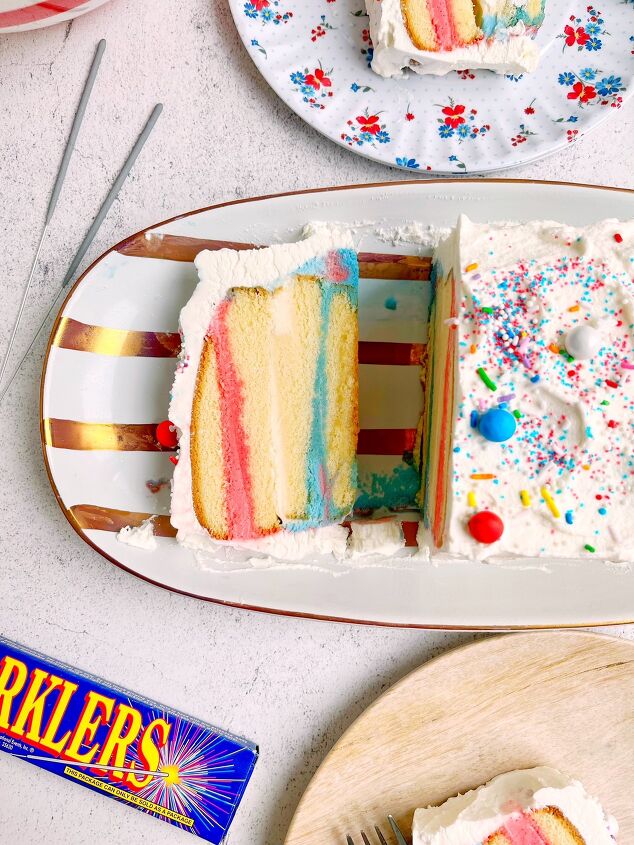
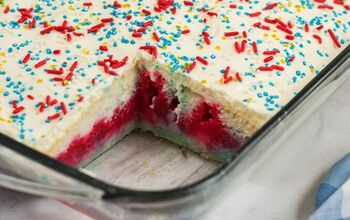
After our colored ice cream has had a chance to set back up, it’s time to layer our cake together. We’ll line a loaf pan with plastic wrap, alternate pound cake and ice cream layers, wrap the cake tightly in plastic wrap, and pop it into the freezer for 5 hours to set.
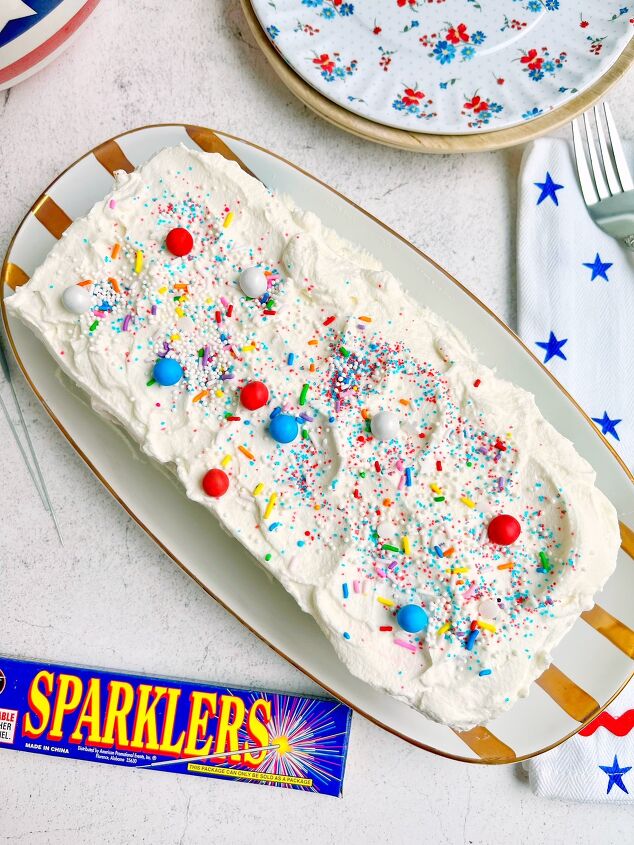
To finish our cake (and hide any imperfections in our cake), we’re going to make a homemade whipped cream to schmear all over the cake. All we need is some heavy cream, some powdered sugar, and some vanilla extract. We’ll beat them together until the whipped cream is stable, pop our cake out of the pan, schmear the cake all over with our whipped cream, and pop it back in the freezer for one more hour so it can set.
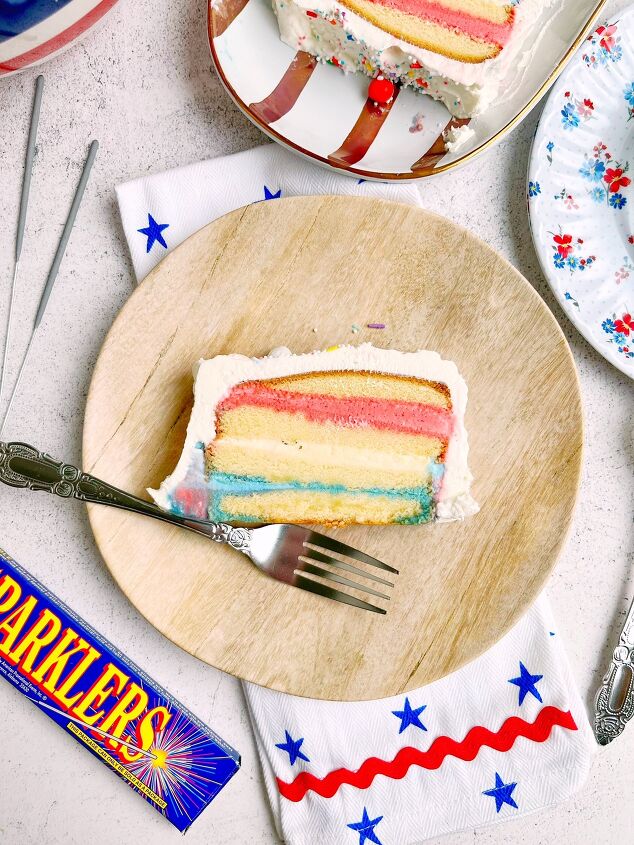
When it’s time to serve, we can slice up our cake and dig in. The layers of ice cream in the cake are thin, but they’re just enough to add a nice coolness to the rich and buttery cake. The whipped cream thickens up but still has a fluffy decadence to it. And the hidden Jello adds the slightest berry notes to the ice cream that brings the whole thing together. And not to mention, it’s beautiful!
Alright, everyone. I hope to see these on your July 4th tables this year. Make sure you tag me on socials when you make this!
I hope you guys enjoy, have a happy and safe holiday, and let’s eat!
Red, White, and Blue Ice Cream Pound Cake
Recipe details
- 10 servings
- Prep time: 6 Hours Cook time: 0 Minutes Total time: 6 hr


Comments
Share your thoughts, or ask a question!