


Homemade Vegetable Broth Recipe
Making this Homemade Vegetable Broth Recipe is easy and results in a much more flavorful broth than any store-bought vegetable broth. This post also contains other suggested vegetables for your broth and vegetables to avoid. Instructions for the optional canning of the vegetable broth for pantry storage are also included. You can make your own vegetable broth in your slow cooker or stovetop.
I started making my own broth and stock 15-20 years ago to control what went into my growing family’s diet. And once you’ve made and tasted the homemade versions of this pantry staple, it is hard to go back to store-bought. To this day, I set aside a couple of days a year to make an assortment of stocks and broths. At this writing, I have Beef Stock, Ham Stock, Chicken Stock, Chicken Bone Broth, and Vegetable Broth in my pantry. I also make Turkey Stock each fall for the best Turkey gravy!
Clearly, I like options in my stocks and broths! We use this Homemade Vegetable Stock in soup recipes and as the cooking liquid for grains like quinoa, rice, couscous, and risotto. And when we are under the weather, I swear by the healing and feel-good power of a cup of hot and nutritious veggie broth.
vegetable stock or vegetable broth
I use the term interchangeably in this post. Technically, the difference between a stock and a broth concerns whether or not you use bones in the making. The stock is made using bones, while broth uses just the meat.
Since we are talking veggies here, I will take liberties and use whatever I feel!
make it super economical
Making homemade vegetable broth is a great way to reduce kitchen waste and save money. Over time, save your vegetable scraps (see the lists below for what to keep and what not to save) and use them solely or add them to your other vegetables.
tips for the most flavorful homemade vegetable broth
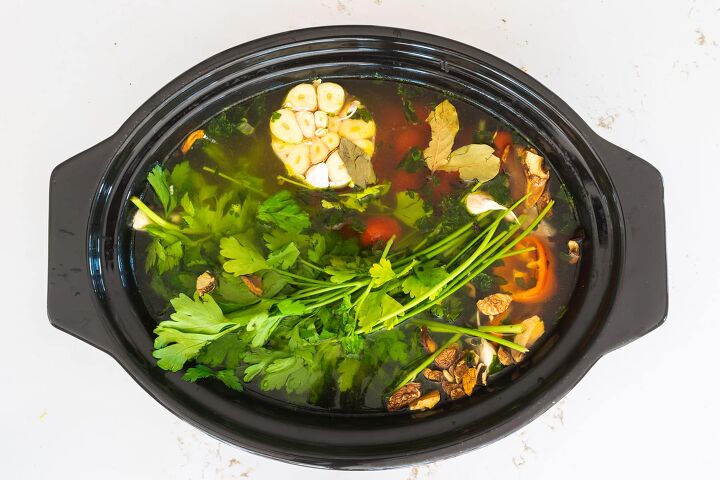
- Chop up your vegetables. This allows quicker extraction of the flavors from each vegetable.
- Make a mirepoix of the carrots, onions, and celery by sauteeing them in olive oil until lightly browned.
- To get an even richer flavor, roast the onions, celery, carrots, tomatoes, and garlic in the oven at 400° for 45 minutes.
- Make sure you have 1-2 pounds of vegetables for each quart of water.
- Use cold water, which allows the vegetables to cook more slowly and evenly.
- Add some dried mushrooms. Even if you don’t love mushrooms, this addition adds a lovely earthiness to your vegetable broth.
- Add tomatoes for their depth and sweetness.
- Consider adding a piece or two of kombu, which is dried kelp. When cooked in your stock, you won’t taste it per se, but your broth will benefit from the glutamic acids in kombu, which adds a bit of mildly salty and subtly sweet umami to it. In addition to the umami benefits, kombu contains iodine, iron, calcium, and vitamins A & C, along with trace minerals. This is the brand I’ve used for the past several years and like. I purchase it at my local natural foods store, but you can also find it on Amazon.
- Don’t let your vegetable broth cook longer than 1 1/2 hours.
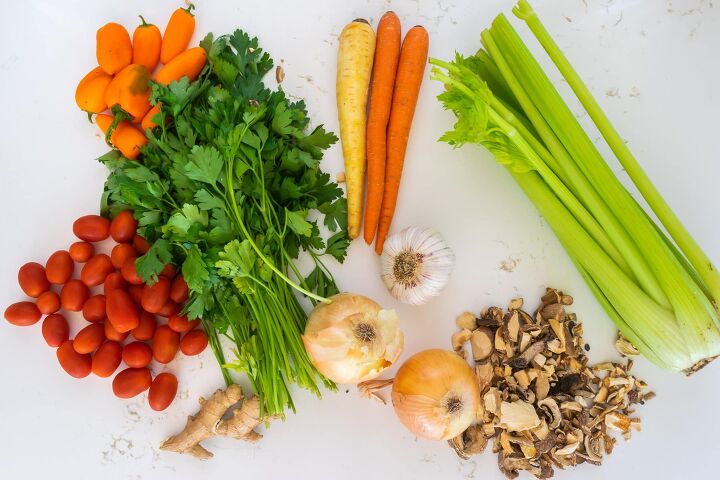
what vegetables and herbs to use in your vegetable broth
- onions
- leeks
- scallions
- shallots
- garlic
- carrots
- celery
- tomatoes or tomato paste
- parsley
- mushrooms
- parsnips
- beet greens (in moderation…they will color your broth)
- corn cobs
- kombu
- leaves and stems of fresh herbs, like parsley, thyme, and basil.
- dried bay leaves (fresh may be too strong)
- ginger root in small quantities
- bell peppers in small quantities
what vegetables to avoid using vegetable broth
I am all about saving kitchen scraps for use in my broth and stock making, but I don’t include any of the following in my veggie scraps bag.
- cruciferous vegetables (broccoli, cauliflower, brussels sprouts, turnips, collard greens, kohlrabi, cabbage, kale, bok choy, mustard) will make your broth bitter
- carrot peels can be bitter
- leafy green parts of carrots and celery can also be bitter
- potatoes and sweet potatoes will make your broth cloudy, and the sweet potatoes can be overwhelming
- green beans
- zucchini and yellow squash
- artichokes
go organic
Especially if you are using the skins on your vegetables in your homemade vegetable stock recipe, opt for organic if possible.
For the past several months, I’ve purchased my organic fruit and vegetables from Misfits Market. Not only is it highly convenient for the produce to arrive on my front porch, but I can find organic produce that I wouldn’t ordinarily be able to find in my local stores. And not for nothing, the prices are regularly 30-40% off what I would pay in my grocery store. Use this code for $10 off of your first order.
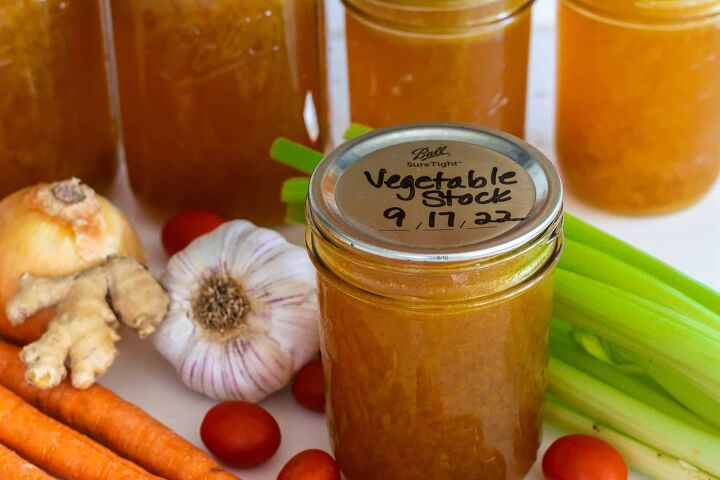
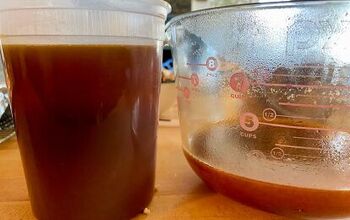
how to store your vegetable broth
Use it immediately, store it in the refrigerator for 3-5 days, freeze it, or can it for pantry storage.
If you are using glass jars to freeze, make sure to let the broth come to room temperature before freezing and leave at least 1 inch of headspace to avoid jars cracking.
Another option is these freezer pods. I have the 2 T pods (which I use for tomato paste and chipotle in adobe), the 1/2 cup (which I use for precooked beans & taco meat), and the 1 cup (handy for freezing soup, broth, stock, and stew portions). Once the food is frozen, I put it in a ziplock bag as it takes less room in my freezer.
This recipe for vegetable broth also includes instructions for canning it for pantry storage.
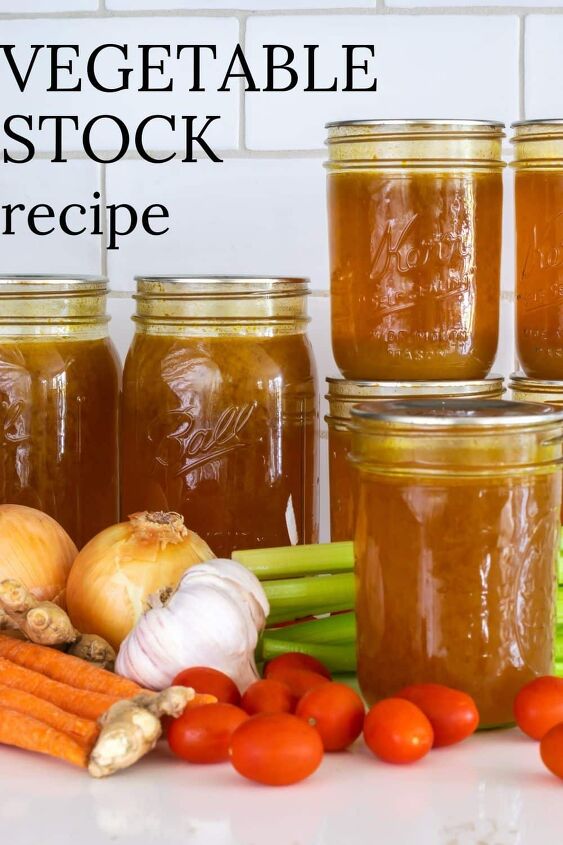
Homemade Vegetable Broth Recipe
Recipe details
- 4 quarts
- Prep time: 15 Minutes Cook time: 90 Minutes Total time: 1 hr 45 min


Comments
Share your thoughts, or ask a question!