How to Make the Best Crunchy Dill Pickles?

Are you wondering how to make the best crunchy dill pickle? I have the best recipe for homemade pickles and it’s easy if this is your first time making dill pickles.
Do you have an abundance of cucumbers like me and want to know how to make a crunchy crispy dill pickle? There is nothing like homemade dill pickles!
On my blog Living Large in A Small House, I may sometimes use affiliate links, which means a small commission is earned if you make a purchase via the link. The price will be the same whether you use the affiliate link or go directly to the vendor’s website using a non-affiliate link. You can find my full Disclosure Policy HERE
The goal for homemade pickles is to not have mushy pickles but crunchy pickles.
You know it’s right when it has a pickle crisp bite.
White vinegar is the best, in my opinion.
You can find canning recipes with apple cider vinegar but I think white vinegar gives it the proper flavor and it also keeps the cucumber the beautiful shade of green they were meant to be.
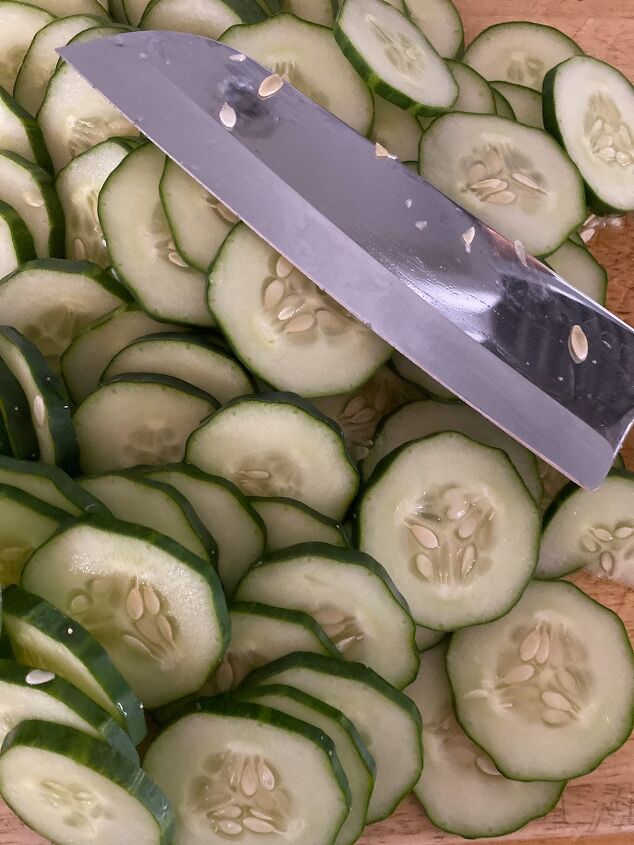
Wash the whole cucumbers and make sure to cut off the blossom end of the cucumber.
Leaving it on can give you a mushy pickle.
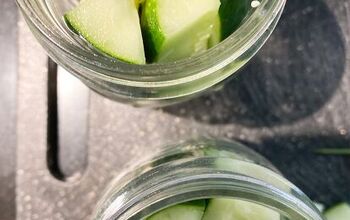
Then you will want to cut your cucumbers into spears or chips.
I cut my smaller pickle cucumbers or Kirby cucumbers into spears and cut my regular cucumbers into chips.
I learned how to can and preserve with a water bath canner. The one I own would definitely be considered vintage. It’s quite old but it still works.
Using the pressure canner is my preference but for crunchy dill pickles, you need to use the water bath canner. The pressure canner would turn the cucumbers into mush.
Tools you’ll need
Making your own pickles is a great way to use your excess cucumbers and jars of pickles that you made sure beat anything you can buy from the grocery store.
I have dill in my garden but my cucumbers were behind my dill so I did have to go to the farmers market to get fresh dill but the garlic came from my own garden.
You don’t typically see me but I shared a little video just for my blog followers!
Peace,
A great way to save this article is to save it to your Pinterest boards. You can find the pin button in the top left corner of the photo below. Also, don’t forget to follow me on Pinterest
Where you can find me
FeaturedHow to Make the Best Crunchy Dill Pickles?
Recipe details
Ingredients
- 24 pickling cucumbers
- 10 garlic cloves, peeled and smashed
- 2 large bunches of fresh dill
- 8 tsp mustard seeds
- 8 tsp black peppercorns
- 8 cups water
- 8 cups white vinegar
- 8 tbsp sea salt or pickling salt
Instructions
Preparing Jars
- Wash jars in the dishwasher and then preheat the oven to 200°. Place the jars on a cookie sheet and heat for 20 minutes in the preheated oven. While jars are heating in the oven put the lids and rings in a small saucepan, cover them with water and bring to a boil. Take off the heat and leave lids and rings in water until you want to use them
Prepare the Whole Cucumbers
- Wash the cucumbers and then trim the tops and bottoms, cut into spears or chips
Prepare the Pickling Brine
- Combine the water, vinegar, sugar, and salt in a large pot. Bring to a boil over high heat. Stirring to make sure that the sugar and salt are dissolved. Let cool down while you are preparing pint jars.
Putting the Jar of Pickles Together
- Put a large chunk of dill in the bottom of the jar, then a garlic clove, 1/2 tsp of mustard seeds, and 1/2 tsp of black peppercorns. If you're using quart jars double the ingredients.
- Cover the cucumbers with the brine mixture, leaving 1/2 inch head space.
- Put a lid and canner ring on the jars.
Refrigerator Pickles
- At this point, you can put your pickle jars into the refrigerator and let them sit for at least 24 hours. They will only get tastier the longer they sit. The best flavor is about 5-6 days.
- The pickles will be good for 4-6 weeks in the refrigerator
Canning Process
- Fill the water canner 3/4 full with water, and add 1/4 cup vinegar to the water to help prevent lime film. Bring the water to a rolling boil.
- Load the jars into the canner basket. Carefully lower the canner basket into the boiling water. I use high-heat plastic gloves to protect my hands.
- The jars need to be completely covered if they aren't add more water and bring it back to a boil then let boil for 10 minutes. After 10 minutes carefully lift the basket out of the canner with the heat gloves and place it on a wooden cutting board.
- Once the jars have cooled and the lid has been sealed. If the top dimples up and down with a slight push, it hasn't sealed. You can change the lid and reprocess.
- I take the rings off, wash the jars, and store them in a cool to room temperature, dry place (my pantry) after 24 hours on the counter.







Comments
Share your thoughts, or ask a question!
I cannot wait to try this, but I do have a question: The sr. ladies at our University of WI Extension Office swear that there is not enough acid to properly preserve dill pickles... but obviously, you can buy jarred pickles at any grocer. Have you ever had a problem with them not preserving properly? I LOVE refrigerator pickles, but I'd love to put some up for fresh pickles in, y'know, January! THANK YOU!!! ~Chrissie
I saw that you mentioned sugar but I didn’t see it in the ingredients or recipe. What amount do you use.