


Shelf Stable Canned Diced Garlic Potatoes
Since it’s winter time, I’ve been using all my free time to free up space in our freezers or just make sure our food doesn’t go to waste. This involves lots and lots of hours spent canning and preserving! Today, I’m sharing with you one of our favorite canned recipes, and it is such an easy and quick dinner side too! It is a diced garlic potato that will stay shelf stable for over a year! If you aren’t canning, you are missing out on cutting costs, having delicious and easy to prepare food, and minimizing food waste.
Dice Your Potatoes
I had a $2 bag of potatoes that was about to go bad. In fact, they were just starting to sprout eyes so I knew they needed to be used up asap. My husband was willing to help, because that’s a lot of potatoes to cut. So we got to work trimming off anywhere that eyes had started to sprout, and dicing the potatoes. We did not peel our potatoes because we prefer skin on, but that step is totally up to you. You’ll want your potatoes diced for blanching anyways, so you might as well get this step done first.
Blanch Your Potatoes
You’re going to want to blanch your potatoes first. This sounds so complicated, but I promise you it’s just as easy as boiling them. Fill a pot with lukewarm water and place your diced potatoes inside. Bring to a boil, then as soon as it starts to boil, bring your heat down to just a simmer. You do NOT want to cook your potatoes. Simply check them with a fork and as soon as a fork can easily pierce the outside, they are done. Drain your potatoes and transfer them to a bowl of ice water so you can stop the cooking process.
Getting Your Canning Jars Ready
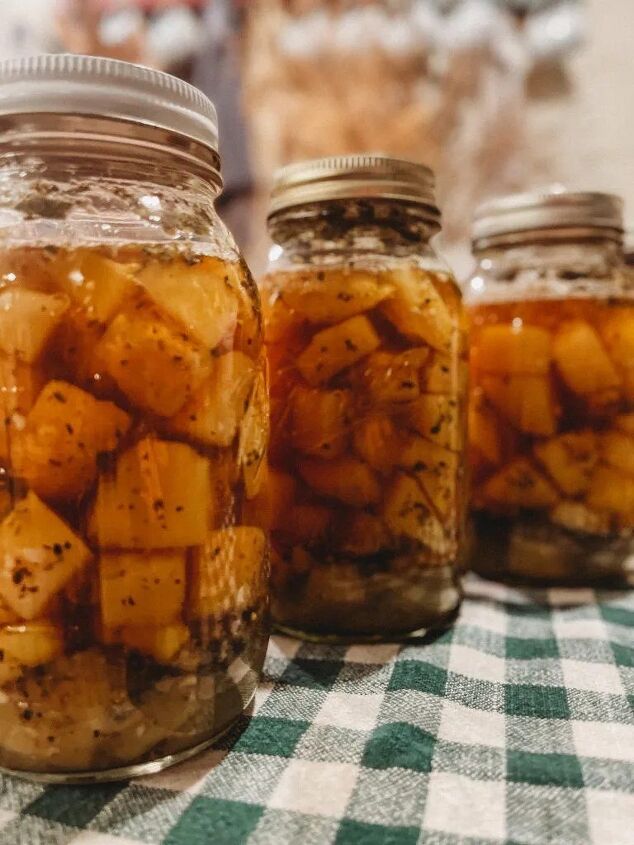
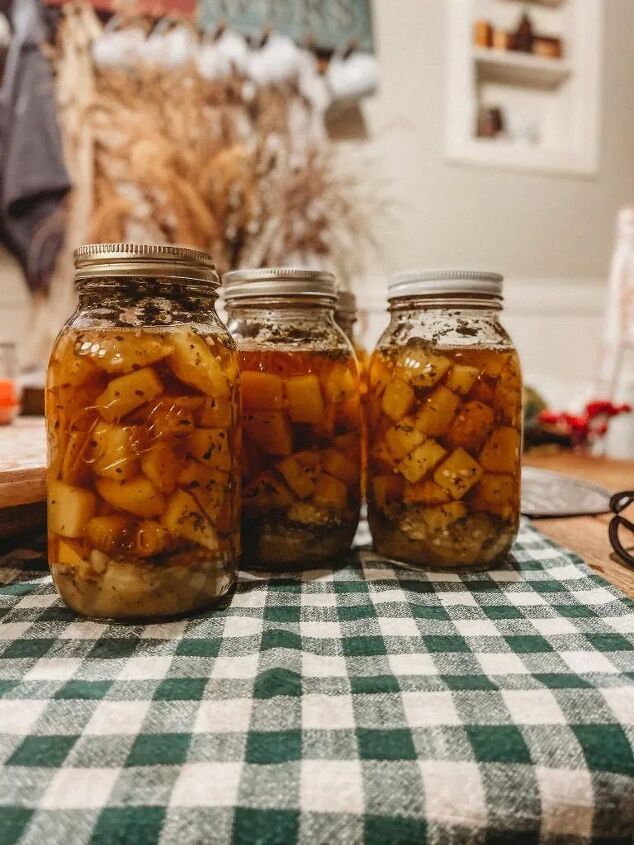
I decided to can these potatoes in quarts because that’s likely what we’ll be preparing at a time for a dinner side anyways. Get your jars ready beforehand. I always pull out a few more than I think I will need for the recipe. Our water gets extremely hot so I wash them really well with dish soap and hot water, including the lids and rings. I then fill the jars with hot water and sit to the side until I’m ready to use them. This keeps them warm all the way up until the canning process, and ensures no chipping or breakage. I lay out my rings and lids on a clean cloth towel until it’s time to use them.
Canning Your Potatoes
Once your potatoes are blanched, use a funnel, and fill up your quart jars leaving head space. In each quart, add 1 tsp garlic, 1 tsp oregano, 1 tsp basil, 1 tsp canning salt and 1/2 tsp pepper. Then fill with hot water, top with your lids, and tighten your rings finger tip tight. Do NOT overtighten. Potatoes must be pressure canned so no water bath canning this recipe! I recently received the NESCO digital pressure canner for Christmas and this makes it super easy to pressure can while you’re working on other things around the house. You can basically set it and forget it, and not have to worry about it not keeping pressure, or messing with the heat.
If you’re using a different version pressure canner, that’s fine too. You know your canner best. For quarts, you will pressure can for 40 minutes. I always let my canner rest for an hour after canning to allow it to release pressure before opening and removing my jars.
| Purchase my digital pressure canner on Amazon here |

Preparing Your Potatoes From A Jar
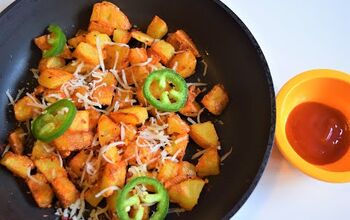
I really hate when I’m reading a good canning recipe and they totally leave off how to prepare the recipe once it’s canned. That’s great, you got me 85% of the way there, but what about the most important part?! Preparing the food for my family. It’s really as simple as dumping your jar of potatoes into a pot and heating over low on the stove. Remember that your potatoes are already partially cooked, so you don’t need to cook these like you would other potatoes. Keep your heat low and just warm up. Sometimes I like to spread them on a piece of parchment paper on a baking sheet, and roast them at 400 degrees until they’re nice and crispy. Other times, I just heat them up in a large pan on the stove, or even go so far as to mash them once they’re heated for a garlic mashed potato. The great thing is, no matter how you prepare them, they heat up so quickly and you have a versatile and delicious dinner side in minutes!
Shelf Stable Canned Diced Garlic Potatoes
Recipe details
- 4 quarts
- Prep time: 20 Minutes Cook time: 40 Minutes Total time: 1 hr


Comments
Share your thoughts, or ask a question!
I have been doing canned white and or sweet potatoes for years. My exception is that I add nothing to the potatoes. Just potatoes and boiling water. I do not pre boil them, I dice them, put them into sanitized jars pour in boiling water, and process them. That way I can add seasoning per what I am making. They taste fresher than pre-seasoned.
if I don’t have a pressure canner, can I improvise with water bath canner?