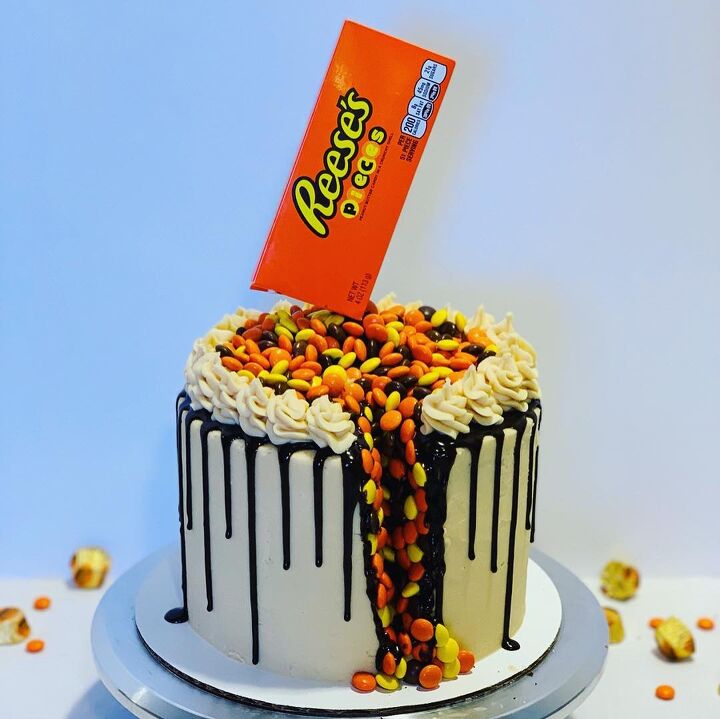
Reese's Geode Cake

Intensive Cake Unit
by Intensive Cake Unit
1 Cake
1 hr 15 min

Geode cakes have been huuugely popular on the Pinterest and Instagram channels that I follow for a LONG time now….and every cool trend has its spin-offs, right?

I love the way geode style cakes look, but honestly – the rock candy they’re made with doesn’t really taste ALL that good, does it? Sooo….why not replace that candy with something that does?

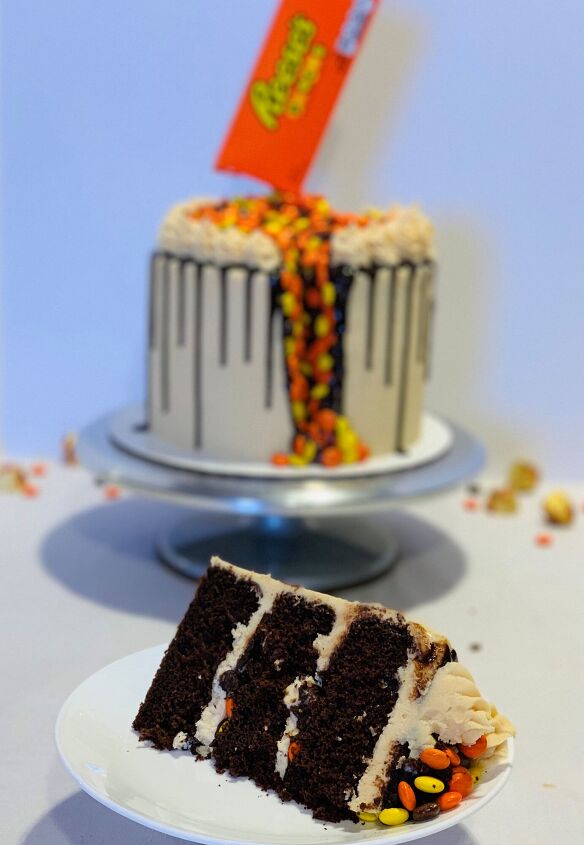
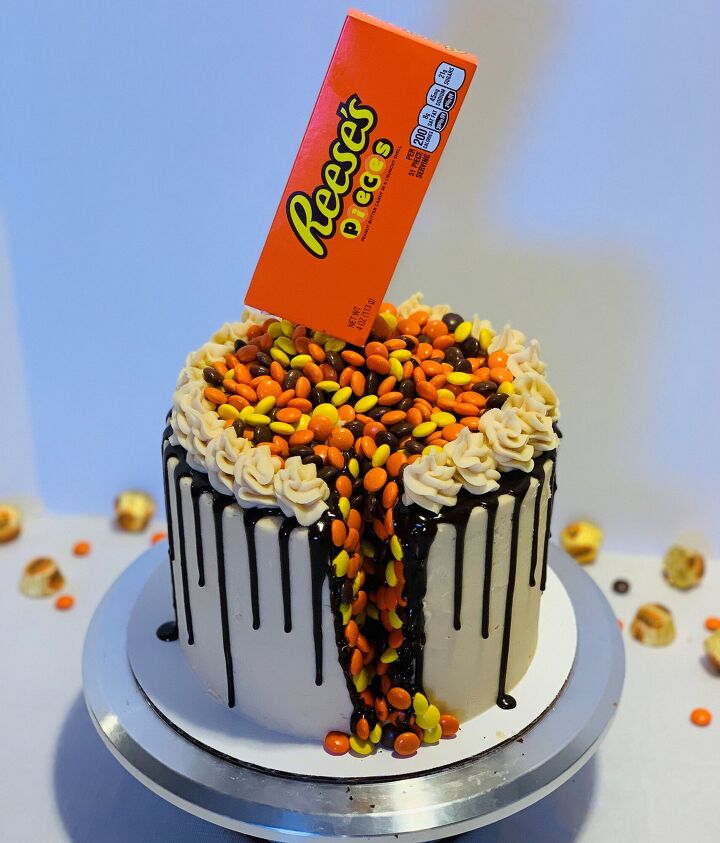
The Reese’s Pieces and box on the top give it a super fun pop of color, and it looks gorgeous on the inside too! This cakes mashes several of my favorite cake styles – geode, drip, and anti-gravity – all into one! Recipe and instructions below!!


I've included instructions for baking the cake layers with boxed mixes - I often fall back on mixes to keep my total assembly time down for cakes with more involved decorating. But IntensiveCakeUnit.com/Reeses-geode-cake has my favorite scratch cake recipe in the post!

Recipe details
  • 1  Cake
  • Prep time: 30 Minutes Cook time: 45 Minutes Total time: 1 hr 15 min
Show Nutrition Info
Hide Nutrition Info
Ingredients
Cake
  • 2 boxed chocolate cake mixes
  • 1 cup butter, melted (this replaces the oil in the box instructions)
  • 2 cups buttermilk (this replaces the water in the box instructions)
  • 6 eggs (a couple more than most box instructions call for)
Frosting
  • 8 oz (one package) cream cheese, softened 16 Tablespoons (two sticks) butter, softened
  • 1 c (8oz) creamy peanut butter
  • 7-8 c powdered sugar
  • 2-4 Tablespoons milk
Chocolate Drip / Decorations
  • 6 oz (1 cup) semisweet chocolate chips
  • 6 oz (3/4 cup) heavy whipping cream
  • - 1 8- or 10-inch cardboard cake circle
  • - small piping bag & small star tips
  • - small paring knife (to make the geode cut)
  • - 1 box Reese’s pieces candy (I emptied mine out to make it easier to work with)
  • - 1 long skewer (or a chopstick, or a straw, or anything long and thin enough to use to make the box stay up on top of the cake!)
  • - 1 large bag Reese’s pieces candy
  • - ½ c chocolate chips (I used semi-sweet)
  • - small piping bag or drip bottle or spoon for adding your chocolate ganache drip - Cake leveler, cake turntable, offset spatula, and bench scraper - not all 100% necessary but incredibly helpful! I found plastic knives, spatulas, and scrapers to work best with the frosting! No idea why, but they did.
Instructions
Cake
Preheat an oven to 350 degrees F (180C) or 320 FC (160C) for a fan forced oven. Grease 3 8-inch pans with baker's floured spray and/or line pans with parchment paper. 
In a large mixing bowl or the bowl of a stand mixer with the paddle attachment, combine melted butter, buttermilk, and eggs, and beat well to combine. Stir in baking mixes and mix gently until combined, then beat for 2 minutes. Scrape down the bowl and mix for another 20 seconds.
Fill the three pans evenly - I find a kitchen scale helpful for this part, and each of mine weighed out to about 700g. Bake for 30-35 min or until a toothpick inserted comes out clean. Allow cake layers to cool completely on a wire cooling rack before frosting. Cool completely – set in the fridge or freezer to accelerate the cooling process if desired.
This is a great time to start prepping your frosting and ganache for the filling and drip!
Frosting
Beat together softened cream cheese and butter; beat in peanut butter until thoroughly combined. Slowly add in powdered sugar alternating with milk until frosting reaches a thick spreadable consistency.
Chocolate Drip / Decorations
Meanwhile, make your ganache. Place chocolate chips in a heat-proof bowl. Place whipping cream in a small saucepan and bring almost to a boil over medium/low heat. Pour over chocolate chips and let rest for 2 minutes, then stir until smooth and silky. (If desired, this can also be done in the microwave – combine ingredients and microwave on half power in 30-second intervals, stirring in between until smooth).
Once your cake layers are cool, level them (if needed/desired). This can be done with a cake leveler or a large serrated knife and a ruler. (Option! I mashed the cake tops with a bit of frosting to make a ‘cake pop’ mix; I wanted the Reese’s box to stand a bit taller above my cake than it would have otherwise – so I mounded some chocolate cake pop mix on top of the cake while I was decorating. Make the cake pop mix now if you want to do this…. otherwise you can just eat the cake tops! Also a good option.)
Place a smear of frosting on your cake circle (to keep the cake from sliding while you decorate it) and center your first cake layer in the center of the circle. Spread the layer with frosting. Pipe a border of frosting around the edge of the cake to keep the filling inside, and sprinkle the layer with chocolate chips, Reese’s pieces, and drizzle with chocolate ganache to your liking! Repeat the process with your remaining cake layers.
Now you're ready to crumb-coat . If you're unfamiliar with crumb-coating, it's just what it sounds like – spreading a thin layer of frosting over the entire outside of the cake to keep crumbs out of your final layer. Once your crumb coat has set (this takes about 5-10 minutes in the fridge), add your final layer of frosting and smooth. I used a small plastic knife and plastic bench scraper for this part. Once your cake is covered, place it into the fridge or freezer to set the frosting.
Decorating:
Take the small paring knife and cut a slanted slice out of the cake – check out about 0:12 of my video if you’re unsure how to make the cut! With a small spatula or knife, crumb coat the inside of the cut you just made, and press Reeses Pieces into the frosting, filling your ‘geode’ cut in the cake.
Okaaaay......the drip! When your ganache has cooled to a moderate temperature – it should feel slightly warm and still be fairly liquid – transfer it to a squeeze bottle or piping bag. A spoon will work if you don’t have either of those, I’ve just found spoons to be a tiny bit more difficult to work with. Slowly drizzle ganache around the upper edge of your cake, pausing every inch or so to let ganache fall in a drip down the side of the cake. Return cake to the fridge or freezer to set the drips.
If you’ve mashed your cake tops into cake pop mix, now’s the time to mound about ½- ¾ c of that mix on top of the cake – this will hold the box up higher off the top of the cake and make it look more dramatic! You can skip this step if you’d rather.
Open the box of Reese’s Pieces and insert your skewer (or straw, or whatever) into the box. I cut a side tab off so that I could close the box, but you could also leave all four tabs open. Invert the box and press the skewer down through the cake pop mix mound into the top of the cake.
Pipe peanut butter frosting in small swirls around the upper rim of your cake – this will help hold the Reese’s pieces in place! Pile Reese’s pieces candy and chocolate chips around the box on top of the cake, making sure to cover the mound of cake pop mix and the frosting on top of the cake. I used a tiny bit of extra ganache to make some of them stick down close to the geode cut so they wouldn’t spill off the top of the cake.
Annnd you’re done! Step back and admire your kick-butt cake!
Tips
  • Make this recipe? Let me know how it went - or find me on Instagram or Pinterest and tag @IntensiveCakeUnit in your photo!
Intensive Cake Unit
Want more details about this and other recipes? Check out more here!
Go
Comments
Next