


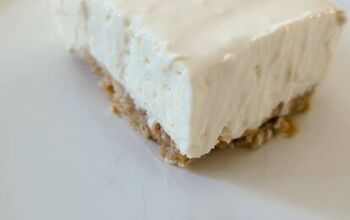
No Bake Apple Cheesecake Bars
Today, we’re making No Bake Apple Cheesecake Bars!
I’m so excited about this one today! These bars are a true no bake dessert thanks to a quick and simple cheesecake filling, some stovetop sauteed apples, and a very special shortcut item that we’re using to build the crust…oatmeal creme pies!
It’s actually funny how this recipe came together. After trying the Little Debbie oatmeal creme pie ice cream in a snack review over the summer (and hating it), I bought a box of oatmeal creme pies with the intention of making a no churn ice cream dupe situation. But then, I broke my foot. And the next thing you know, it’s fall. And, those little sweet snacks remained in my pantry untouched. Which is actually kind of a miracle because I LOVE those little treats.
When I decided I had to move on from the ice cream idea (for now), I remembered something I saw on social media, shifted my mindset to fall flavors (as much as I’m not ready to do that yet), and here we are!
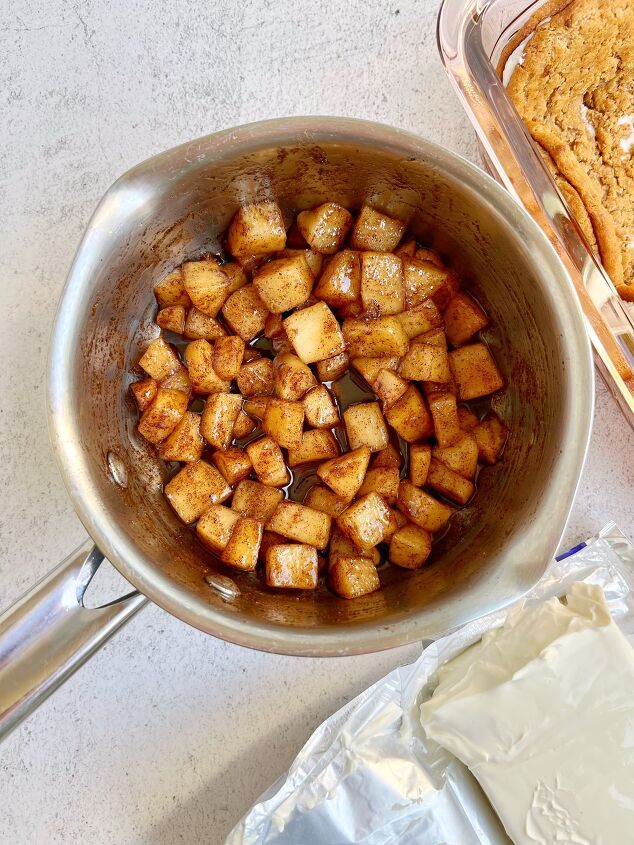
Let’s start with the apples. We want to get these going first, because we don’t want to put hot apples on a cold pie filling; so they need a chance to cool down. We’ll start with a couple gala apples that we’ll peel and dice. Then, we’ll toss them in a saucepan with some butter, some white and brown sugar, a little cinnamon and nutmeg, a splash of water, and a pinch of salt. We’ll let those come to a simmer and cook for just a few minutes until those apples have softened a smidge and become nice and syrupy. I do not like a mushy apple, so we’re cooking these just long enough that they’re not crunchy but still have a little chew to them. Then, we set them aside to cool completely, and step 1 is done!
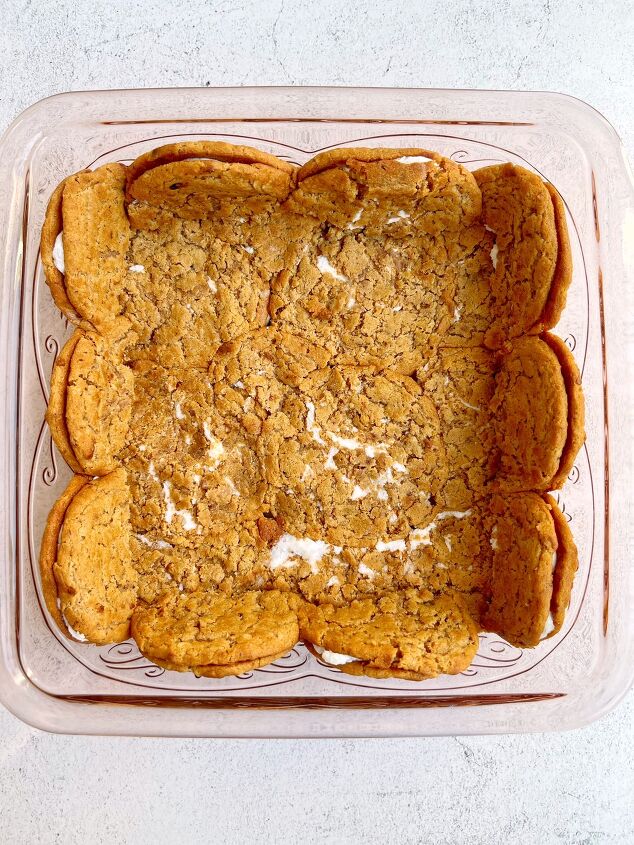
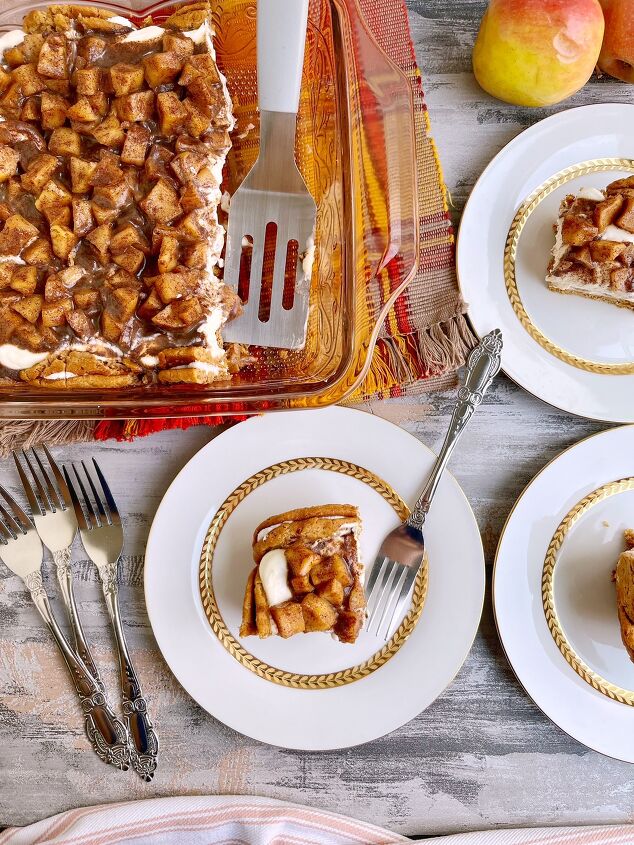
Our crust for these bars could not be more simple. We’re going to grab a baking dish, unwrap 12 oatmeal creme pies, and smoosh them into the dish. That’s it! I used 7 pies for the bottom, breaking them as needed to fill in any holes. Then, we need to give them a gentle press to expand them enough to fill the space. We don’t want all of the creme filling oozing out. We just want to press them enough for all of the pies to fuse together and create a stable base. Then I broke the remaining 5 pies in half, and arranged them around the sides of the baking dish to create the side crust. And that’s all there is to it. Step 2 is done!
For our filling, we’re going to make a super simple no bake cheesecake mix that we’ve actually made here before. We’ll start by whipping some cream in a stand mixer. Then we’ll remove half of the whipped cream for a second, and add in some cream cheese, powdered sugar, sour cream, and vanilla to the mix. Let that beat in the mixer until smooth. Then fold in the reserved whipped cream until the cream cheese mix is light and fluffy. It’s so simple, and that’s all there is to step 3!
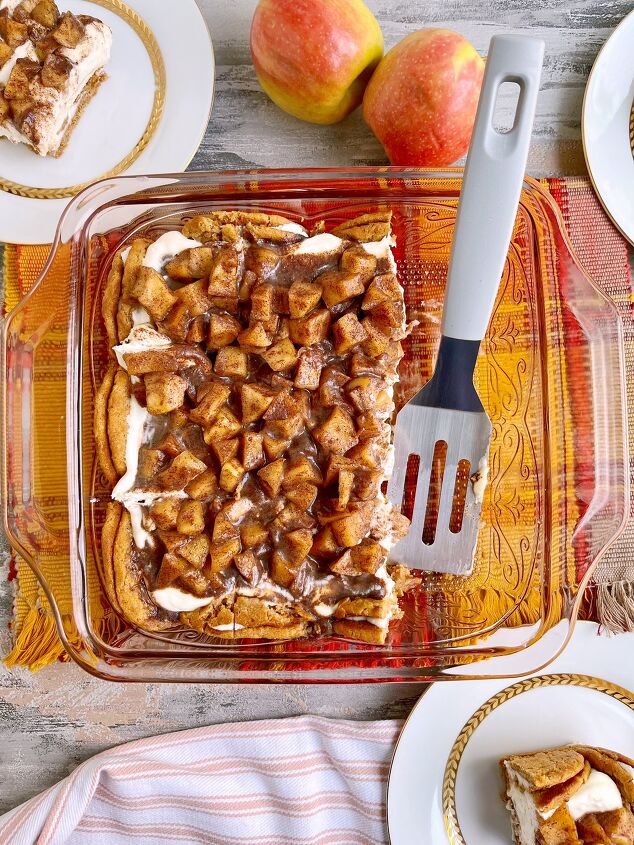
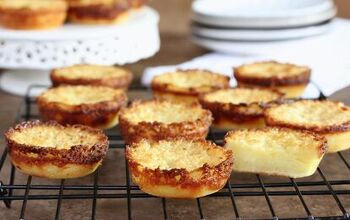
To assemble, we’ll spread that cheesecake mix into our oatmeal creme pie crust, pour those cooled apples all over the top, and to the fridge the pie will go for at least 8 hours. The cheesecake is light but the apples are heavy, so we really can’t rush the setting time on this one. From there, we’ll slice these into 9 squares, and it’s time to enjoy.
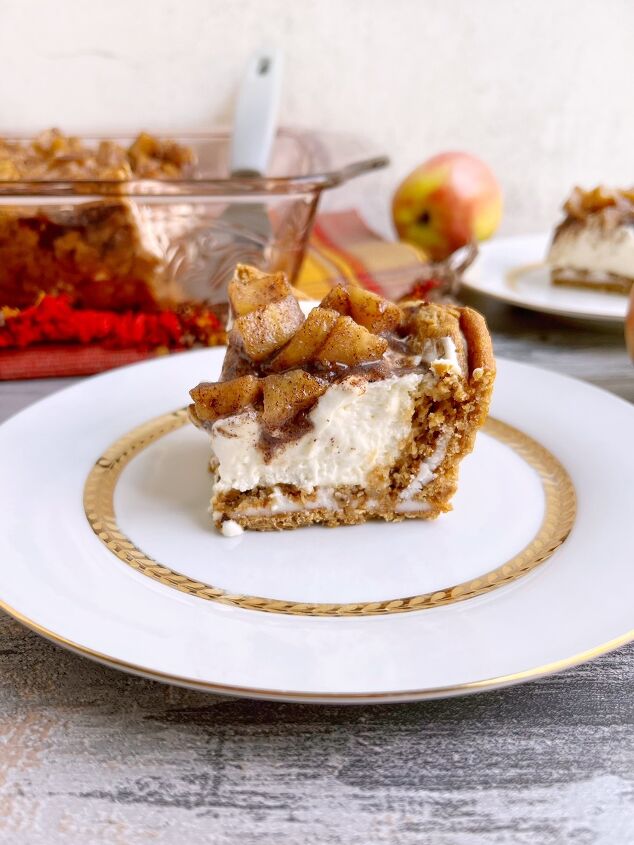
These bars…let me tell you. We all know that I do NOT thrive this time of year, AT ALL. But these bars almost made me excited for all. ALMOST. Those oatmeal cream pies on the bottom bring their own nostalgic comfort. The light and creamy cheesecake layer gives you the decadence of cheesecake without the heaviness. And, the sauteed apples on top mimic the inside of an apple pie which inevitably could put anyone in the mood for the 4th quarter holidays. Simply put, these bars are incredible.
Alright, everyone! Though we’ve officially dipped our toes in the autumnal waters, I’m still holding on tight to all things summer. Who’s with me?!?
I hope you guys love this one! Let’s eat!
No Bake Apple Cheesecake Bars
Recipe details
- 9 bars
- Prep time: 8 Hours Cook time: 5 Minutes Total time: 8 hr 5 min


Comments
Share your thoughts, or ask a question!