


Valentine's Day Dessert
Last night I brought dessert to my friends’ house as it was Valentine’s Day. Look at these darling heart-shaped ❤️ cheesecakes. Aren’t they sooo fun and festive? The perfect Valentine’s Day Dessert.

Here’s how I made them. But full disclosure, they were VERY time-consuming to make. Worth it in my book, but advance planning is needed. Okay, let’s proceed:
Valentine’s Day Dessert Mini-Cheesecakes
Ingredients:
Red Crust:
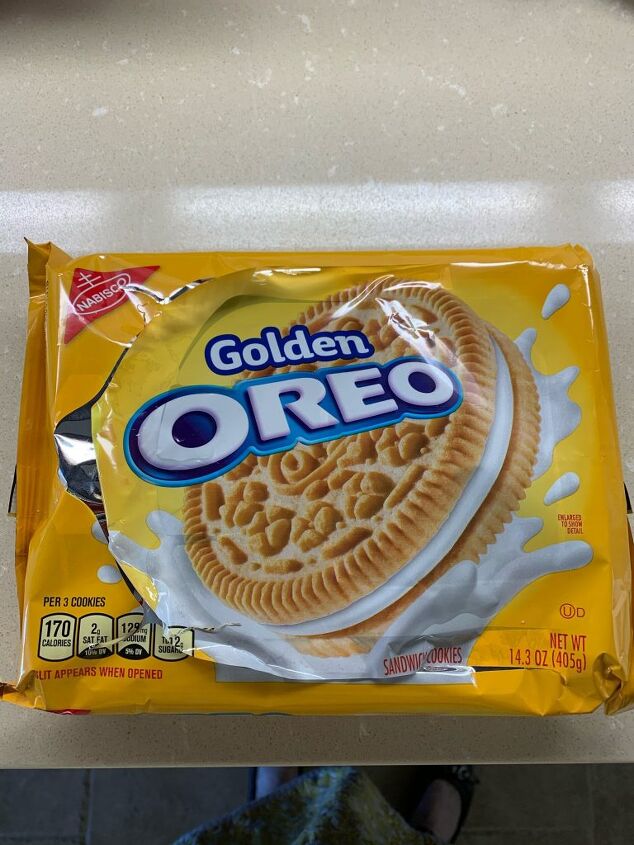
-One 14.3-ounce package of Golden Oreos
-1 stick melted butter
-1 Tablespoon red food coloring
Filling:
-3 8-ounce packages of cream cheese, softened to room temperature
1 1/2 cups sugar
1 1/2 teaspoons vanilla extract
4 large eggs
1/2 cup sour cream
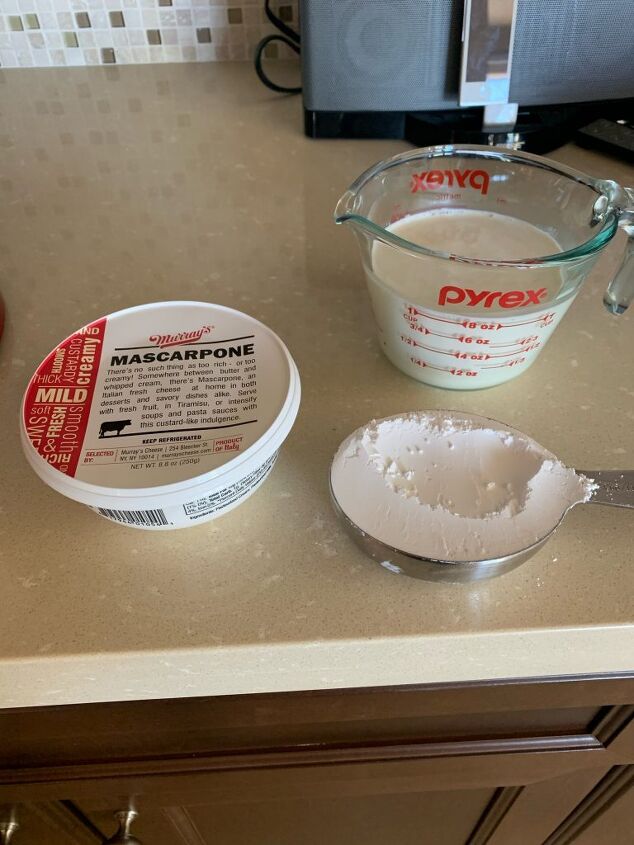
Whipped Mascarpone Cheese:
-1 cup heavy cream (keep cold)
-1 cup mascarpone, room temperature
1/2 cup powdered sugar, sifted
Strawberry 🍓 Garnish
-8 medium strawberries 🍓, hulled and sliced lengthwise
Steps:
- For the red crust: Adjust the oven racks to the lowest and medium levels of the oven. Preheat the oven to 350 degrees.
- Put a large roasting pan filled with water on the bottom rack of the oven. I think this keeps the humidity right for the cheesecake.
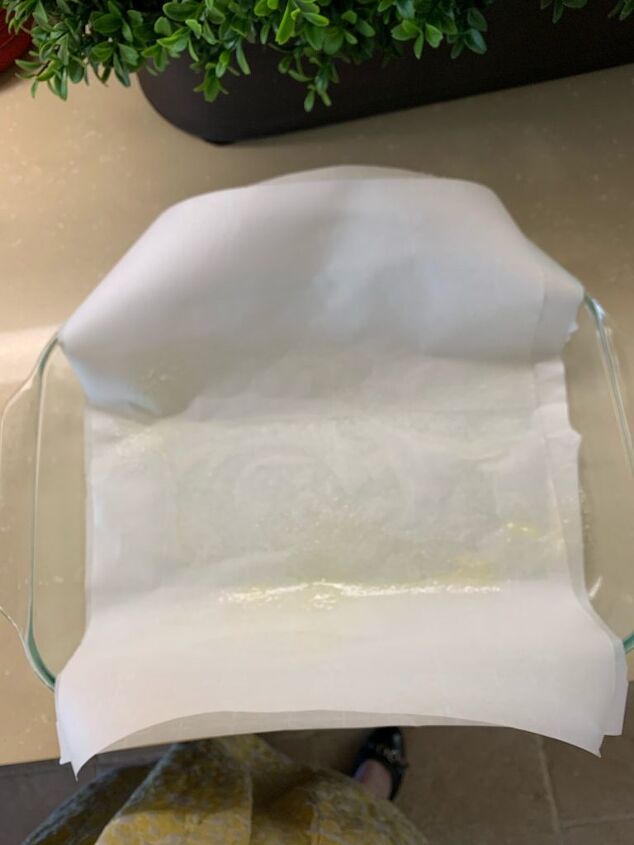
- Spray a 9 x 13-inch pan with non-cook spray. Then place a double layer of parchment paper into the pan so that it overhangs the long sides; then spray the parchment with non-cook spray.
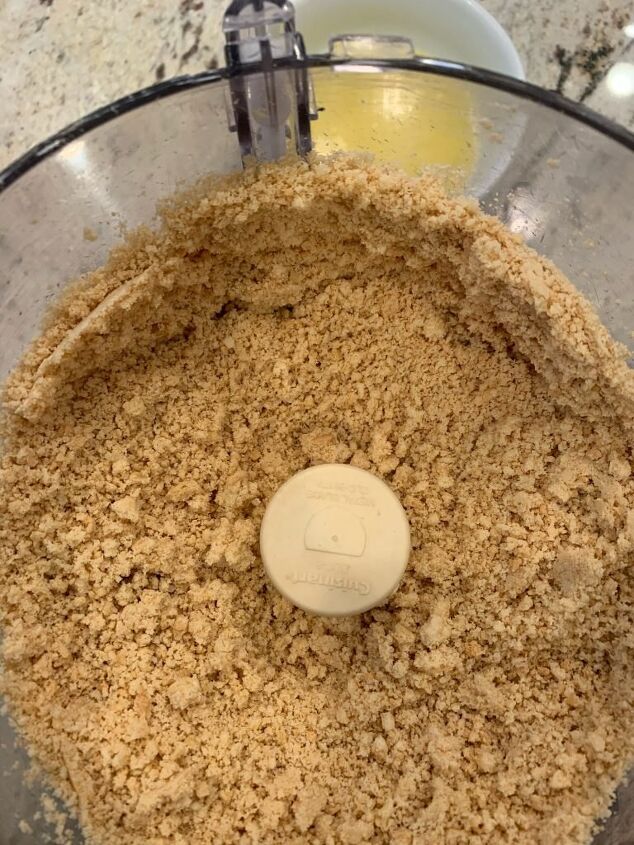
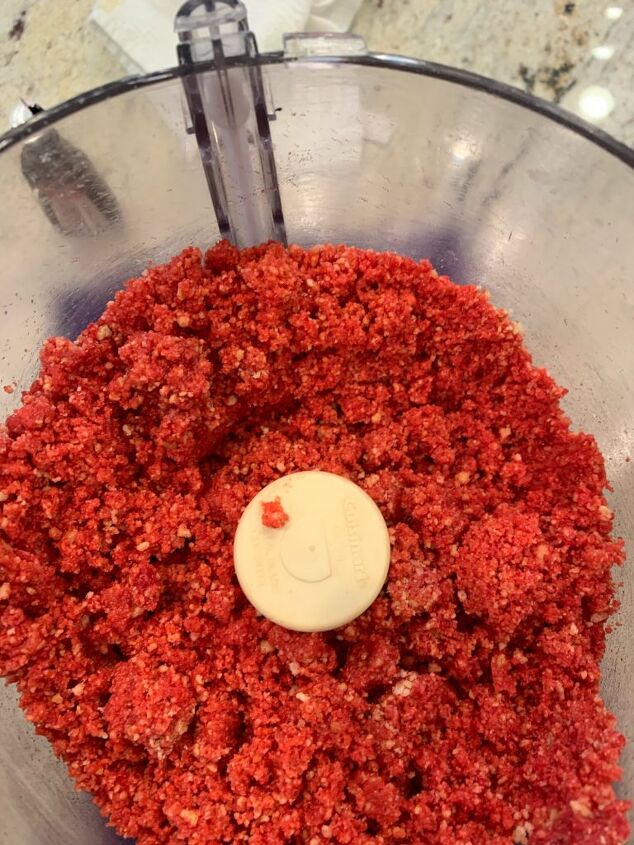
4. Add all the cookies to a food processor and pulse until the cookies look like crumbs.
5. Drizzle in the melted butter and food coloring.
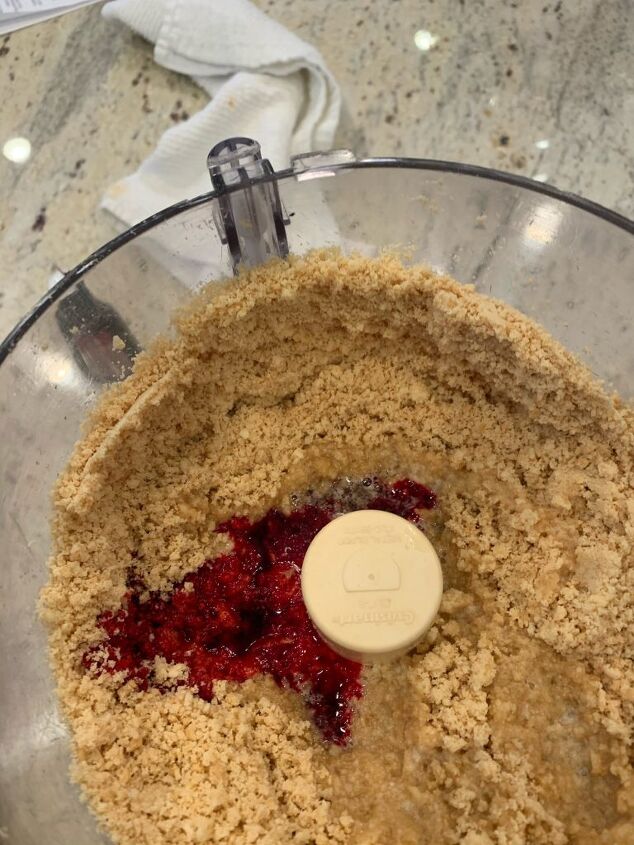
6. Pulse until it’s all incorporated.
7. Wearing disposable gloves if you have them, press the crust down into the pan to make an even layer. If you don’t have gloves, use the bottom of a glass to press down the crust so you don’t end up with red fingers!
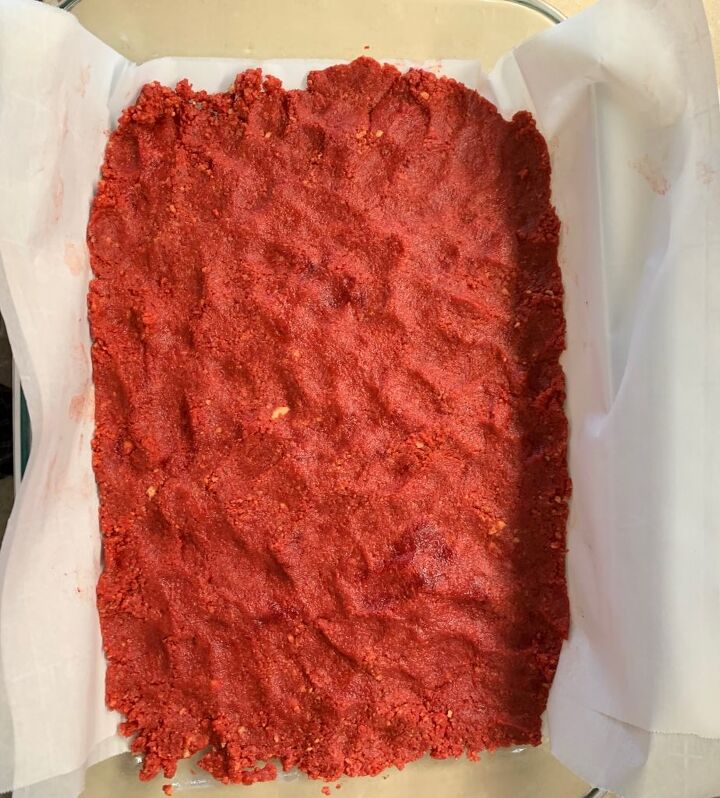
8. Bake for 10 minutes. (This will smell terrific!)
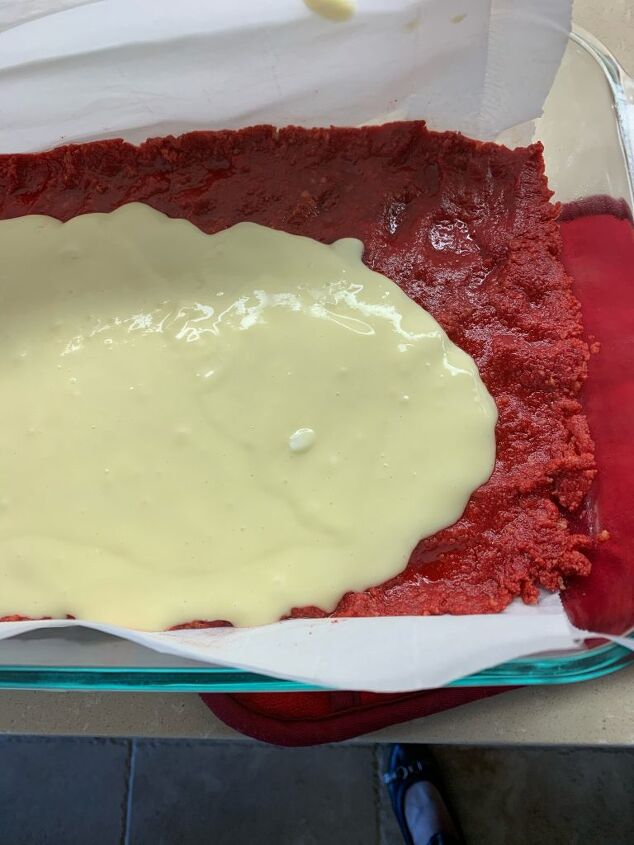
9. For the filling: Beat the cream cheese, sugar, and vanilla with a stand mixer using the paddle attachment. Add the eggs one at a time, beating after each addition. Add the sour cream and mix again.

10. Pour the filling over the crust and smooth the top.
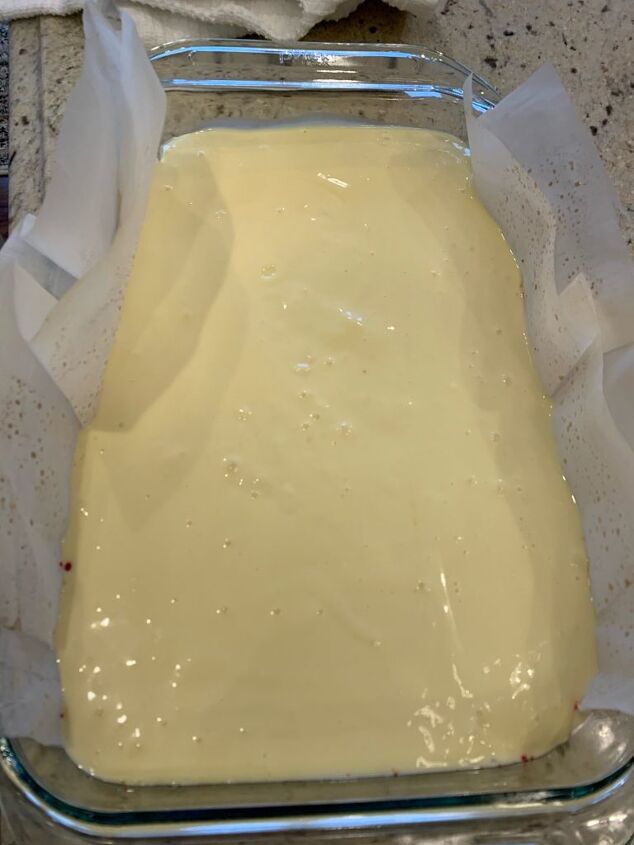
11. Put the cheesecake pan on the rack in the middle position of the oven and bake for about 45-55 minutes until the cake is set and no longer jiggly.
12. Turn off the oven, open the oven door, and allow the cheesecake to sit in the range for 15 minutes.
13. Remove from oven and put on a rack to cool to room temperature for two hours.
14. Now pop it in the fridge for two hours (or overnight). I covered the pan with plastic wrap.
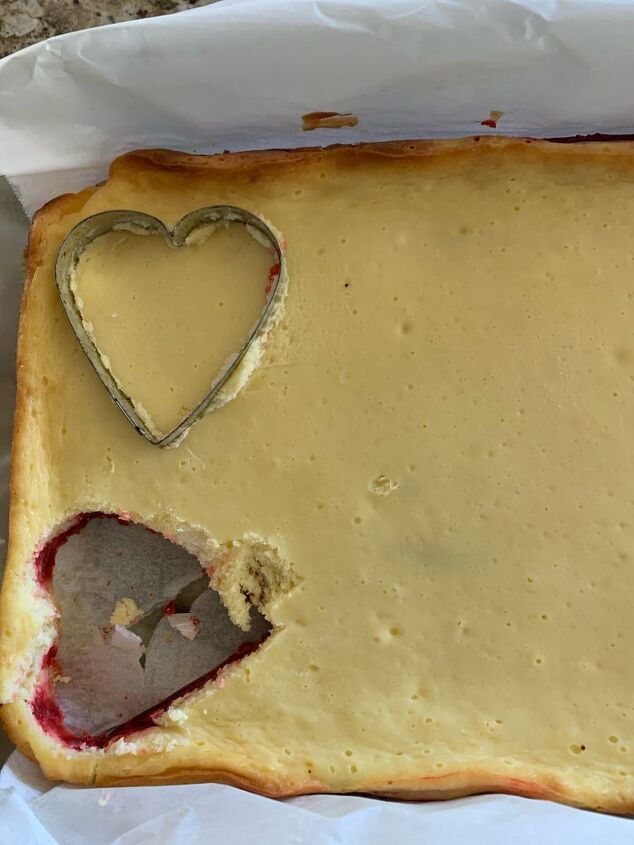
15. So as you can see lots of time has gone by with all this baking and cooling but all the steps so far are simple… It’s the assembly steps that are a bit of a pain.
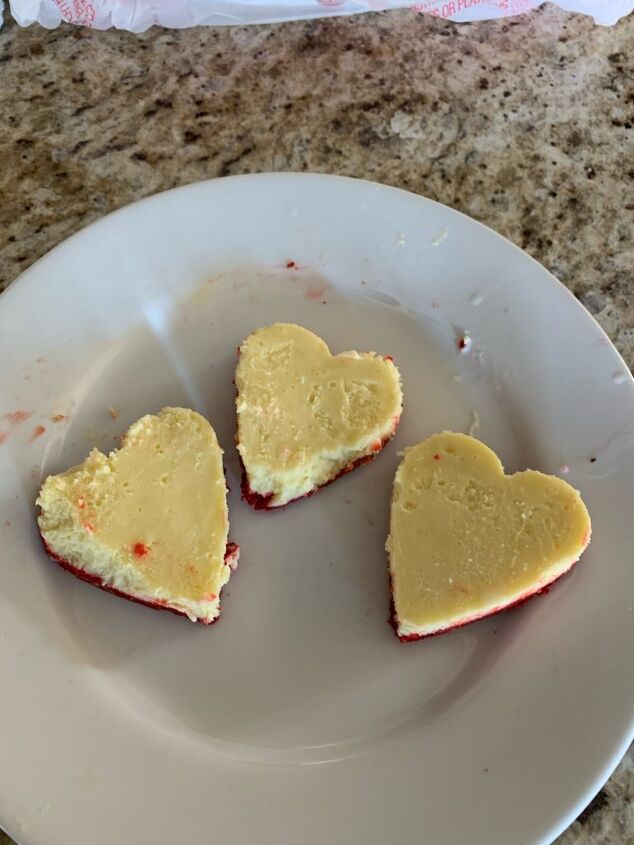
16. Remove the chilled cheesecake from the pan by lifting up the parchment paper. Using a heart-shaped ❤️cookie cutter, carefully pinch out about 8 3-inch mini-cheesecakes. There will be a lot of (delicious) scraps.
The problem is the cheesecake filling causes drag in the cutting process so that it’s tough to push the cutter through the filling and then the crust. My solution is to lightly cover the cookie cutter once it’s in the filling with a clean dish towel, and then push down hard to complete the cutting through the crust.
I’m sorry I don’t have a photo of this trick but Mr. G.Q. was out golfing 🏌️ during this step so I couldn’t snap a photo with both of my hands occupied 😬. I also wiped the cookie-cutter inside and out with a paper towel after each heart❤️cake. This helped somewhat with the cutting step.
17. Remove the hearts to a serving platter and refrigerate them while you make the mascarpone cream.
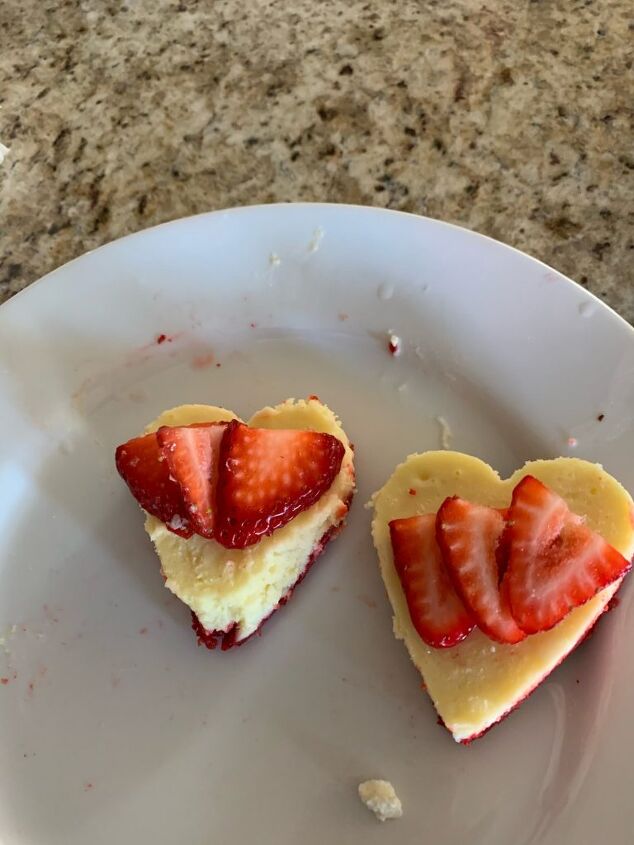
18. Garnish the cakes with several slices of fresh strawberries 🍓.
19. For the whipped mascarpone cream: Add the cold heavy cream to a stand mixer fitted with the whisk attachment and whip it to stiff peaks. Add the room-temperature mascarpone and powdered sugar and mix until well combined and smooth. Transfer the mixture to a disposable piping bag fitted with a pastry tip or put it in a ziplock bag trimming off the corner.
20. Pipe a fun border around the edge of the heart ❤️ cakes!
21. Yay you did it!!! So ENJOY❤️❤️❤️!!!!
N.B. This recipe was adapted from a similar recipe from the Pioneer Woman. Don’t you just love her?! I thinned the red crust by half so that I could cut through it. Also, her darling recipe was for Santa 🎅 hats! Thank you, Ree!
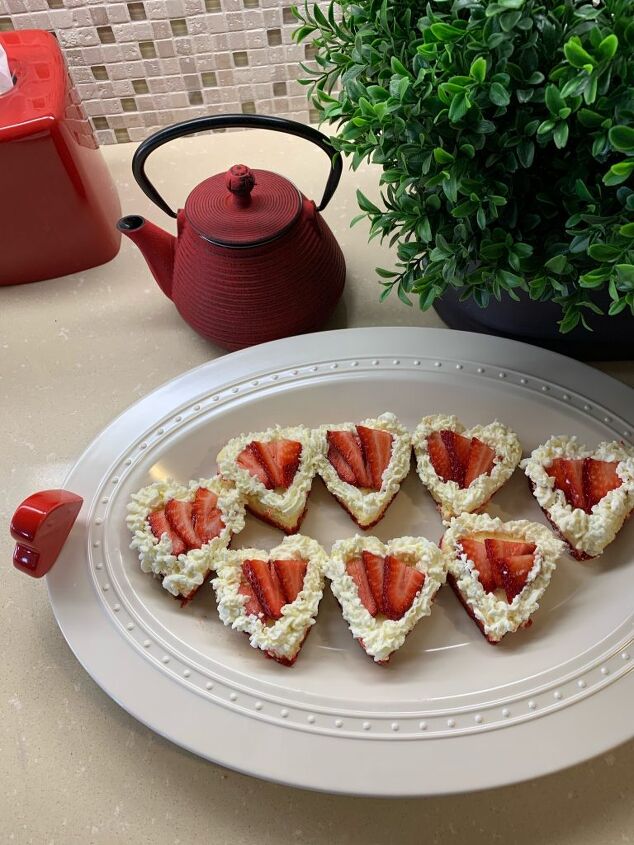
T his great platter is by Nora Fleming. She has many “charms” or “minis” that you can purchase that you can interchange for every blog-worthy holiday! Stay tuned for more as the holidays unfold ☘️ ☘️ ☘️ !!!
Valentine's Day Dessert
Recipe details
- 8 servings
- Prep time: 5 Hours Cook time: 45 Minutes Total time: 5 hr 45 min


Comments
Share your thoughts, or ask a question!
Instead of preparing in an oven pan, could i use ♥ shaped cookie pan??