Beginner Overnight Sourdough Bread

12 servings
10 hr 45 min

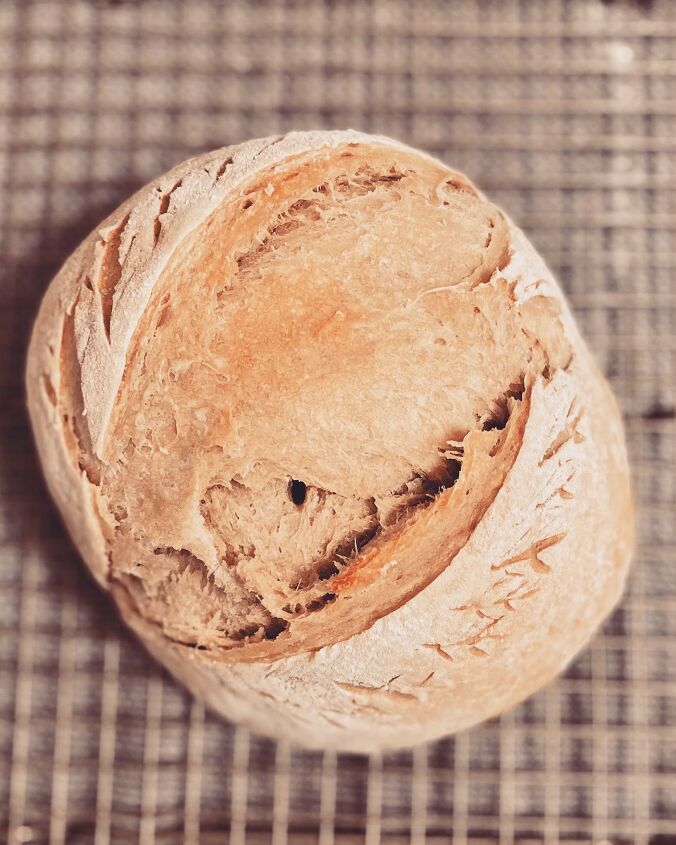
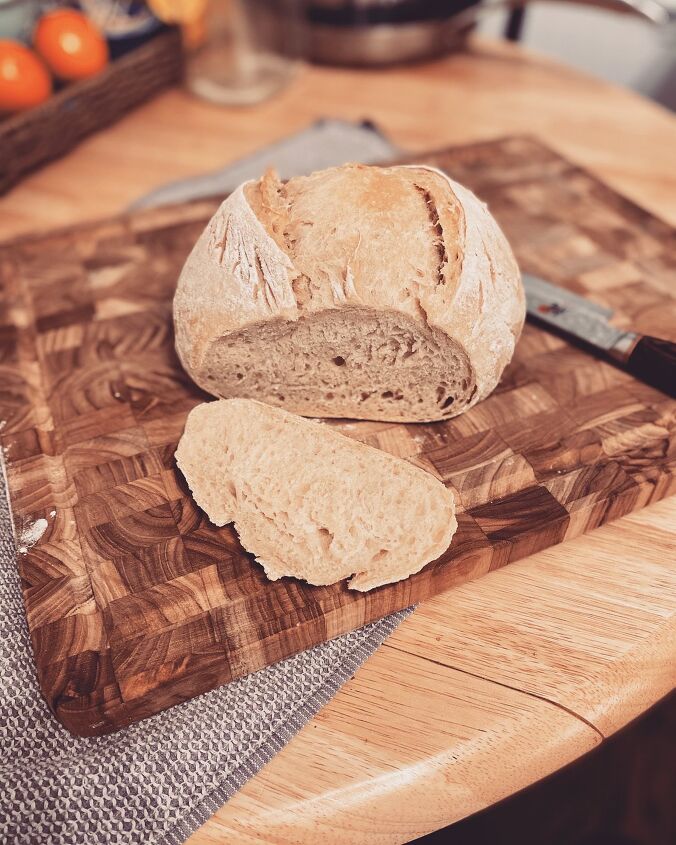
Finding good sourdough recipes has been surprisingly difficult. That's why I was so happy to discover Makhaya's (truly) beginner overnight sourdough bread recipe. Her introduction and instructions were so succinct and easy to understand, and informative! I can't wait to try more fo her recipes, and am so glad to be going along in this sourdough journey with her. The texture was amazing, crumb was beautiful, and the flavor was perfect! Not too sour, but plenty sour to know that you were eating that gut-healthy bread. If you're struggling with sourdough creations, you have to try this out!


Check her out on Instagram: @thrilledfoodie

Check ME out on Instagram: @bellesdirtydishes

Beginner Overnight Sourdough Bread
Recipe details
  • 12  servings
  • Prep time: 10 Hours Cook time: 45 Minutes Total time: 10 hr 45 min
Show Nutrition Info
Hide Nutrition Info
Ingredients

  • 165 grams Active Sourdough Starter
  • 500 grams Bread Flour or all purpose flour
  • 20 grams Salt
  • 300 grams Water
  • spray avocado oil *optional
Instructions

Feed/activate your sourdough starter. You will want to give your starter plenty of time to activate, so I suggest feeding it 5-6 hours before you plan on making your bread. Try the float test and make sure its active.
Once your starter is active, grab your large glass mixing bowl.
Place your mixing bowl on your food scale, and zero it out. Also make sure your scale is set to grams!
Add all ingredients one by one to your bowl. (see notes**)
Once starter, flour, water, and salt have been added to your bowl, take your hands and squelch(mix) together into a loose and lumpy ball of dough forms.
You will want everything combined well, but this is not the step where you form a nice looking ball of dough just yet!
Next, you will cover your bowl with cling wrap. (I like to use a shower cap for this part because its reusable.)
You will let your dough sit for 30 minutes.
After thirty minutes have passed, uncover your lumpy dough ball. This is where you will stretch and fold your dough, before leaving it to sit over night. Take one side of your dough, and pull up. Stretching it about eight inches upwards. Then you will fold that stretched piece of dough over onto the rest of the dough in the bowl(see recipe photos).
You will perform this stretch and fold sequence one time for each side of the dough. A total of 4 stretch and fold motions.
Once you have performed the stretch and fold sequence, your dough should be a little bit smoother. Turn the dough over so it has more of a smooth ball shape. Then cover it back up, and leave it on your counter until morning(Or for at least 9-10 hours)!
By the next morning, your bread should have risen significantly. It usually doubles in size, if your sourdough starter was active enough!
Grab your parchment paper, baking sheet(if your using one), and your all purpose flour. (see notes**)
Sprinkle a handful of flour ontop of your baking parchment paper.
Carefully, pour your risen dough onto the flour covered parchment paper.
Next you will do the same 4 stretch and fold motions you did the night before.
Stretch and fold the dough with care, so that you minimize the bubbles popping in your bread. The more air bubbles, the better, in my opinion!
After your stretch and fold sequence is complete, carefully turn your dough over, tucking in any sides so that you can form a smooth ball.
(This is an optional step), but I like to spritz mine with a spray of avocado oil on the top. I like the little extra oomf it gives to the top of the crust after its baked.
Once your ball is formed, you will take a piece of cling wrap and cover completely. Tucking the sides of the plastic close to the edges of your bread to minimize any air getting through. This is your proofing section of the recipe.
You will let your dough sit for another 30 minutes.
While your dough is proofing, pre-heat oven to 475ºF and place your lidded dutch oven pot inside on the middle wrack.
Once 30 minutes is complete, remove cling wrap. Using a sharp knife or razor blade you will slice a 4-5 inch line across the top, about half a centimeter deep.
Using oven mits, remove your pre-heated pot from the oven, and remove the lid.
Grabbing the four corners of your parchment paper, carefully pull up, and transfer your dough to your pot.
If your parchment paper is sticking up quite a bit from the top, you can take a pair of scissors and cut it down so that the lid fits comfortably without squishing the paper into the bread.
Cover with a lid, and place in the oven. Bake for 20 minutes.
When 20 minutes have passed, remove the lid from your pot. At this time you will also reduce the temperature of your oven to 450ºF.
Bake for an additional 20-25 minutes or until golden brown.
Remove your sourdough loaf from cast iron pot, and let cool on a cooling wrack.
Once cooled, slice with a bread knife, and enjoy!
Tips
  • IF you have a digital scale, you do not have to measure each ingredient separately, and then add it to your bowl. You can add your starter(for example), and then just make sure to zero out your scale before you add the next ingredient. If you have a non-digital scale, then yes, you will need to weigh each ingredient separately and then add to a bowl, or just do a lot more math:)
  • You can put your parchment paper right on the counter, but I prefer to do it on top of a baking sheet. This minimizes mess, and also gives me the ability to move my bread around a little bit easier while it proofs.
Belle's Dirty Dishes
Want more details about this and other recipes? Check out more here!
Go
Comments
  • Liz Liz on Apr 09, 2022

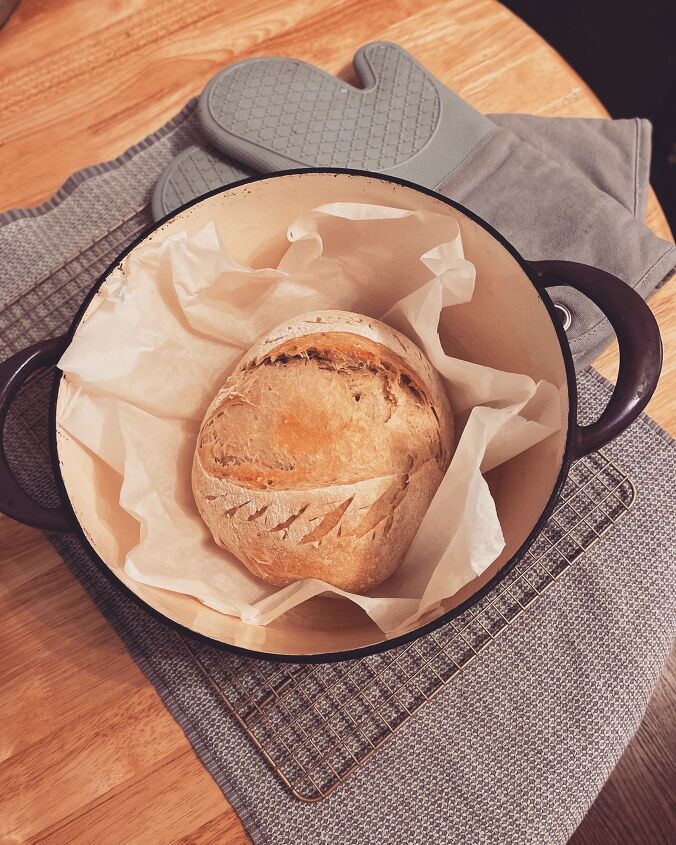
    Is it essential to use the cast-iron pot? What about just the oven?

Next