2 Ingredient Dough Flatbread

Today, we're making 2 Ingredient Dough Flatbread!
I know, I know. “Here we go with the 2 ingredient dough again” is probably what you're thinking. But, I truly can't help myself! There are so many times when I need some kind of bread to help me solve a mealtime problem, and being able to whip up a quick and simple 2 ingredient dough with basically no effort is oftentimes the answer. It's healthy, versatile, fast, easy, and it can basically be transformed into whatever you need it to be.
Now let me quickly address this now, because it comes up every time I post one of these recipes. Yes, I know how to count. And yes, I'm aware that after I season my dough, it's technically a 4 ingredient dough. And yes, I'm also aware that any toppings or finishing ingredients add to the ingredient count. However, I still choose to call this 2 ingredient dough because at it's core, that's what it is. Self rising flour and plain greek yogurt are the only 2 ingredients that we really need for this recipe to be successful. If I chose not to season this dough, the recipe would still work as intended. And, it would still taste just perfectly fine. The bonus ingredients don't impact the magic or functionality of the dough. They just make it taste even better!
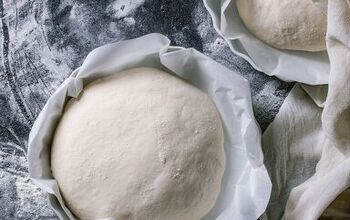
With that being said, our dough starts with self rising flour, nonfat plain greek yogurt, and a little salt and garlic powder for seasoning. We'll mix it up with a spoon until it starts to come together, then use our hands to finish forming it into a dough. This recipe actually doesn't require any kneading of the dough, so we'll turn our dough out onto a lightly floured surface, divide the dough into six portions, and use a rolling pin to roll the dough into nice, thin, rustic, oblong flatbreads.
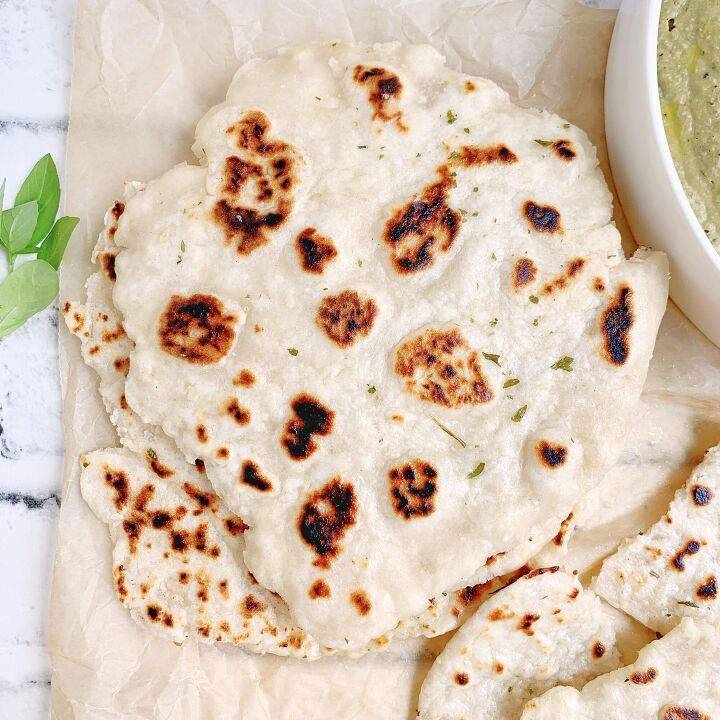
As if this dough couldn't be any more magical, the way this particular recipe cooks is just as impressive. We're going to take our flatbread dough, one at a time, straight from our countertop to a medium hot, dry, nonstick skillet. From there, little air bubbles in the dough will start to form, puff, and become perfectly charred and toasty all while the dough is fully cooked through in no more than 2-3 minutes per side. It's super fast, and super cool how this dough requires no oil to cook through beautifully.
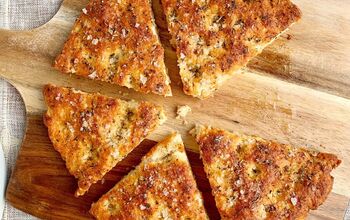
Now traditionally, flatbreads are generally brushed with some kind of butter and parsley or butter and garlic mix as soon as they come out of the pan. This not only results in a beautiful glisten on the flatbread, but it's also a way to sneak in some extra flavor. Since we're using a slightly lighter, slightly healthier dough; I thought we'd use a slightly healthier fat to brush on our dough for finishing: olive oil! All we need to do is mix a little olive oil with some dried parsley, give each flatbread a gentle brushing of oil on both sides, and finish it with a little sprinkle of flaky sea salt for extra pizzazz. And, that's it. The flatbreads are ready to eat!
There are many things that I love about this quick and simple flatbread option, but mostly I love how versatile it is. You could use this flatbread as a dipper for your favorite hummus or spread. You could use this flatbread as a base for a sandwich. Or you could even use this flatbread to make little personal sized pizzas! I tend to find myself obsessively making cheesy garlic bread out of these flatbreads, so I highly recommend that too. Regardless of how you choose to serve it, these are best served warm.
So where does this 2 ingredient dough flatbread rank in comparison to traditional flatbread? Well, because of the nature of the dough, it is a little more dense and breadier. However, we're rolling the dough out so thinly that you barely even notice that it's a little chewier than your standard store bought flatbread. So, I'd certainly call that a winner!
I wouldn't expect the 2 ingredient dough recipes to come to a halt any time soon, but if you have anything you'd like to see converted into a 2 ingredient dough recipe, let me know. I'm always up for the challenge!
In the meantime, enjoy! And, let's eat!
2 Ingredient Dough Flatbread
Recipe details
Ingredients
- 1 ½ cups self rising flour, plus more for dusting
- 1 cup non-fat plain greek yogurt
- 1/8 tsp salt
- 1/8 tsp garlic powder
- 1 tbsp olive oil
- 1 tsp dried parsley
- flaky sea salt, to taste
Instructions
- To a mixing bowl, add flour, yogurt, salt, and garlic powder. Mix with a spoon until ingredients start to come together, then use your hands to fully combine the mix and form a dough. Lightly dust a clean surface with flour, turn the dough out of the bowl, form it into a ball, and divide the dough into 6 equal portions.
- Using a floured rolling pin, roll each portion of dough into a thin, oblong shape that's roughly 8x4 inches. Repeat with remaining dough. Shake off any excess flour from each flatbread.
- Heat a dry non stick skillet over medium heat. Add flatbreads, one at a time, to the skillet. Cook for 2-3 mins until the top of the flatbread starts to bubble, and the bottom of the flatbread has browned spots. Then flip, and cook an additional 2 mins until the other side of the flatbread has browned spots. Repeat with remaining flatbreads.
- Mix olive oil and dried parsley in a small mixing bowl. Lightly brush both sides of each flatbread, if desired. Sprinkle with flaky sea salt, to taste. Enjoy!
Tips
- *Flatbread is traditionally brushed with butter when it comes out of the pan to give it extra shine and glisten. This step is totally optional. To keep things light, we're using olive oil to brush our flatbreads instead. This is also optional, but totally recommended!
- *The flatbreads are best served warm. You can serve them as is straight from the pan, or you can toast them up in the oven for a couple of minutes to make them extra crispy on the outside. Store any leftovers in a sealed bag in the fridge, but toast them before eating again.
- *You can use these flatbreads in so many ways! Use it as a vehicle for dip. Use it for sandwiches. Use it to make mini pizzas. The possibilities are endless!






Comments
Share your thoughts, or ask a question!
You said 2 ingredients
A LOT more than 2 ingredients.