


No Churn Oreo Ice Cream
Today, we're making No Churn Oreo Ice Cream!
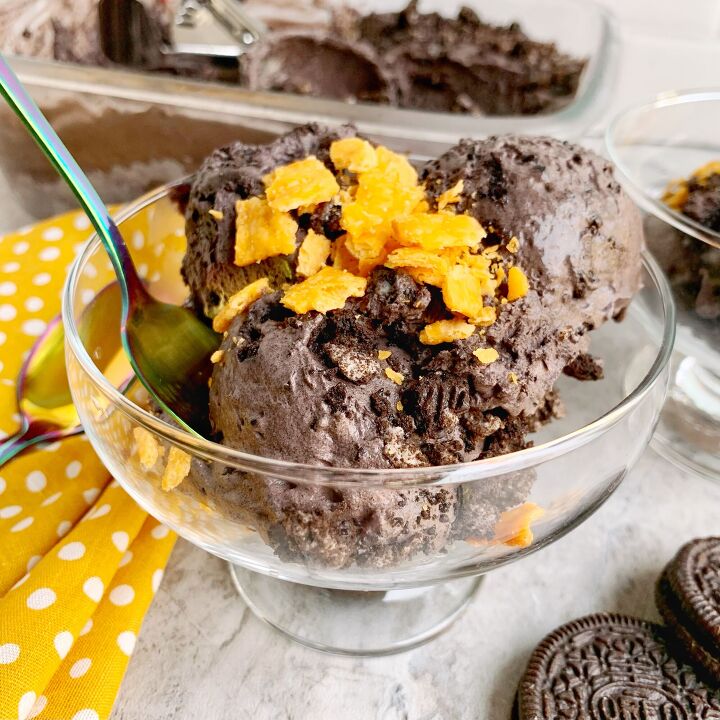
Here's the gameplan for this ice cream. First, we're going to make a super special, super easy no churn dark chocolate ice cream that's loaded up with Oreo cookie pieces. Then, if you trust me, we're going to serve our ice cream with a super special topping: crushed Cheez-it crackers! If you are as big of a fan of salty/sweet pairings as I am, you're gonna love this one!
Let's start with the ice cream. No churn ice cream is super duper easy to make. It starts with sweetened condensed milk, heavy cream that we'll whip into whipped cream, and whatever flavoring agents we want to use. We'll gently fold our components together, pop it in the freezer, and BAM! Ice cream!
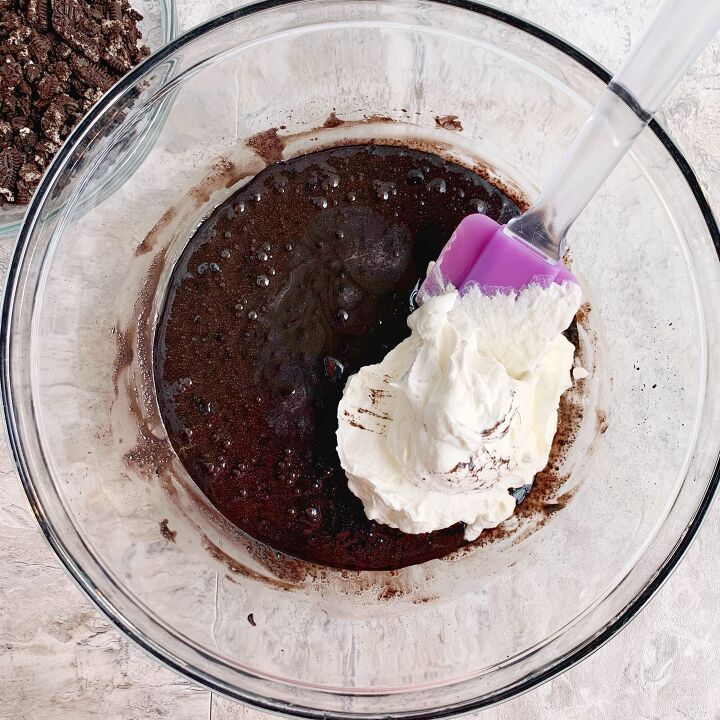
To make this ice cream rich and chocolately, we're going to mix some black cocoa powder into our sweetened condensed milk. Black cocoa powder is ultra dutch processed, which basically means it's been treated with an alkaline solution to reduce the acidity in the cocoa. This process helps to take out some of the bitterness from the cocoa and leaves us with a super dark, rich cocoa.
So, what does black cocoa taste like? To me, it tastes like Oreos! Black cocoa is actually used to make Oreos, hence the black coloring without the need for extra food dyes. It's rich and not cloyingly sweet like a dark chocolate, but it's less bitter thanks to the way it's processed. It can be a little tricky to find in mainstream grocery stores, but I just order mine from Amazon.
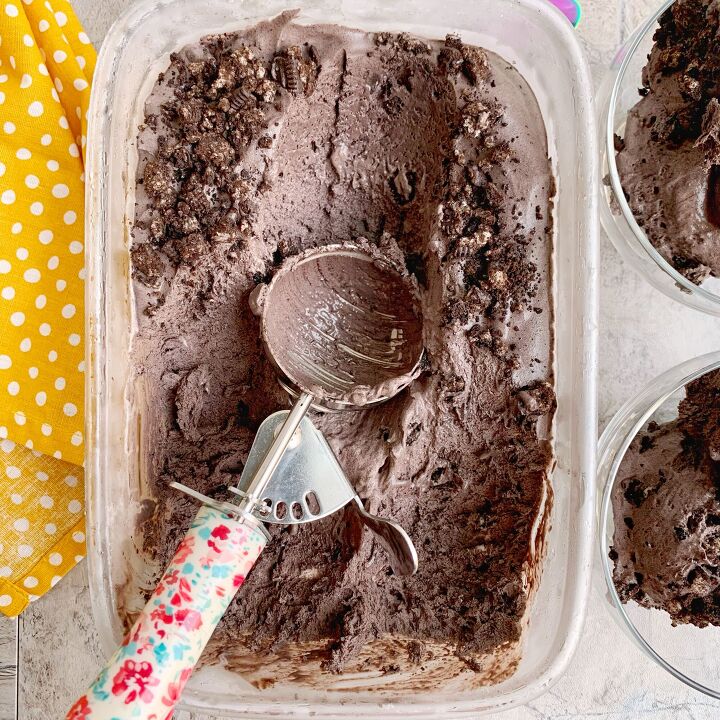
The black cocoa powder gets mixed into the sweetened condensed milk along with some vanilla extract. And then, we'll slowly start mixing in our whipped cream. We want to be really gentle when we combine the whipped cream with the cocoa mix, because the air in the whipped cream is what helps ensure we have a smooth and creamy ice cream as a final product. So we'll fold in the whipped cream, a little at a time until the mixes are just barely combined. Then, to really drive the Oreo flavor home, we're going to gently fold some crushed Oreos cookies right into our ice cream mix. From there, our mix goes into a chilled loaf pan to hang in the freezer for a couple hours.
And, that's it. In about 4 hours time, we have ice cream that's the consistency of a soft serve ice cream. After about 6 total hours, the texture is just like traditional ice cream.
This ice cream is so creamy and smooth. It's super rich like dark chocolate, but it's not crazy sweet either. In all honesty, I'm not a huge dark chocolate fan. So, I had a couple extra taste testers that love dark chocolate try this one out for me too to make sure I wasn't delusional. And we all agreed, this ice cream is delicious.

And, here's where the trust exercise comes in. Before we serve up the ice cream, we're going to top it with some crushed Cheez-it crackers. Yup! My taste testers agreed that the cheese crackers took this ice cream from yum to YUUUMMMM!
The harmony of cheese crackers and Oreos is hard to describe, and maybe that's why it's taken me so long to figure out a way to share it with you in a way that wouldn't scare you. But the cheesy, salty, crunchy crackers combined with the cool, rich, chocolate ice cream creates this perfect balance that's beyond salty sweet. The way the sharp cheddar and the dark chocolate balance each other out at all turns is what creates the magic of this ice cream.
I've never steered you wrong before, have I? TRUST ME!
And even if you don't (which you should), you still have a rich, chocolate, Oreo flavored ice cream to enjoy, cheese crackers or not.

This flavor combo is so special to me for so many reasons, and I don't think I've ever been more excited to hear what you guys think of a recipe. And, this recipe is EXTRA special because it's my 500th posted recipe! :-o So, make sure you tag me when you make it so I can see!
I hope you guys love this one as much as I do. So, let's eat!
No Churn Oreo Ice Cream
Recipe details
- 12 servings
- Prep time: 6 Hours Cook time: 0 Minutes Total time: 6 hr


Comments
Share your thoughts, or ask a question!