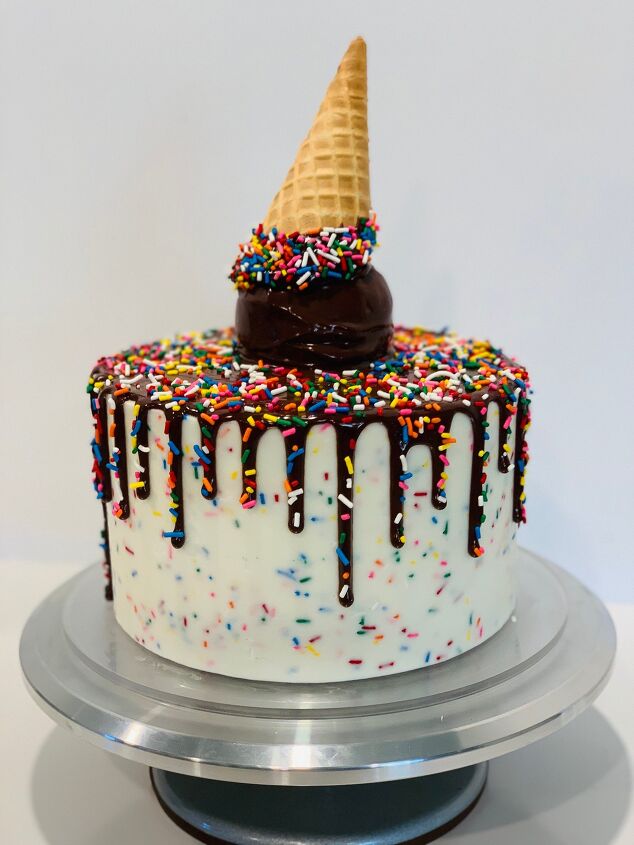
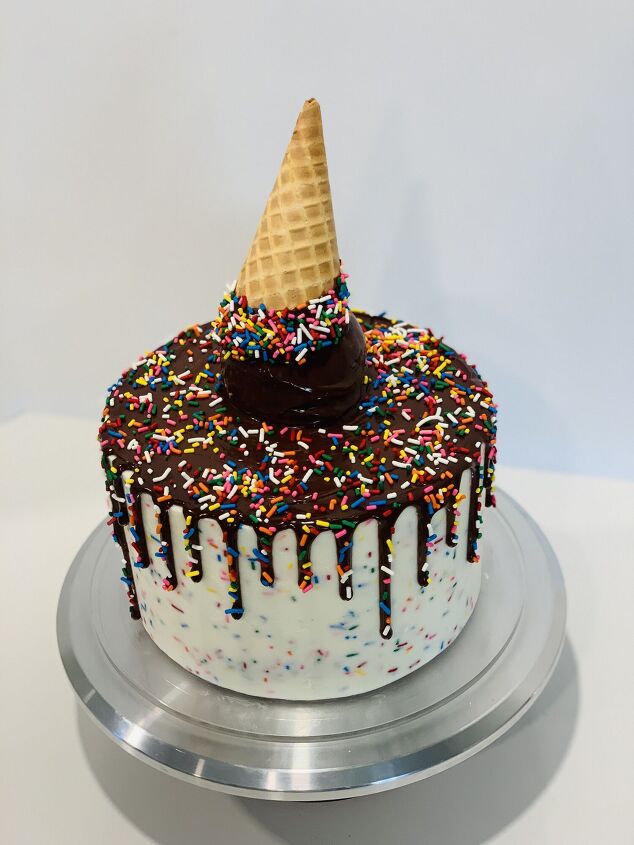
Melting Ice Cream Cake

Intensive Cake Unit
by Intensive Cake Unit
1 cake
1 hr 20 min

I know this style’s nothing new, and these cakes have been made in a ton of different styles tons of times before...but as summer kicks off I felt like I had to make ONE MORE ‘Melting Ice Cream’ cake with a fun confetti flair!

For as fun and fancy as it looks, it's actually really simple to put together once all the pieces are made!

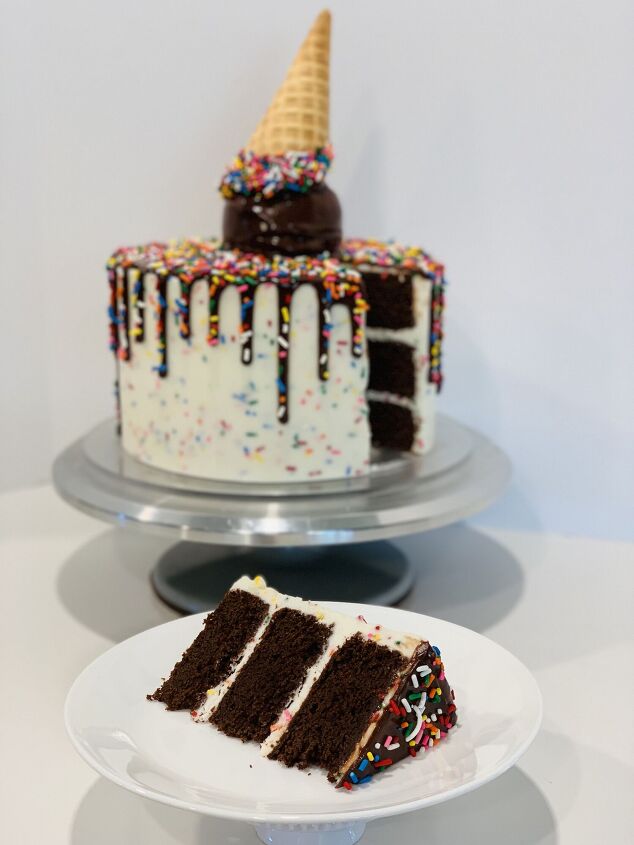
Recipes and instructions are below! I added in a boxed cake mix to make the ‘cake pop’ ice cream scoop – I did this to make sure there would be enough cake pop mix to make a scoop the size of the one in the pictures that I’ve posted. If you’d like to skip that step though, you can just use the cake tops once you level your cake layers. Just know your ‘ice cream’ scoop may look a little smaller! :)

Recipe details
  • 1  cake
  • Prep time: 45 Minutes Cook time: 35 Minutes Total time: 1 hr 20 min
Show Nutrition Info
Hide Nutrition Info
Ingredients
Cake
  • 350g all purpose flour (roughly 2 ¼ c)
  • 450g caster sugar (roughly 2 ¼ c)
  • 100g cocoa powder (roughly 1 ¼ c)
  • 1 tsp baking soda
  • 1 tsp salt
  • 1 c /250g /16 T unsalted butter, softened
  • 4 large eggs, at room temperature
  • 350ml buttermilk (about 1 ½ ; buttermilk powder with water is an option if you can’t find liquid buttermilk at your grocery store!)
  • 2 t vanilla extract
Frosting / Decorations
  • 8 oz (one package) cream cheese, softened
  • 16 Tablespoons (two sticks) butter, softened
  • 6-7 c powdered sugar
  • 2-4 Tablespoons milk
  • 1 T clear vanilla extract
  • 1/4 t. salt (if using unsalted butter)
  • ½ c rainbow jimmies sprinkles (NOT nonpareils; the color will melt and turn brown! And you can use as many or as few as you’d like; more sprinkles=more color but also a tougher smoothing time.) 
  • 12 oz (2 cups) semisweet chocolate chips + 12 oz (1 ½ cups) heavy whipping cream, melted together (microwave at half power in 30 second intervals)
  • - 1 8- or 10 -inch cardboard cake circle (I prefer Wilton’s center-punched circles) or an 8” acrylic cake disc (I started using these so I wouldn’t waste so many cake circles!) 
  • - Cake leveler, cake turntable, large offset spatula, and pastry cutter/bench scraper - not all 100% necessary but incredibly helpful! (Here’s a link to the cake turntable I use) 
  • - Additional ½ cup rainbow jimmies sprinkles (for the cone, top of the cake, and to add to the drip)
  • - 1 large waffle cone (you’ll have enough ganache leftover to dip the cone and add sprinkles if you’d like, but this is optional!)
  • - Squeeze bottle OR piping bag OR spoon – whatever you’d prefer to add your ganache drip to the cake - about 1 teaspoon of shortening – this will make transferring sprinkles to your drip easy!
Cake pop mix (optional)
  • 1 chocolate boxed cake mix
  • ½ c butter, melted
  • 3 eggs
  • 1 c buttermilk, room temperature (or buttermilk powder with water) 
  • 1 ½ t vanilla extract
  • ¼ c frosting (recipe above)
  • Bake according to package directions. Cool and crumble cake with a fork, and combine with reserved frosting (see below). If you'd rather skip this step, level your cake layers and just use the cake tops.
Instructions
Cake
Preheat oven to 350 degrees F (180C) or 320 FC (160C) for a convection oven. Grease 3 8-inch cake pans with baker's floured spray and/or line pans with parchment paper. 
In the bowl of a stand mixer with the paddle attachment, add the cocoa powder, flour, salt, baking soda, and sugar. Turn mixer on low speed and allow it to mix for a couple minutes to help everything combine well (or sift the ingredients together). Add in the softened butter until it’s well incorporated into the dry ingredients and no lumps of butter are visible. 
Next, add buttermilk, eggs, and vanilla together and whisk until well combined. Add wet ingredients to dry ingredients in a slow and steady stream until no dry ingredients are visible. Scrape down the bowl and mix for another 20 seconds.
Fill the three pans evenly - I find a kitchen scale helpful for this part, and each of mine weighed out to about 550g. Bake for 30-35 min or until a toothpick inserted comes out clean. Allow cake layers to cool for 10-15 minutes on a wire cooling rack before removing from pans, and cool completely before frosting. Set in the fridge or freezer to accelerate the cooling process if desired.
Frosting / Decorations
Beat together softened cream cheese and butter; slowly add in powdered sugar alternating with milk until frosting reaches desired consistency. Add vanilla and salt if needed and beat until well combined. Reserve 1/4 c for your cake pop ice cream scoop - see instructions below! Stir rainbow jimmies sprinkles into your remaining frosting.
Once your cakes are cool, level them (if needed/desired). This can be done with a cake leveler or a large serrated knife and a ruler.
Place a smear of frosting on your cake circle (to keep the cake from sliding while you decorate it) and center your first cake layer in the center of the circle. Spread the layer with frosting, and add your next cake layer on top. Repeat the process with your remaining cake layers.
Now you're ready to crumb-coat . If you're unfamiliar with crumb-coating, it's just what it sounds like - a thin layer of frosting over the entire outside of the cake to keep crumbs out of your final layer. Once your crumb coat has set (this takes about 5-10 minutes in the fridge), add your final layer of frosting and smooth. I like to use an offset spatula and bench scraper for this part – smoothing the frosting with all the sprinkles in the way takes a little more time; go slow and smooth gently! I usually hold the bench scraper at a 90 degree angle when I’m smoothing; I angled it toward me about 45 degrees to smooth this one. That helped smooth in the sprinkles without dragging them. Once your cake is covered, place it into the fridge or freezer to set the frosting. This also helps set the chocolate ganache drips.
If you're decorating your waffle cone, this is a great time to dip it in the ganache and add a few sprinkles! Set upright in a short glass in the fridge to cool and set the chocolate. 
Okaaaay......ganache drip time! I found a squeeze bottle worked the best for this ganache since it’s very runny until it sets, but I’ve used a piping bag for similar drips before. Using a squeeze bottle or piping bag, drizzle ganache around the top rim of the cake, letting it run over the edge to form drips down the side of the cake. Spread ganache over the top of the cake as well. Set your cake pop ‘ice cream’ top of your cake. Drizzle the ganache over the cake pop and smooth, and then set your waffle cone upside down on top of the cake pop.
This part is optional but SO fun – add some more rainbow sprinkles to the top of the cake, and then spread a bit of crisco shortening on your fingertip and transfer rainbow sprinkles to your ganache drip! Refrigerate until ready to serve! 
Tips
  • Make this recipe? Let me know how it went - or find me on Pinterest or on Instagram and tag @IntensiveCakeUnit in your photo!
Comments
Next