


Dragon Toe Cookies
This is one of my favorite food-inspired dragon activities preschoolers can create. Not only is it fun to make, but it’s also a yummy treat for a party. You will start out with pre-made cookies so there is no cooking required for this activity. That makes it a great option for younger kids that you don't want to use the stove.
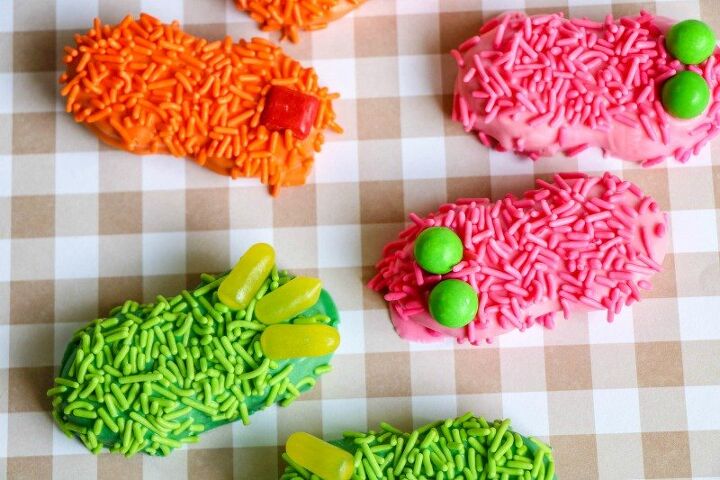
If your child loves dragons, why not let them make these cute dragon toes. Or, you can call the dinosaur toes if your child prefers dinosaurs. The colors are completely customizable so feel free to make them blue, grey, or brown if your child prefers traditionally colored dinosaurs.
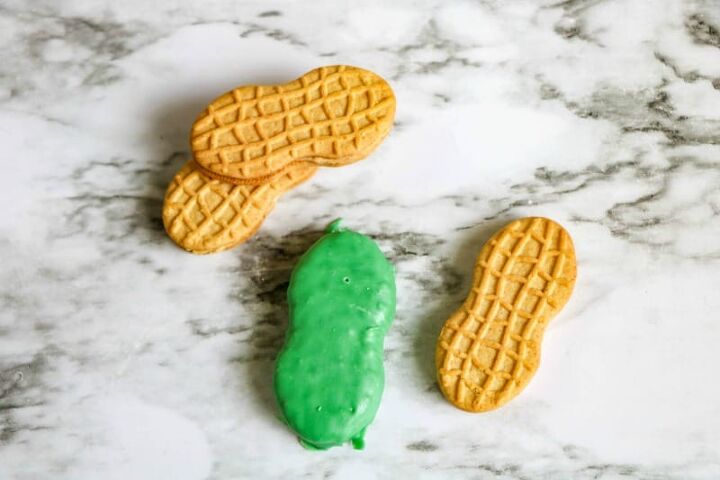
We started with store-bought nutter butter cookies. But, you can easily use the generic version as well. The key is to make sure that they have the same shape so that they look like toes.
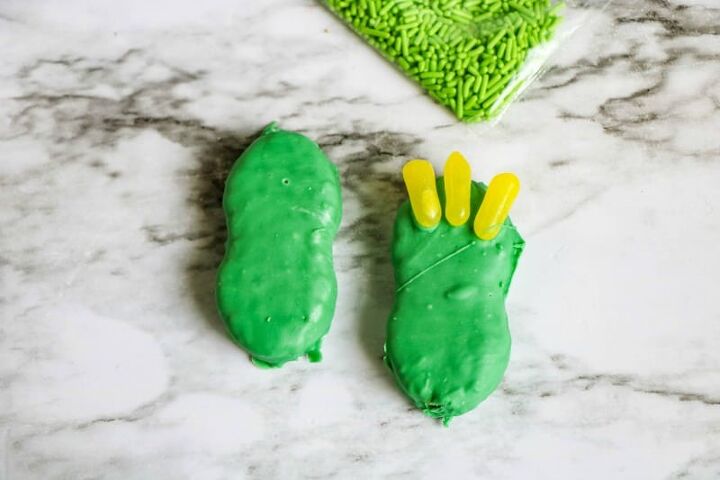
For the dragon toes, just look for candy that is long and thin. Those can be the toenails. There are a number of different brands in the grocery store that will work for this shape. They even have some that is naturally colored.

If you cannot find solid colored sprinkles, you can use multicolored ones instead. Look for them in the ice cream aisle.
Get the full recipe here.
Dragon Toe Cookies
Recipe details
- 15 cookies
- Prep time: 15 Minutes Cook time: 0 Minutes Total time: 15 min


Comments
Share your thoughts, or ask a question!