


Easy No Bake Chocolate Oreo Cookie Dirt Recipe Card
Welcome to Cloches & Lavender, my name is Cindy and I love sharing easy recipes, crafts, DIYs, and decorating ideas.
This easy no bake chocolate Oreo cookie dirt recipe card is not only delicious but also so much fun to make!
Wondering how this delightful dessert came to be? Well, mushrooms were the trendiest thing in spring home decor, and that inspired me to come up with a unique way to make chocolate mushroom caps.
This chocolate Oreo cookie dirt recipe requires minimal equipment. You won’t need a hand mixer, stand mixer, large mixing bowl, dry pudding mix, piping bag, or even cookie dough. It’s a simple yet tasty treat that you can whip up in no time!
Equipment Needed For This No-Bake Dessert:
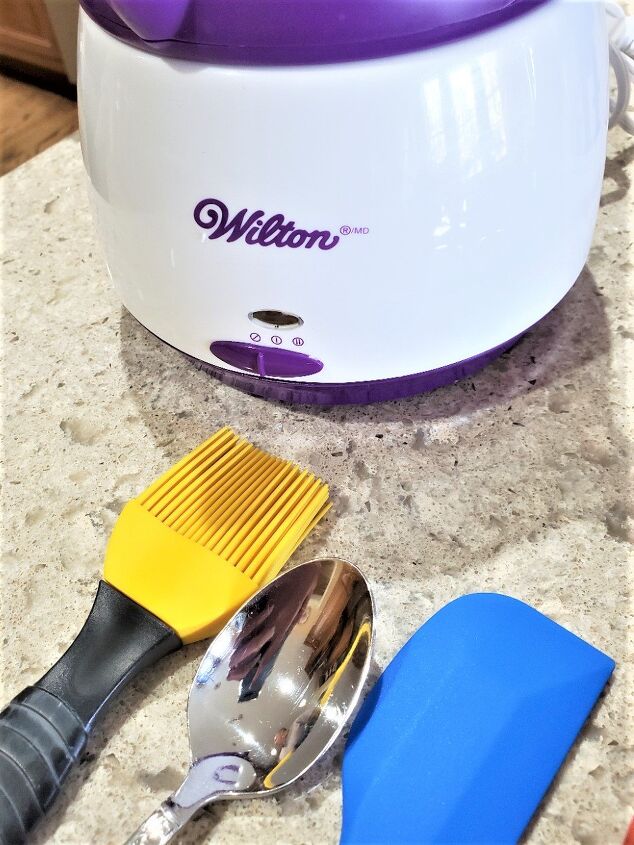
- Wilton candy melt- I have this and LOVE IT!
- medium bowl
- food processor or rolling pin to crush Oreos into fine crumbs –
- semi-sphere silicone molds
- baking sheet
- piece of parchment paper
- resealable bag
- knife or spoon
- straight-edge metal spatula
- teaspoon
- flower pot or individual cups or teacups as I did
Ingredients:
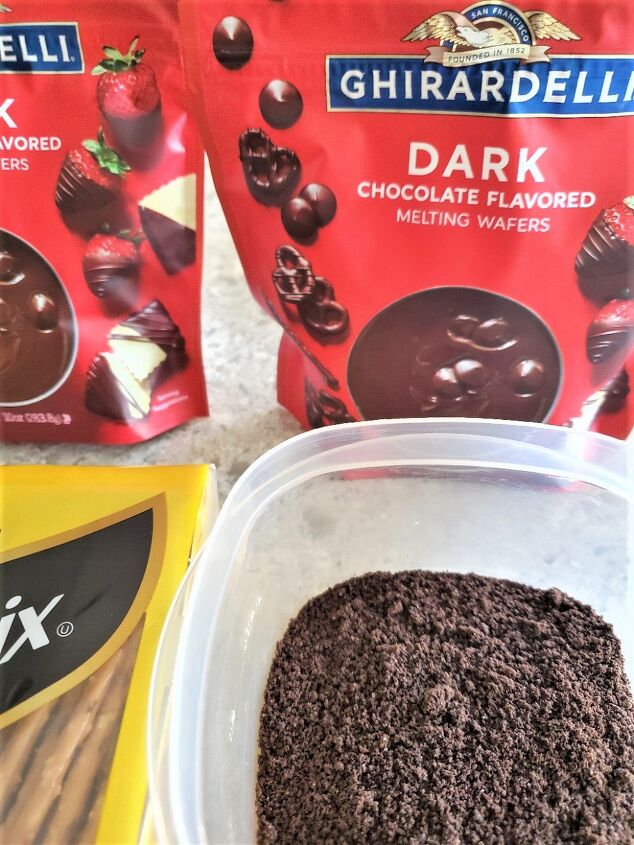
- Oreo Cookies
- pretzel sticks
- chocolate melts, chocolate chips, or white chocolate
- Shelled Pistachios fine crumbs – if there are nut allergies buy golden Oreos
- store-bought cupcakes topped with vanilla buttercream frosting- for the big chocolate lover chocolate buttercream
Take Apart Chocolate Sandwich CookiesStep 1: Open The Chocolate
Cookies
Open the chocolate Oreo cookies by gently pulling apart the two cookie halves.
Next, using a small knife or a spoon, carefully scrape off the cream filling from one of the cookie halves.
In the above picture, the chocolate melts have a white coating on them. This is nothing to be concerned about. It has no effect on the flavor and quality of the chocolate.
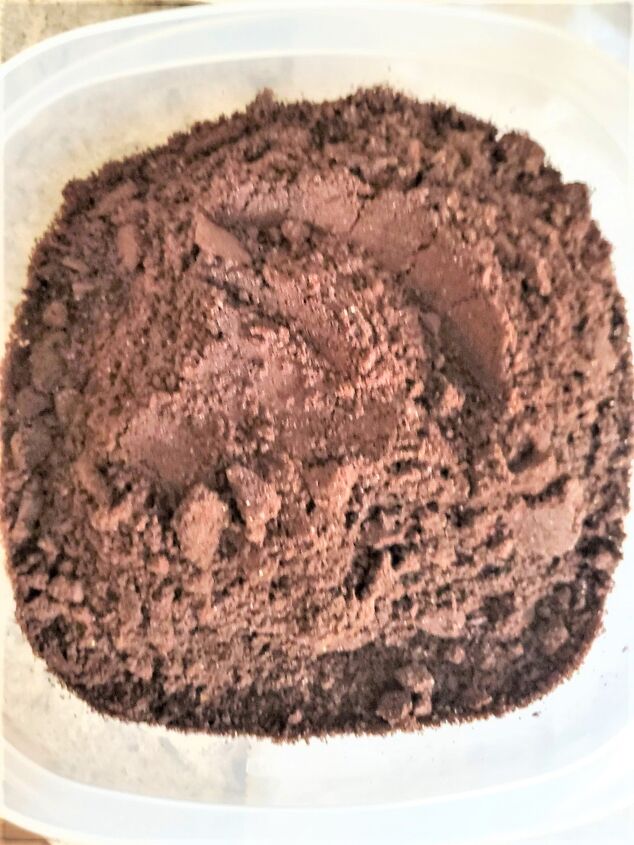
Step 2: Crush Oreo Cookies To Fine Crumbs
To create Oreo cookie crumbs, you have two options. You can either use a food processor or a rolling pin and a sealed bag.
If you choose to use a food processor, follow these steps:
- Place the chocolate Oreo cookies into the food processor.
- Secure the lid and pulse the cookies until they are fine crumbs. This will result in a uniform texture for your chocolate cookie dirt dessert recipe.
- Once the cookies have reached the desired consistency, transfer the crumbs to a medium bowl and set them aside for later use in your recipe.
If you prefer to use a rolling pin and a sealed bag, follow these steps:
- Place the chocolate Oreo cookies inside a resealable bag. Make sure the bag is sealed tightly to prevent any cookie crumbs from escaping.
- Use a rolling pin to gently crush and roll over the cookies inside the sealed bag. Continue this process until the cookies grind into fine crumbs.
- Once you have achieved the desired crumb texture, open the bag and transfer the crumbs to a separate bowl. Again, set them aside for later use in your recipe.
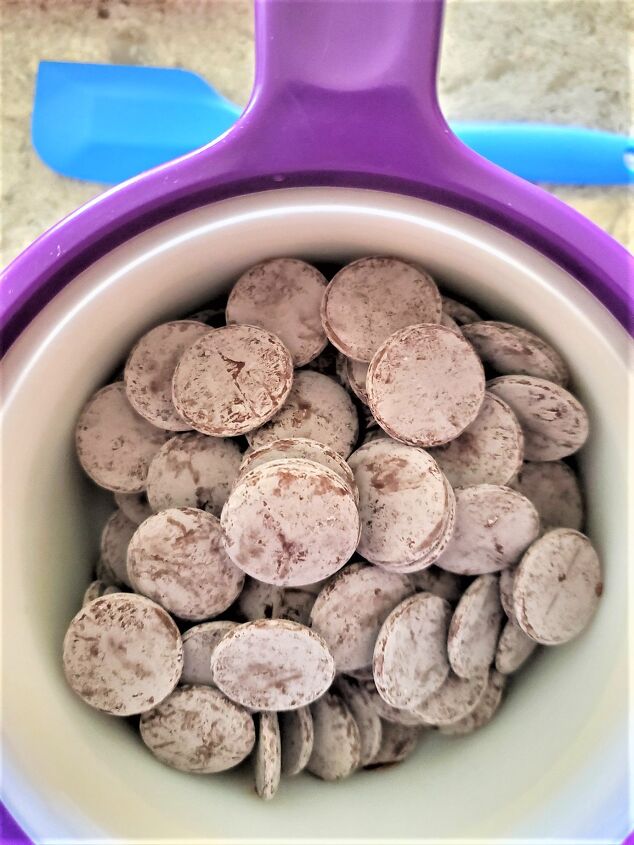
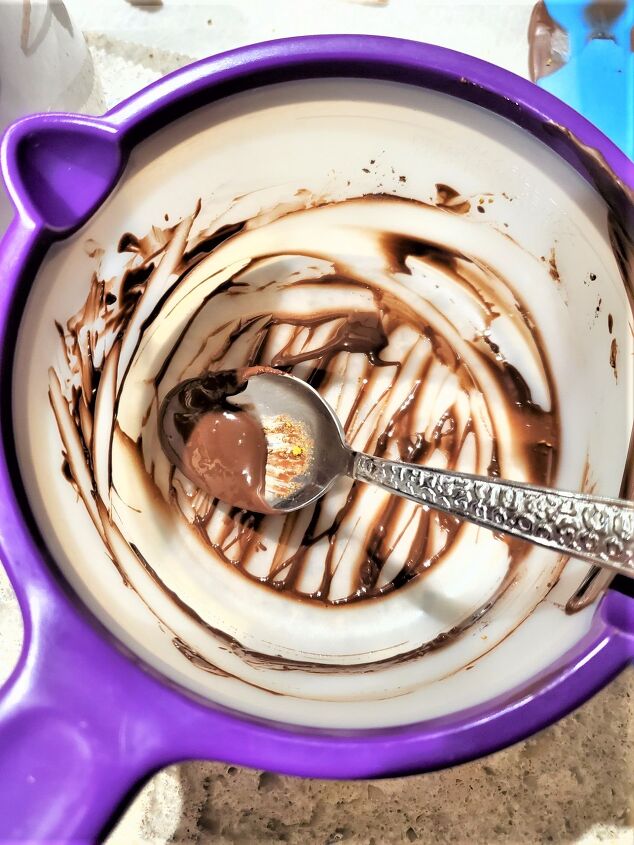
Step 3: Melt Candy Wafers Or Chocolate Chips
To melt the chocolate wafers or chocolate chips for your recipe, follow these steps:
- If you are using chocolate wafers, refer to the instructions provided on the package for melting in the Wilton Melt. Follow the recommended method to be sure the chocolate wafers melt properly.
- If you are using chocolate chips, place them in a microwave-safe medium bowl. Microwave the bowl at 30% power for 30 seconds.
- After the initial 30 seconds, remove the bowl from the microwave and stir the chocolate chips well. This helps distribute the heat and promotes even melting.
- Return the bowl to the microwave and continue to heat at 30% power in 30-second intervals. After each interval, remove the bowl and stir the chocolate thoroughly.
- Repeat the process of microwaving in 30-second intervals and stirring until the chocolate is completely melted and smooth. Be cautious not to overheat the chocolate, as it can burn easily.
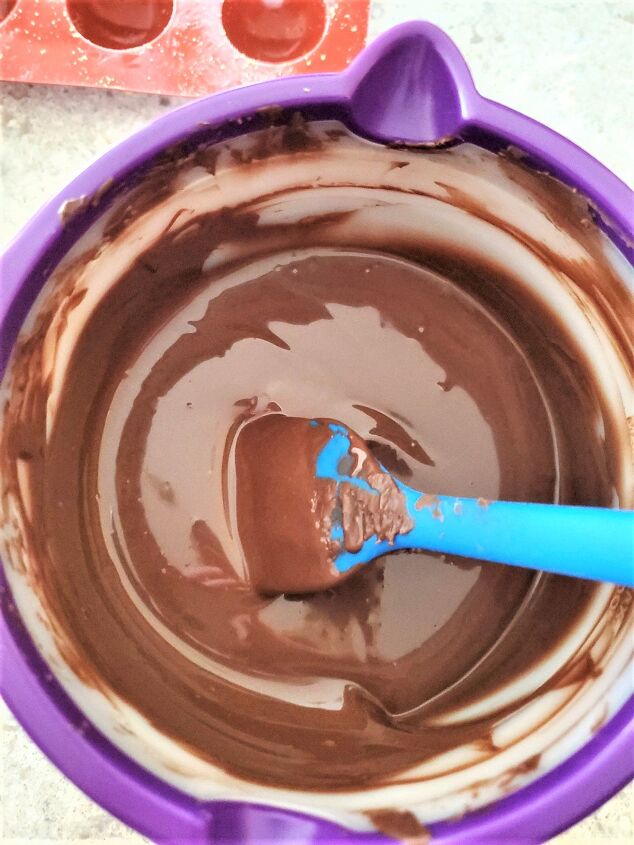
Tip: If there are a few lumps remaining in the melted chocolate, microwave it for only 15 seconds at 30% power. This will help melt the remaining lumps without overheating the chocolate.
Step 4: Fill The Silicone Mold With Melted Chocolate
To fill the silicone mold with melted chocolate and achieve a smooth and flat surface, follow these steps:
- Pour the melted chocolate into the silicone mold, evenly filling each cavity. Use a spoon or a small ladle to add melted chocolate chips. If you are using the Wilton candy melt use the pour spout. to carefully transfer the chocolate into the mold.
- Once the cavities are filled, use the back of a knife or a small straight spatula to smooth the surface of the chocolate. Gently glide the tool across the top of the mold to create a flat and even layer of chocolate in each cavity.
- Allow the chocolate to set up for about two minutes. This will help it slightly thicken and hold its shape.
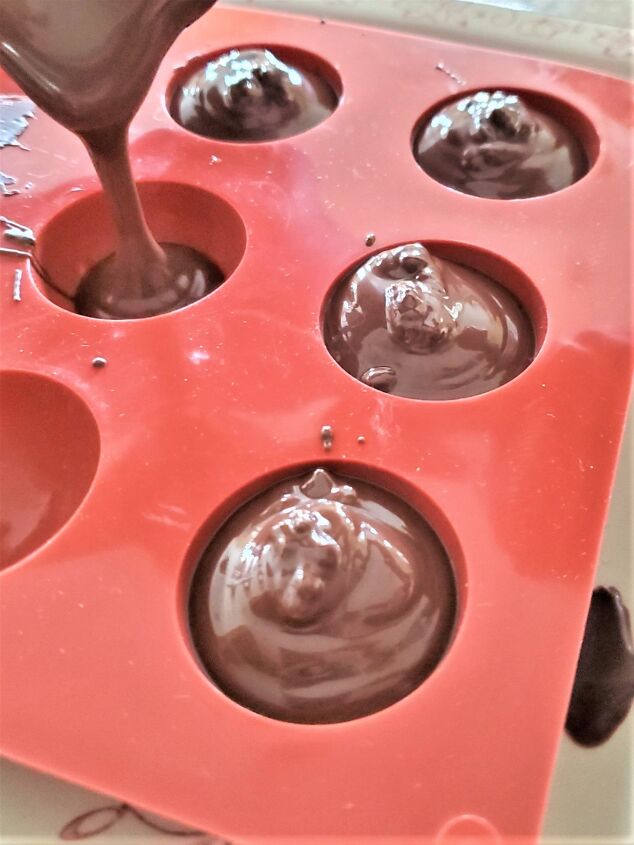

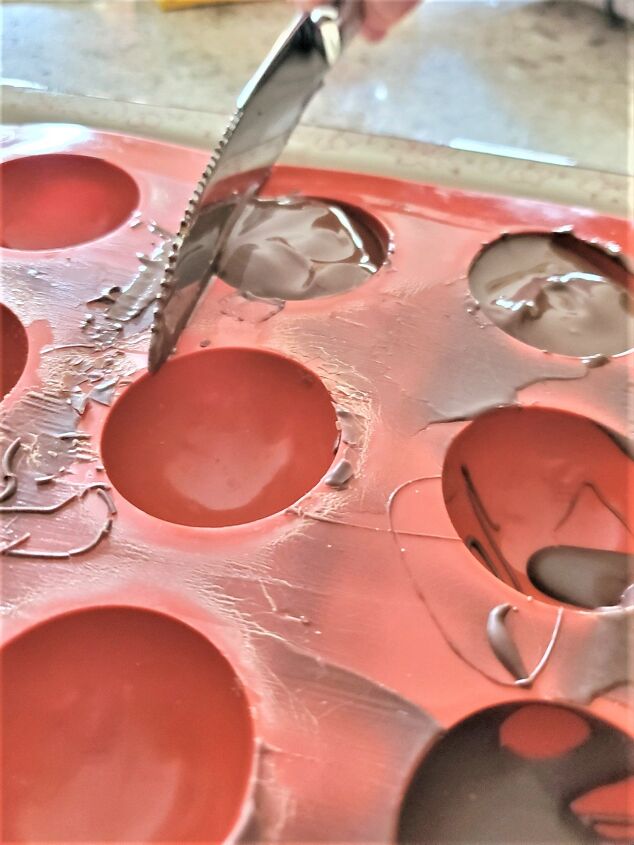
Tip: If you notice any air bubbles on the surface of the chocolate, lightly tap the mold on the counter or gently shake it from side to side. This helps release trapped air bubbles and ensures a smoother finish.
Once you have filled and smoothed the chocolate in the mold, you can move on to the next steps.
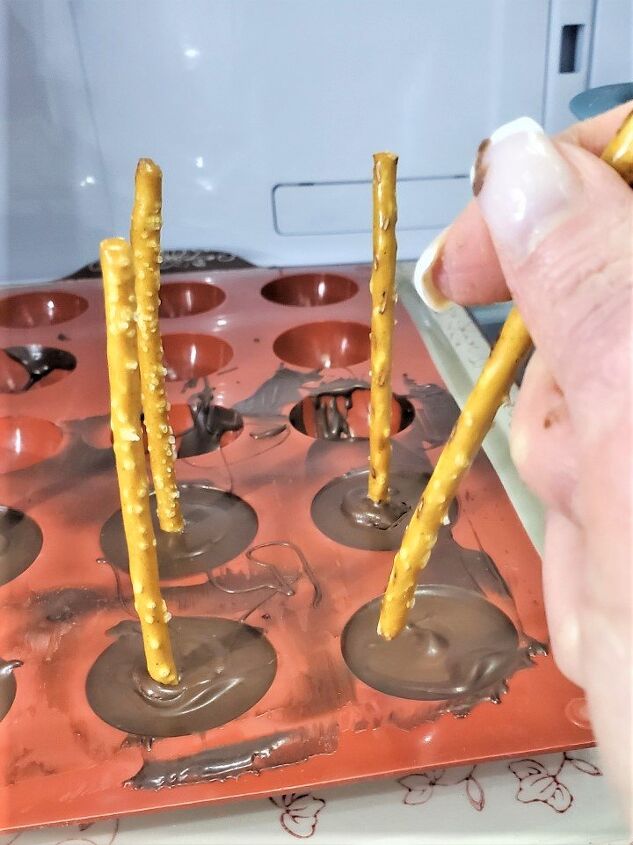
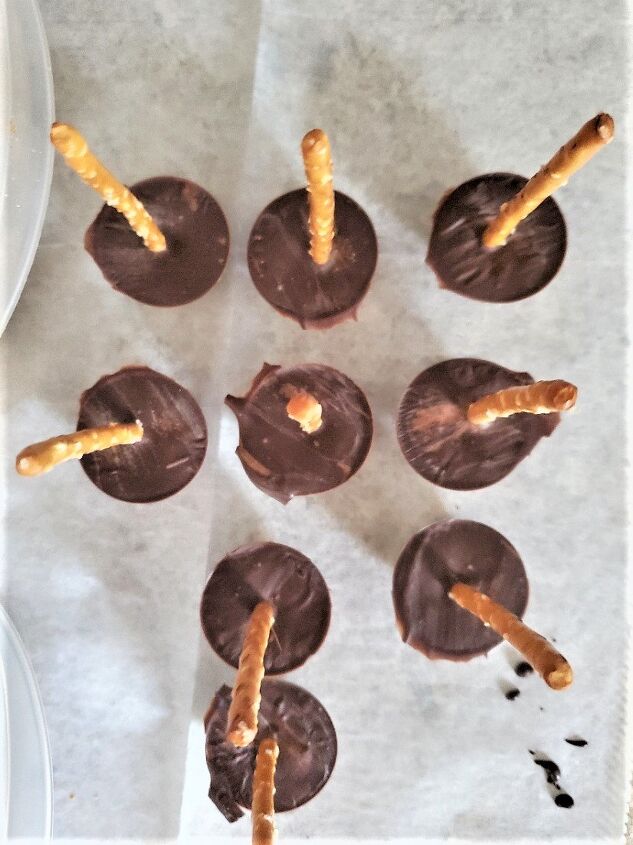
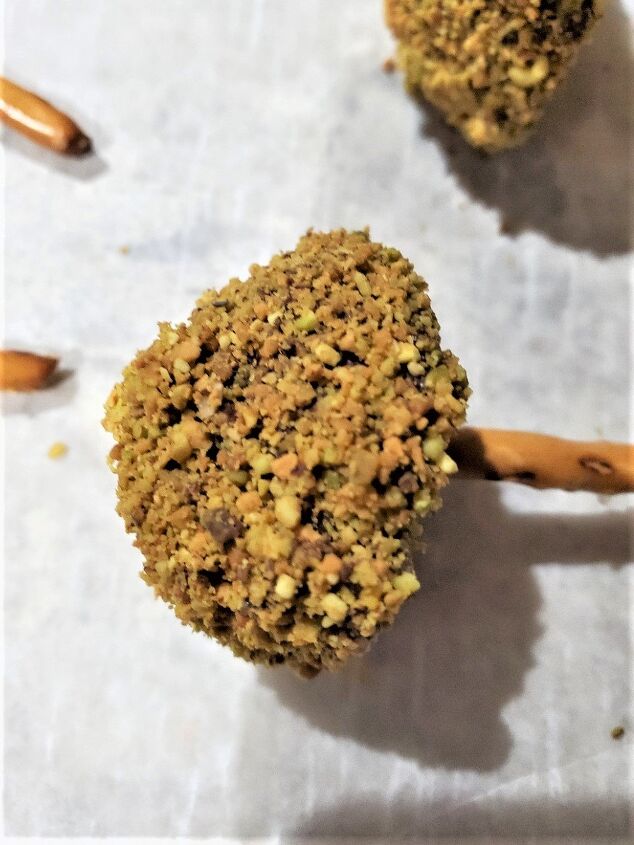
Step 5: Add Thin Pretzel Sticks
Add thin pretzel sticks to the center of each piece of chocolate, and follow these steps:
- Take the silicone mold filled with chocolate and slightly set but not fully hardened.
- Gently insert a thin pretzel stick into each chocolate piece’s center, so it stands upright. You want the pretzel to reassemble a stem.
- Repeat this process for all the pieces of chocolate in the mold.
- Allow the chocolate to fully set and harden. This may take some time, depending on the specific instructions provided with the chocolate you used. Follow the recommended setting time for the best results.
Once the chocolate has been completely set and hardened, the pretzel sticks will be securely set in the center of each chocolate piece. This addition provides a delightful crunch and a complementary flavor to the chocolate.
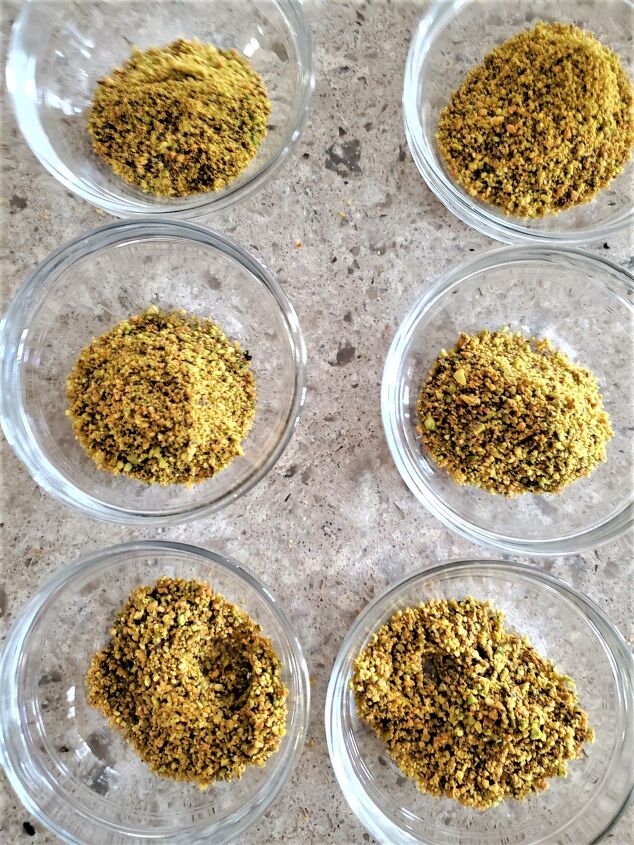
Step 6: Grind Pistachios Into Fine Crumbs
To incorporate pistachios into your recipe as fine crumbs, follow these steps:
- Take a desired amount of pistachios and place them into a food processor.
- Secure the lid of the food processor and pulse the pistachios until they are finely ground into crumbs.
- Once the pistachios have reached the desired consistency, transfer them to a separate container or bowl, and set them aside for later use in your recipe.
These finely ground pistachio crumbs can add a great nutty flavor, texture, and crunch to your dish. Sprinkle on top of desserts, used as a coating, to add texture to resemble real mushrooms.
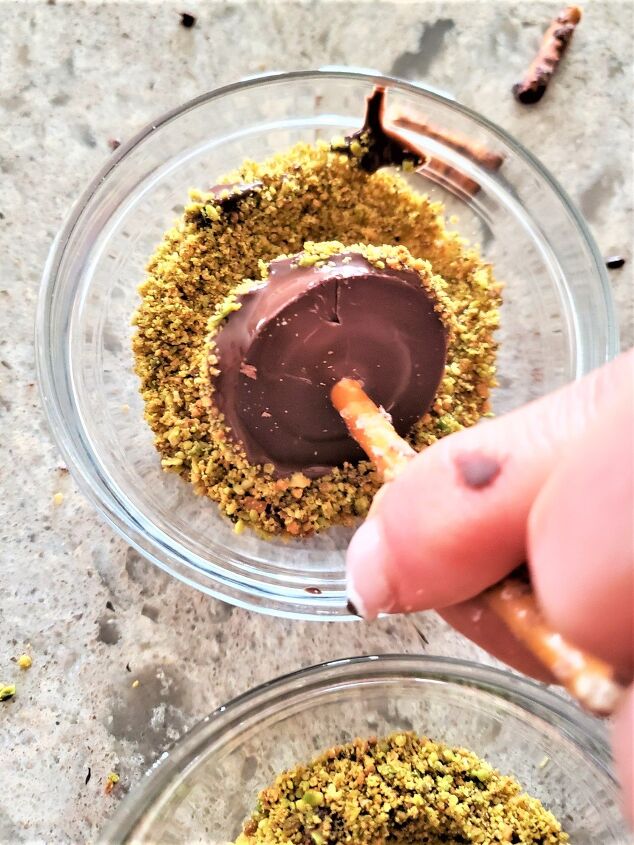
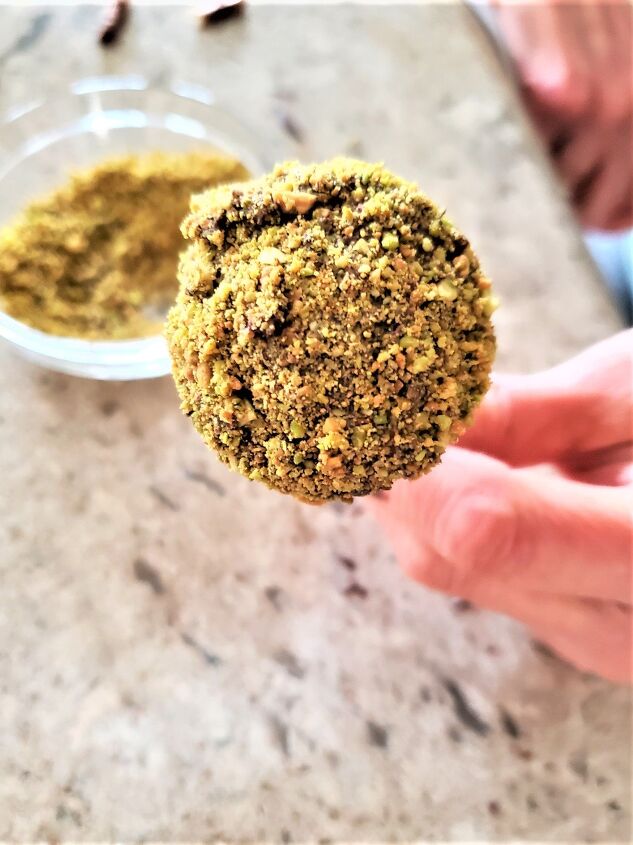
Step 7: Lightly Coat The Chocolate With A Layer Of Melted Chocolate
To give the chocolate a coating, follow these steps:
- Melt a bit more chocolate for the dessert. You can either melt additional chocolate wafers or chocolate chips using the method described above
- Take the pieces of chocolate you prepared in the mold and dip each one into the melted chocolate. Lightly coat the chocolate piece just enough to coat the surface. Do this by carefully holding the pretzel stick.
- After dipping, transfer the coated chocolate to a clean surface.
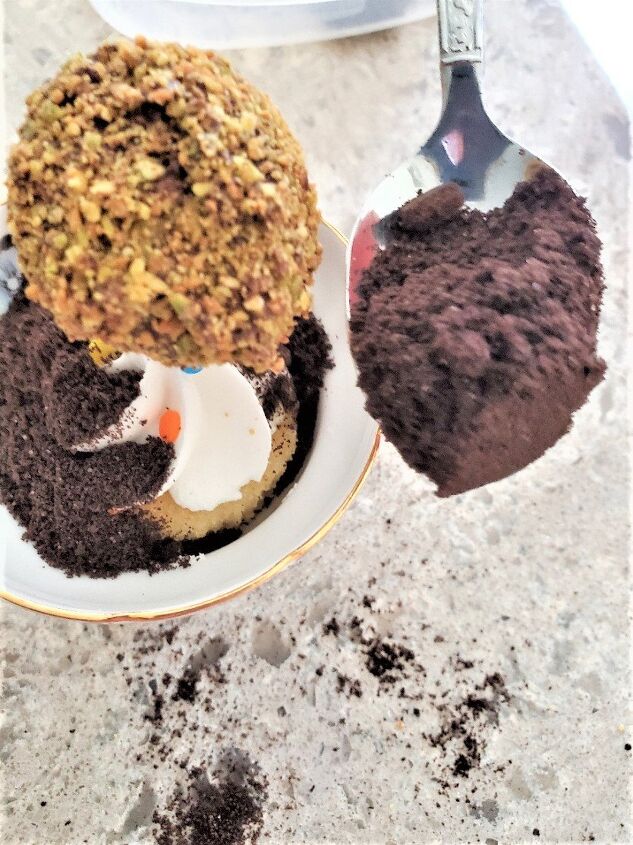
- Immediately roll the coated chocolate in the fine pistachio crumbs you prepared earlier. Be sure that the chocolate is evenly coated with the pistachio crumbs for added texture.
Tip for Nut Allergies: If nuts are not an option due to allergies or personal preference, you can use an alternative coating option. Grind additional Oreos and golden Oreos separately until they become fine crumbs. Combine the two types of crumbs together in a medium bowl. This mixture can be used as an alternative coating for the pistachios. Simply dip the chocolate pieces in the melted chocolate and roll them in the combined Oreo crumbs for a similarly textured coating.
NOTE: This step can be done one day ahead. It’s very important to store these in an airtight container. DON’T USE A RESEALABLE BAG!
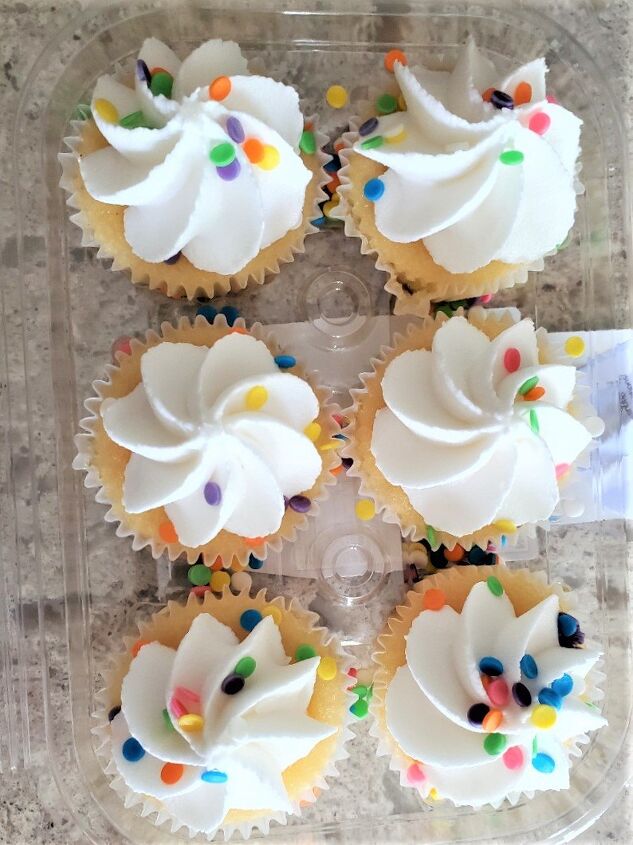
Step 8: Put The Chocolate No Bake Dessert Together
To assemble the dessert, follow these steps:
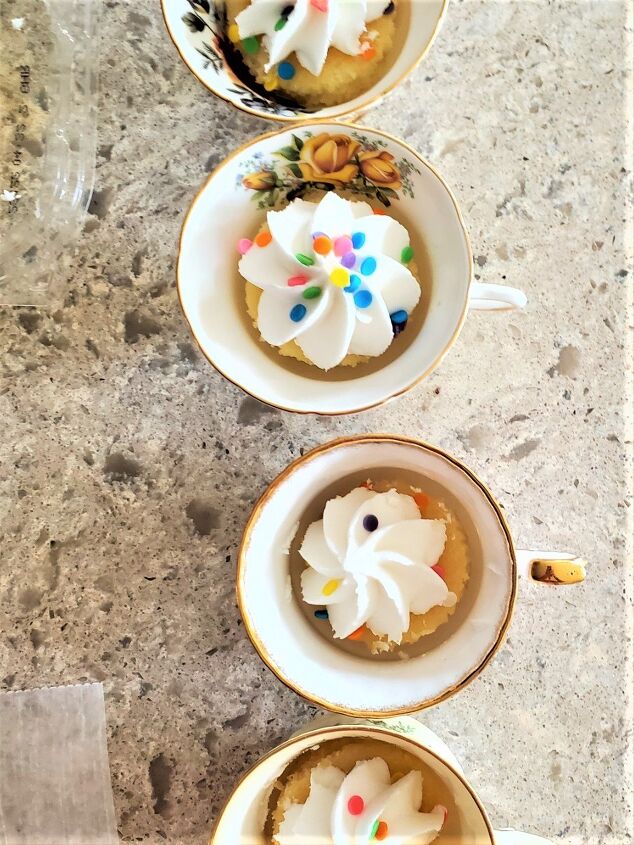
- Take store-bought cupcakes and place one in each individual serving cup. You can choose any flavor or type of cupcake that complements the overall dessert.
- Next, place one of the chocolate and pretzel stick pieces in the center of each cupcake, pressing it carefully into the cupcake.
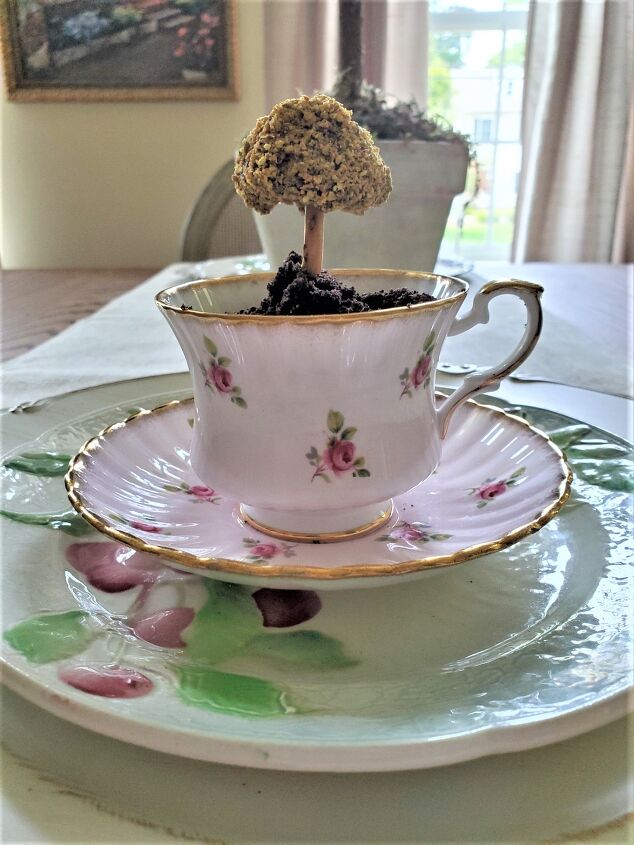
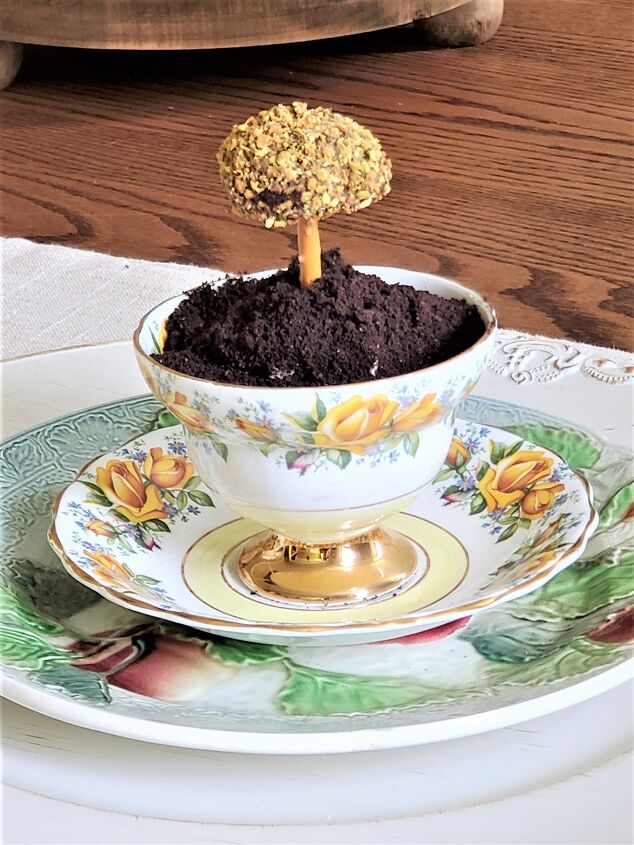
- Sprinkle crushed Oreos over the top of each cupcake. The crumbled chocolate cookies will resemble dirt, adding a playful and visually appealing element to the chocolate dessert.
- Serve and enjoy this delicious dessert with its delightful combination of flavors and textures.
With its whimsical presentation and tasty combination of flavors, this dessert is sure to be a hit at any gathering or celebration.

Enjoy assembling and serving this chocolate dessert trifle, and watch as it becomes a crowd-pleasing treat at your next gathering.
Follow Cloches & Lavender for more ideas so you never miss a post!
FOLLOW US ON: FACEBOOK, PINTEREST, AND INSTAGRAM
Easy No Bake Chocolate Oreo Cookie Dirt Recipe Card
Recipe details
- 4 people
- Prep time: 20 Minutes Cook time: 0 Minutes Total time: 20 min


Comments
Share your thoughts, or ask a question!