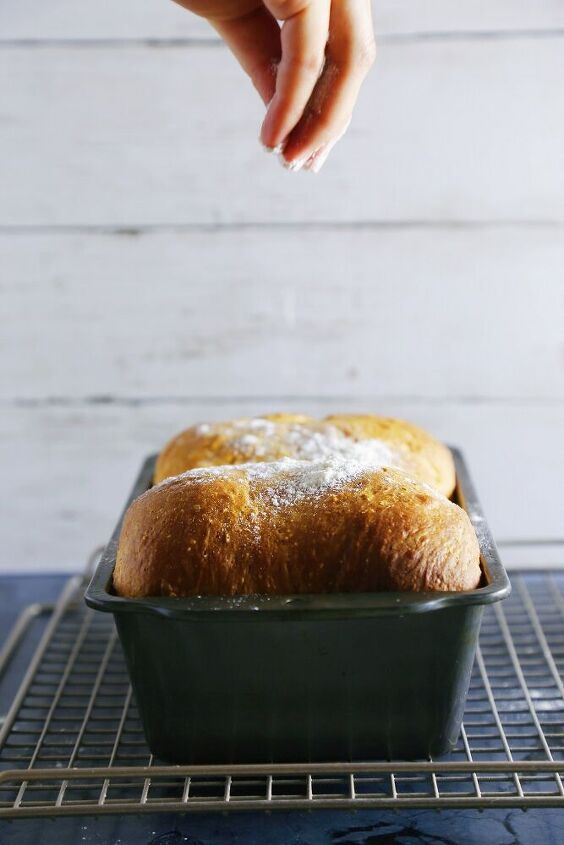
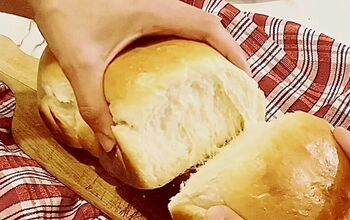
Japanese Milk Bread

Ala
by Ala
1 Loaf
2 hr 10 min

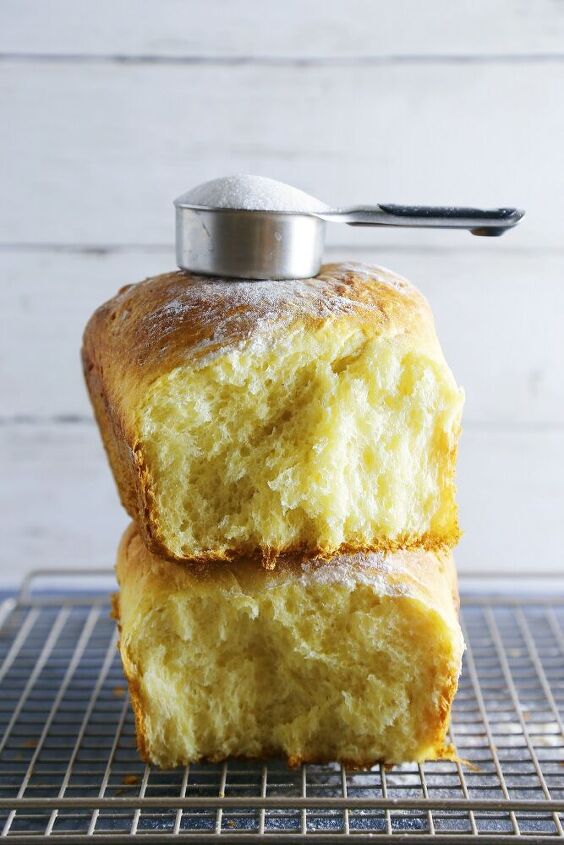
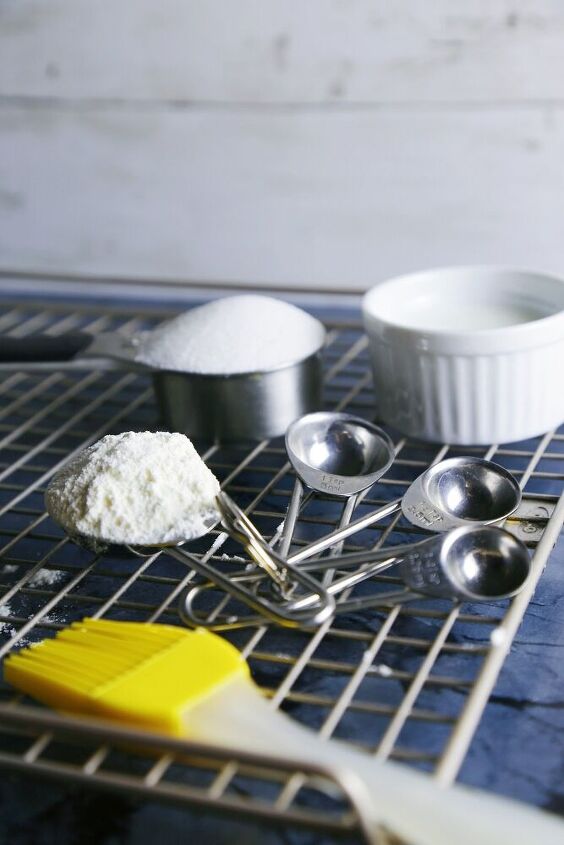
As Agnes from Despicable Me puts it, “[It’s] so fluffy, I’m gonna DIE!” This unbelievably light, fluffy Japanese milk bread is worth the effort–slightly sweet and buttery, it’s the perfect bread for making French toast or simply enjoying with a side of your favorite spread. If you’ve never heard about Japanese Milk Bread, you’re in for a treat. Like most Japanese baked goods, it’s extremely fluffy and derives its slightly sweet & buttery flavor from–you guessed it–some extra sugar and butter. Like all yeast breads that require kneading, just make sure that you allow your dough plenty of time to rest between kneading sessions and handle it gently in order to avoid compressing all of the air bubbles that make this such a light loaf. If this is your first time kneading bread by hand, check out this guide to kneading bread from Spruce Eats for some extra tips!

The result was extraordinary: not only did this loaf rise like a steamy dream fresh from the oven, it also had a soft and chewy crust that’s perfect for making thick French toast, which I plan on cooking soon with my leftovers. And the best part of all? My fear of baking bread from scratch has been cured so thoroughly that I now plan on baking the living bejeezus out of every bread out there. And maybe marrying the bejeezus out of Peeta, too. Now that’s my kind of bread hero!

Recipe details
  • 1  Loaf
  • Prep time: 90 Minutes Cook time: 40 Minutes Total time: 2 hr 10 min
Show Nutrition Info
Hide Nutrition Info
Ingredients
For the starter:
  • ⅓ cup/45 grams bread flour
  • ½ cup/120 milliliters whole milk
For the dough:
  • 2 ½ cups/325 grams bread flour
  • ¼ cup/60 grams sugar
  • 2 teaspoons/7 grams active dry yeast (1 packet)
  • 1 teaspoon/4 grams salt
  • 1 egg
  • ½ cup/120 milliliters warm whole milk, plus extra for brushing on the unbaked loaf
  • 4 tablespoons/60 grams unsalted butter, cut into pieces and softened at room temperature
  • Oil for greasing bowl and pan
Instructions

Start at the beginning with your starter! In a small pot, whisk together flour, milk and 1/2 cup water. Bring to a simmer over low heat and cook, stirring often, about 10 minutes (should be thickened but still pourable). Transfer to a measuring cup and cover lightly with a paper towel. Allow starter to cool to room temperature while you make your dough.
Next up is your dough! In a large mixing bowl (or stand mixer fitted with a dough hook, if you're using one), combine flour, sugar, yeast, and salt.
Add egg, milk, and 1/2 cup of your starter. (Note: You can discard any extra starter at this point, or save it for another batch if you have enough.) Knead for 5 minutes, making sure not to overwork your dough. Let rest for 5 minutes.
Add butter and knead for another 10-12 minutes, until butter is uncorporated and dough is smooth, springy, and just a bit tacky. Note: Your dough will be VERY greasy at the outset if you're kneading by hand, so just be prepared to wash your hands thoroughly afterward!
Lightly grease the inside of a large mixing bowl with oil. Gently shape dough into a ball, then place in prepared bowl. Cover with damp kitchen towel and let rise in a warm place for 50-60 minutes, or until dough is doubled in size.
Punch down the dough and transfer to a cutting board. Cut in half using a knife or bench scrape, then re-shape each piece into a ball. Let rise for an additional 15-20 minutes.
Preheat oven to 350 degrees. Generously grease a 9x5-inch loaf pan and set aside.
Using a rolling pin, gently roll out one dough ball a time into a thick oval. (Original note: "By this time, the dough should be moist and no longer sticky. You probably will not need to flour the surface, but you may want to flour the pin.") Your oval should be 12 inches long and 6 inches wide.
Fold the top 3 inches of the oval down, then fold the bottom 3 inches of the oval up, making a rough square. Starting from the right edge of the square, roll up the dough into a fat log, pick it up and smooth the top with your hands. Place the log in the buttered pan, seam side down and crosswise, nestling it near one end of the pan. Repeat with the other dough ball, placing it near the other end of the pan.
Cover and let rest for an additional 30-40 minutes, until dough has risen to the height of your loaf pan and your dough logs are meeting in the center. Brush tops with milk, then bake in preheated oven for 35-40 minutes, or until tops are golden brown.
Allow bread to cool in pan for 10 minutes, then remove to wire rack and cool for an additional hour. (Don't cut your bread too soon, or it will lose its fluffy air bubbles!)
Cut, enjoy, and scream with delight: "It's so fluffy, I'm gonna DIE!"
Ala
Want more details about this and other recipes? Check out more here!
Go
Comments
  • Montnan Montnan on Dec 18, 2020

    Why make the 2 dough logs instead of just making all the dough into one?

    • Ala Ala on Dec 20, 2020

      Hi Montnan! It's just the way Japanese Milk Bread is usually styled--it makes it more fun to pull the soft bread apart. But you can certainly bake it up as one loaf if preferred!

  • Sheila N George Yates Sheila N George Yates on Dec 20, 2022

    Will this work at high altitude? I live at five thousand feet and I've yet to find a recipe that works. Angel food cake is also a disaster.

    • Bus49638425 Bus49638425 on Jan 25, 2024

      I'd check for your area there is online place to look it up. I hope this helps as I am not the author of this recipe. Best wishes

Next