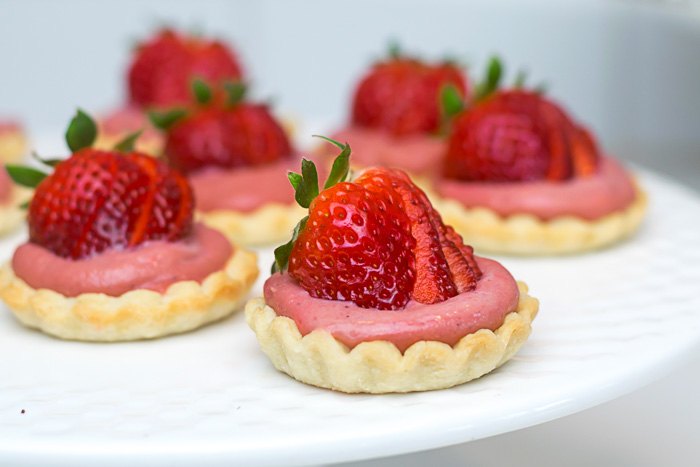
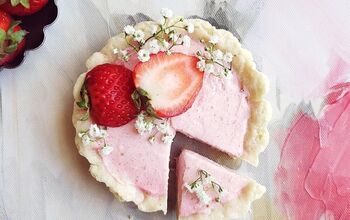
231 Views
Strawberry Tartlets
by
Lynn @ Nourish and Nestle
(IC: blogger)
30 mini tarts
50 min
Make the components of this strawberry tartlet recipe ahead of time for a special, yet quick dessert. And with a mini strawberry tart, you get the benefit of satisfying your sweet tooth without the guilt of a big dessert! 😉
I’ve said it before; I am all about mini desserts! My sweet tooth is assuaged without the guilt of a large treat. When a little bit of a post-dinner sweet is combined with the ease of this make-ahead dessert, then it is an even greater win!
These strawberry tartlets have three simple components:
- The simple, sugar-cookie-like mini-tart shells can be made ahead and even frozen if need be.
- This fresh strawberry curd can be made ahead and frozen.
- Fresh strawberries to top your mini strawberry tarts.
Make the tarts ahead of time, for easy filling when needed.
Make 3 cuts into a strawberry, from bottom until almost to the stem. Then fan out the sections to place on top of your tartlet.
Strawberry Tartlets
Recipe details
Ingredients
- 1 1/4 cup all-purpose flour
- 1/3 cup granulated sugar
- Pinch of salt
- 1 stick of very cold butter
- 1 egg yolk
- 2 tablespoons ice-cold water
- 1 teaspoon vanilla extract
- One recipe of Strawberry Curd
- Fresh Strawberries for Garnish
Instructions
- Cut the butter into 1/2 inch (ish) pieces and put back in the freezer.
- Combine egg yolk, ice water, and vanilla extract and keep cold
- Combine flour, sugar, and salt in the bowl of a food processor or in a large bowl.
- If using a food processor, add the butter all at once and pulse to combine. You will want it to look like coarse cornmeal with the larger butter pieces no bigger than a pea. If not using a food processor, using a pastry cutter or 2 knives, cut the butter into the flour mixture until it resembles coarse cornmeal with the larger butter pieces no bigger than a pea.
- Add the egg mixture. If using a food processor, combine just until the dough starts to pull together and you can squeeze the dough together and it holds. If by hand, mix with a fork until the dough starts to pull together and you can squeeze the dough together and it holds.
- Divide the dough between two sheets of plastic wrap. Form into disks, wrap in plastic wrap, and refrigerate for a least 30 minutes.
- Preheat oven to 350°
- Remove one disk at a time and roll out on a lightly floured surface, re-dusting your rolling pin and the surface of your dough just as needed to prevent sticking.
- Roll to 1/8" thickness
- Using a knife, biscuit cutter, or cookie cutter, cut dough 1/2" to 1" wider in diameter than the diameter of your mini-tart pan.
- Grease pan if needed.
- Transfer by spatula to your tart pan and gently push down into your tartlet pans.
- Optional: add dried beans to the uncooked dough to prevent any bubbling.
- Bake for 10 minutes, checking after 8 for browning.
- Let cool in pans.
- Once cool, transfer to an airtight container until ready to be filled and enjoyed.
- Your baked mini-tart shells will keep in the refrigerator for up to 5 days and in the freezer for a month.
Want more details about this and other recipes? Check out more here!
Published March 28th, 2021 6:59 PM
Comments
Share your thoughts, or ask a question!
Wow! These look delicious!