Baked Coconut Chicken Tenders

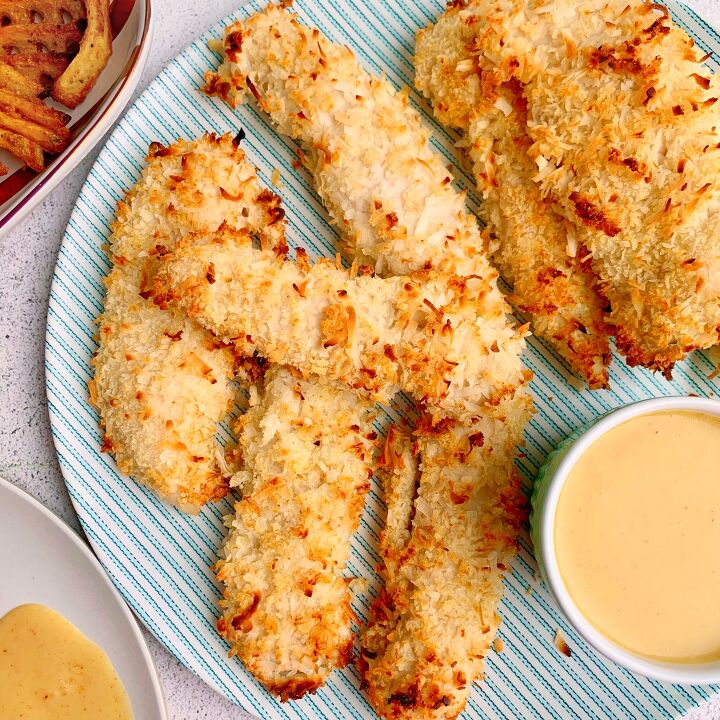
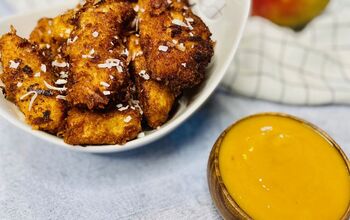
Today, we’re making Baked Coconut Chicken Tenders.
These chicken tendies are coconut through and through. If you’re a coconut hater, keep on scrolling; and see you next week. But if you LOVE coconut like me, this one is for you!
We’ll start with the marinade for our chicken. We’re going to soak our chicken overnight in a creamy bath of coconut milk, rice vinegar, and a little salt. Essentially, this is the coconutty version of marinating chicken in buttermilk overnight. The rice vinegar is going to add that “souring” element to the coconut milk that we’d experience from a dairy buttermilk. It also helps with tenderizing the chicken so that it stays moist and juicy while it cooks. And, the salt makes sure the chicken is seasoned from the inside out. This marinade is one of those “the longer it sets, the better it gets” kind of deals. Letting the chicken soak overnight is ideal, but you could get away with letting it marinate for as little as 4-6 hours.
After the chicken has a chance to marinate, it’s time to bread it and bake it. The cool thing about using a thick coconut milk for the marinade is that we don’t need egg or flour to help our breading mixture stick to our chicken. It’s thick enough to help the breading hang on tight. To coat the chicken, we simply need some panko breadcrumbs and some unsweetened coconut flakes. We don’t even need any additional seasoning, because the chicken soaked up all that flavor from its marinade. It’s as simple as taking the tenders one at a time out of the marinade, shaking off any excess liquid, and dredging the chicken right in the coconut/breadcrumb mix. So easy! Though you could skip this step, I like to give the coconut flakes a rough chop before I mix them with the panko to break them down into slightly smaller pieces. Stray flakes of coconut that stick out a little on the chicken tend to burn faster in the oven. So, chopping it down a bit helps to eliminate some of that.
When it’s time to bake, we’re going to arrange our chicken on a baking rack over a sheet pan. This helps airflow get under the chicken while it bakes so the bottoms have a chance to crisp up without having to flip the chicken halfway through the cooking process. We’re also going to give the top side of the chicken a little spritz of coconut oil cooking spray to aide with that crisping factor too. You could also use olive oil cooking spray, and that will help darken the final color just a smidge.
Now, what are chicken tenders without a sauce? While the chicken bakes, we’re going to mix up a super quick hot honey mustard sauce. We need a little mayo, some dijon mustard, a splash of rice vinegar, a pinch of cayenne, and some hot honey. Mix it all together, and done! Here’s the thing about this sauce, it’s perfectly sweet and savory like your standard honey mustard sauce. But then, you get a little tingle of heat on the back of your tongue from the hot honey and the cayenne. It’s not a spicy sauce, at all. Just that little whisper of heat to perfectly balance out all of the sweet things happening with this chicken.
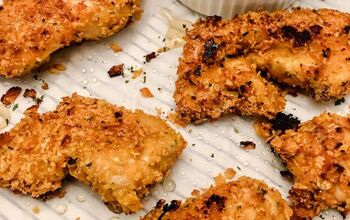
When it’s time to eat…WOW. This chicken is sooooo goooood. It’s light and delicate. But, it’s popping with flavor. It’s perfectly savory on the inside and perfectly sweet on the outside. Then, we have the hot honey mustard which adds a surprising kick. You can eat these tenders and dip as is on their own. You can throw them in a wrap with some lettuce. Or, you can serve them as your protein in a salad. The dip is thin enough that it can double as your salad dressing.
Don’t you love it when I give you options?!?!
Ok, everyone (coconut haters included)…back to the comfort food on Monday. So, stay tuned!
In the meantime, enjoy! And, let’s eat!
Baked Coconut Chicken Tenders
Recipe details
Ingredients
For the Coconut Chicken Tenders
- 1 cup full fat coconut milk
- 1 tbsp rice vinegar
- ½ tbsp salt
- 1 lb chicken tenders
- 1 cup unsweetened shredded coconut
- ¾ cup panko breadcrumbs
- coconut or olive oil cooking spray
For the Hot Honey Mustard
- ¼ cup mayonnaise
- 2 tbsp dijon mustard
- 2 tbsp hot honey (I used Mike's)
- ½ tbsp rice vinegar
- 1/8 tsp cayenne pepper
Instructions
- Marinate the Chicken: To a mixing bowl, add coconut milk, ½ tbsp rice vinegar, and salt. Stir to combine. Place the chicken into the mixture, and cover the bowl with plastic wrap. Refrigerate overnight (or minimum 6 hours).
- Bake the Chicken: Preheat oven to 400 degrees. Line a baking sheet with aluminum foil. Spray a baking rack generously with cooking spray, and place on top of the baking sheet. Set aside.
- Place shredded coconut on a cutting board, and run your knife through it a few times to slightly chop it into smaller pieces. Add chopped coconut to a shallow bowl along with the panko, and toss to combine. Using tongs, remove one piece of chicken from the coconut milk, letting the excess liquid drip off. Place the chicken in the coconut mix, and coat the chicken in the breading, pressing gently to adhere. Place the chicken on prepared baking rack. Repeat with remaining chicken. Gently spritz the tops of the chicken with cooking spray. Bake for 18-22 minutes until the internal temperature of the chicken reaches 165 degrees.
- Meanwhile, make the Hot Honey Mustard: To a small mixing bowl, add mayonnaise, dijon, hot honey, ½ tbsp rice vinegar, and cayenne. Whisk well to combine.
- Serve coconut chicken with hot honey mustard dip, and enjoy!
Tips
- *I like to chop the shredded coconut a little extra to help keep the longer pieces from burning or getting overdone in the oven. You could skip this step, but I think it makes a difference.
- *It's important to use full fat coconut milk for this marinade. Lite coconut milk is a little too thin to handle the job.
- *Soaking the chicken overnight in the coconut milk mixture helps to keep the chicken moist and flavorful while it bakes. The chicken can rest in this marinade anywhere from 6-24 hours, but the longer the better!
- *The baking rack on the baking sheet is a necessary step to the process. It helps the warm air of the oven circulate around the chicken so it gets crisp on both sides! And, we don't have to stop and flip them and risk losing some of our breading!! Don't forget to spray the rack with cooking spray though, or it will stick.
- *The aluminum foil on the baking sheet is just for easy cleanup.




Comments
Share your thoughts, or ask a question!
My chicken didn't brown, I think I'll fry it in a shallow pan 1st next t time, but the sauce OMG it was fantastic...I now need to cook this again tomorrow, but with salad not vege :)
Can this be done in an airfryer?