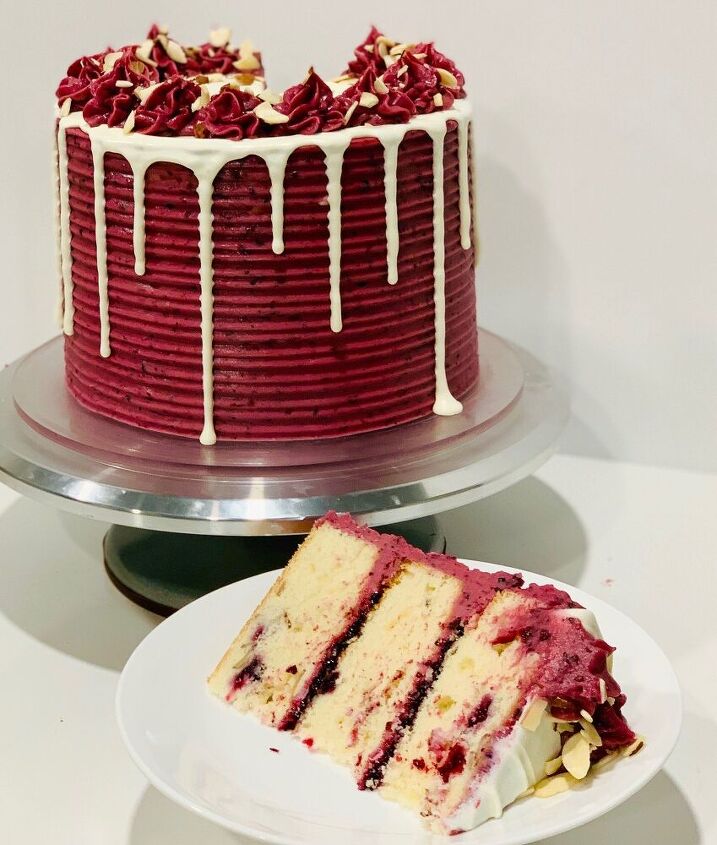
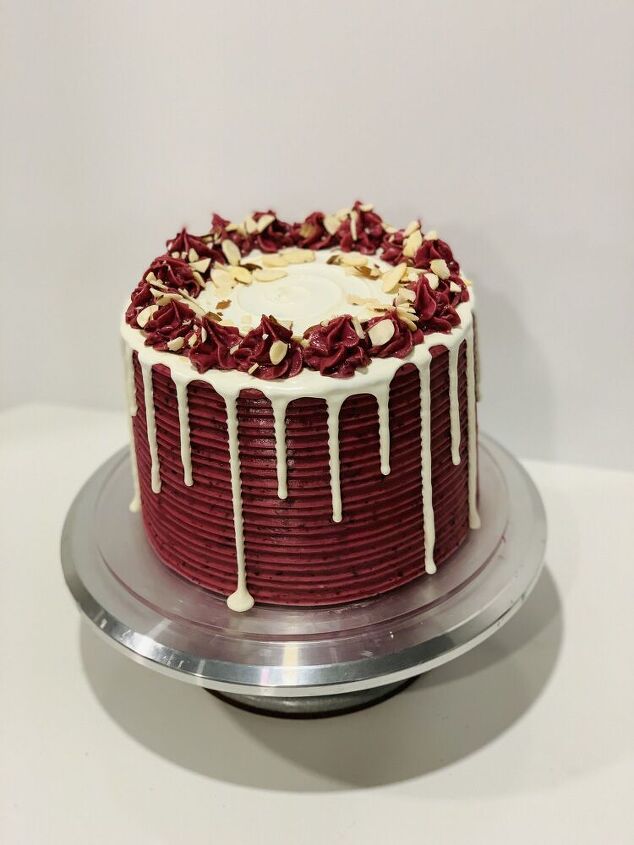
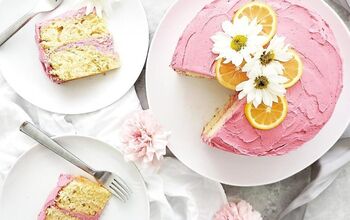
Almond Blackberry Cake

Intensive Cake Unit
by Intensive Cake Unit
1 8 inch cake
2 hr 5 min

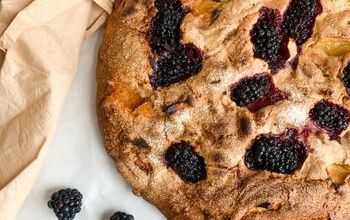
There is a huge line of wild blackberry bushes just down the street from my house, and every summer about August they’re covered in blackberries – I’ve been soo spoiled the last few years! I can usually pick enough to have a pretty good stock on hand in the freezer through at least spring if not summer of the next year. This year I encountered a problem I’d never had before – stocking up the freezer with meals before our new baby’s arrival, I ran myself out of freezer space and needed to get through some blackberries! I made a blackberry reduction from one quart bag and added it to a batch of cream cheese buttercream frosting – and we were off! The same reduction makes an AMAZING filling, and paired with slivered almonds and almond extract – oh man. So good! This cake basically vaporized the day I took my tester in to my coworkers ;) Recipe below!

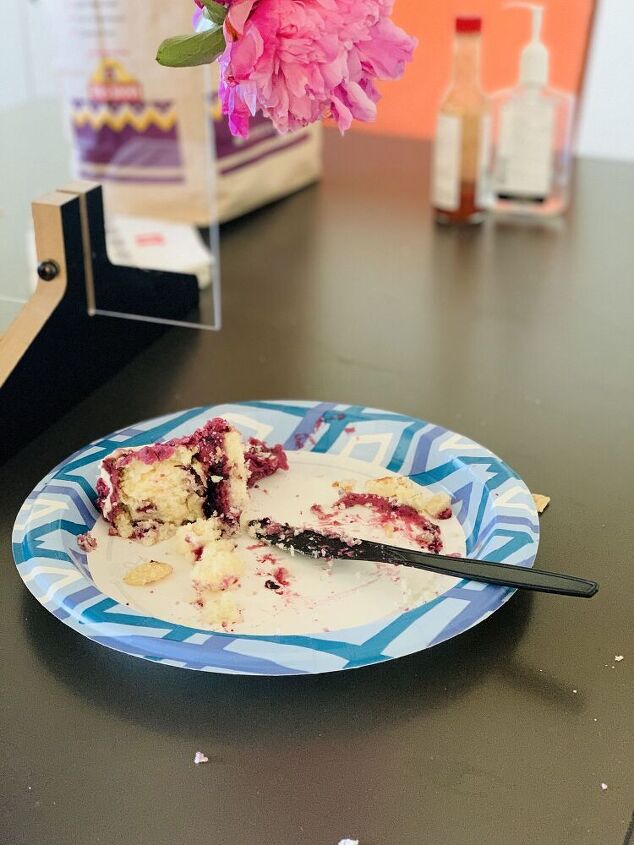
All that was left the day I took my tester cake in to work!

Recipe details
  • 1  8 inch cake
  • Prep time: 90 Minutes Cook time: 35 Minutes Total time: 2 hr 5 min
Show Nutrition Info
Hide Nutrition Info
Ingredients
Cake
  • 3 1/4 cup all-purpose flour
  • 3 cup granulated sugar
  • 2 1/2 teaspoon baking powder
  • 1 teaspoon salt
  • 1 cup unsalted butter (or 2 sticks) room temperature
  • 2 teaspoons almond extract
  • 5 eggs 
  • 1 1/2 cups buttermilk, room temperature (or buttermilk powder with water is an option if you can’t find liquid buttermilk at your grocery store!)
  • 1/8 cup (28 grams) vegetable oil
  • 1 cup chopped blackberries (fresh or frozen; I used frozen) ¾ cup sliced almonds
Blackberry Reduction
  • 3 ½ cups blackberries (fresh or frozen; I used frozen)
  • ½ cup brown sugar
Frosting + Decorating
  • 8 oz (one package) cream cheese, softened
  • 16 Tablespoons (two sticks) butter, softened
  • 6-7 cups powdered sugar
  • 1 cup blackberry reduction (see above)
  • 1-2 teaspoons milk (if needed)
  • 1 teaspoon clear vanilla extract
  • 1/4 t. salt (if using unsalted butter)
  • - 1 8- or 10 -inch cardboard cake circle (I prefer Wilton’s center-punched circles) or an 8” acrylic cake disc (I started using these so I wouldn’t waste so many cake circles!)
  • - Large piping bag & tip – I use this set of reusable large bags & tips more than almost any of my others! A smaller bag with the Wilton 1M tip would work great as well.
  • - Remaining blackberry reduction (see above)
  • - Additional ¾ cup sliced almonds
  • - Cake leveler, cake turntable, large offset spatula, and pastry cutter/bench scraper - not all 100% necessary but incredibly helpful! (Here’s a link to the cake turntable I use)
  • - Textured cake comb (if you want to texture the frosting) – I used a comb from this set by Wilton!
  • - 4 oz white candy melts (I use the Wilton brand Bright White) + 2 Tablespoons heavy whipping cream (the brand I usually use comes from Costco and is incredibly thick; you may need a bit less depending on the thickness of your heavy cream!) + ½ teaspoon almond extract (for cake drip)
Instructions
Cake
Preheat oven to 350°F. Line four 7 inch pans (for taller layers) or three 8-inch cake pans with parchment rounds, and /or grease with non-stick or baker’s floured cooking spray.
Mix together all dry ingredients (flour, baking powder, sugar, and salt) in a stand mixer with a paddle until fully combined.
Mix chunks of room-temperature butter slowly into the dry mix, on a low speed. Continue to mix until no large chunks of butter remain, and the mixture becomes crumbly.
Pour in eggs and mix on low until just incorporated. Mix in the buttermilk in two parts on low speed. Add in flavor and oil, and mix at a low speed until fully incorporated. Scrape down the sides of the bowl with a spatula, then beat on medium speed for about 30 seconds. Fold in blackberries and sliced almonds.
Divide batter evenly between the prepared cake pans (I find a kitchen scale helpful for this part). This guarantees your layers will bake to be the same height.
Bake for 35-37 minutes if using 8-inch pans, or 37-38 minutes for 7-inch cake pans (or until a toothpick comes out clean). Allow cake layers to cool for 10-15 minutes on a wire cooling rack before removing from pans – it helps to run an offset spatula or knife around the perimeter of the pan first. Cool completely before frosting. Set in the fridge or freezer to accelerate the cooling process if desired.
Once the layers have fully cooled, the caramelized bits can be trimmed from the sides / top of the cake using a serrated knife if desired. Be sure the layers are completely cooled or chilled before trimming. If you try to trim the layers while they’re still warm, they will crumble apart.
This is a great time to make your blackberry reduction and frosting!
Blackberry Reduction
Place both ingredients in a medium saucepan over low heat. Stir for 2-3 minutes, pressing berries with the back of your spoon until they begin to soften and break down into a sauce. Continue to cook uncovered over low heat, stirring occasionally, for 50-60 minutes until reduction appears darker and thicker. Cool to room temperature before using. (Note: you can strain this reduction to remove the blackberry seeds; I find the process painful and time-consuming and don’t mind the texture of seeds in the filling or frosting. Up to you!)
Frosting + Decorating
Beat together softened cream cheese and butter; slowly add in powdered sugar alternating with blackberry reduction until frosting reaches desired consistency. Add vanilla and salt if needed and beat until well combined.
Once your cakes are cool, level them (if needed/desired). This can be done with a cake leveler or a large serrated knife and a ruler. Place a smear of frosting on your cake circle (to keep the cake from sliding while you decorate it) and center your first cake layer in the center of the circle. Spread the layer with frosting, and spread a layer of blackberry reduction over the frosting. Add the next layer on top. Repeat the process with your remaining cake layers.
Now you're ready to crumb-coat . If you're unfamiliar with crumb-coating, it's just what it sounds like – spreading a thin layer of frosting over the entire outside of the cake to keep crumbs out of your final layer. I usually do this with my large offset spatula. Once your crumb coat has set (this takes about 5-10 minutes in the fridge), add your final layer of frosting and smooth. I like to start with an offset spatula and bench scraper for this part, and I textured the cake with this Wilton cake comb. Once your cake is covered, place it into the fridge or freezer to set the frosting.
This recipe is very similar to my white chocolate ganache recipe – you’re basically using candy melts instead of white chocolate to make a very similar drip ganache. Place heavy cream and candy melts in a microwave-safe bowl, and microwave on 50% power in 30-second intervals until smooth, stirring in between.
I usually find a squeeze bottle or piping bag work the best for this ganache, but I’ve used a spoon for similar drips before.
When your candy melt mix has cooled to a moderate temperature – it should feel slightly warm and still be fairly liquid – transfer it to a squeeze bottle or piping or small ziplock bag. A spoon will work if you don’t have either of those; I’ve just found spoons to be a little bit more difficult to work with.
Slowly drizzle ganache around the upper edge of your cake, pausing every inch or so to let more fall in a drip down the side of the cake. Cover the cake top with the remaining drip mix and smooth. Return cake to the fridge or freezer to set the drips.
Transfer your remaining frosting to a piping bag fitted with the tip of your choice, and add swirls of frosting around the upper edge of the cake. Sprinkle with a few more sliced almonds – and you’re done! Snap a picture, and serve and enjoy!
Tips
  • Make this recipe? Let me know how it went - or find me on Pinterest or on Instagram and tag @IntensiveCakeUnit in your photo!
Intensive Cake Unit
Want more details about this and other recipes? Check out more here!
Go
Comments
  • Me Me on Jun 30, 2021

    That is one beautiful cake. Almost to pretty to eat, ( well almost) I just know it will be delicious. Thank you for sharing.

  • Gretta A Gore Gretta A Gore on Jul 02, 2021

    Can it be made with blueberries or strawberries?

    • Intensive Cake Unit Intensive Cake Unit on Jul 02, 2021

      I've only ever done raspberries and blackberries; I think you could try it with blueberries or strawberries but you may have to simmer your reduction longer to get the same reduction consistency since they have a bit higher water content. But I think it would work!

Next