


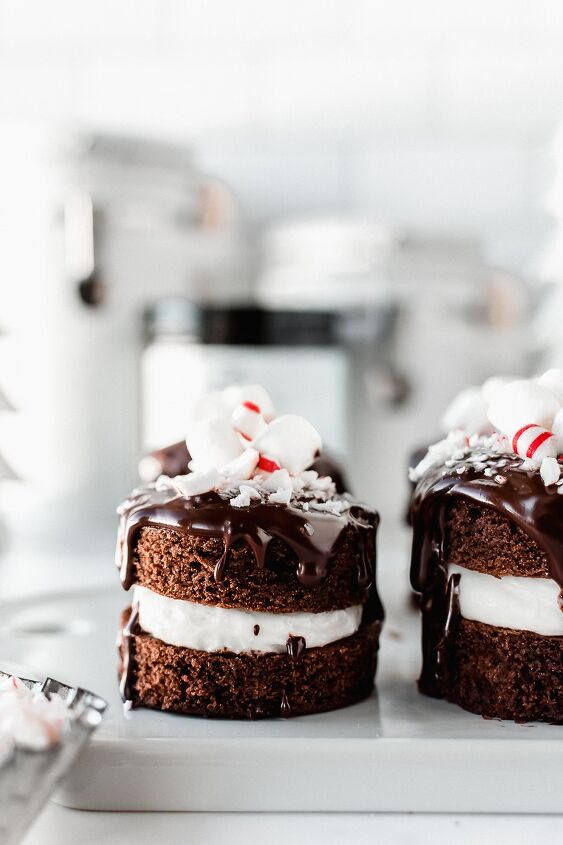
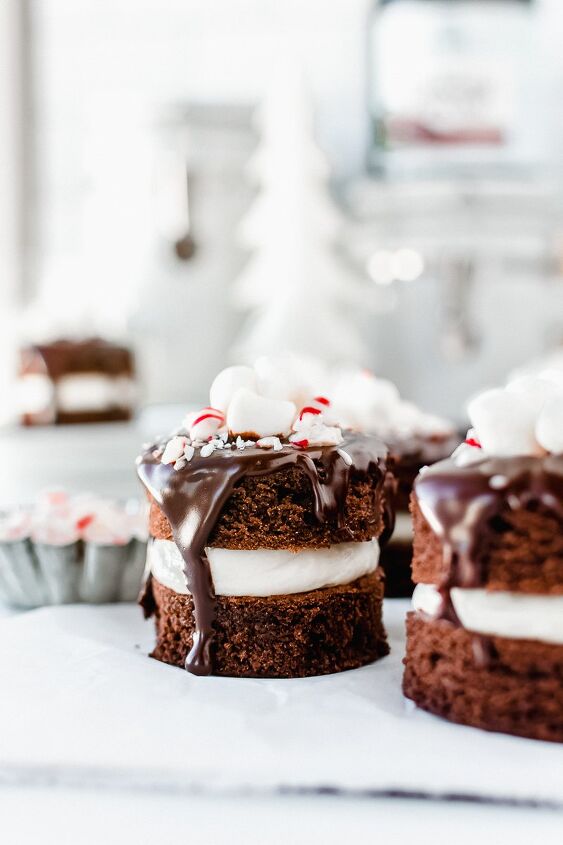
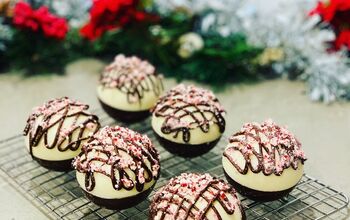
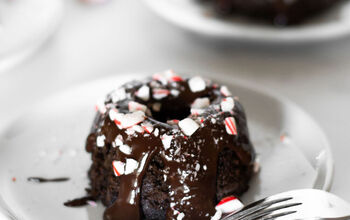
Mini Peppermint Hot Cocoa Cakes

These mini peppermint hot cocoa cakes are the perfect little treat to have around for all of your upcoming holiday gatherings! They are easy to assemble and are a fun, individual bite-sized dessert option to serve this Christmas season! Made out of the most decadent chocolate sheet cake recipe - all you'll need to do is cut small circles of cake and assemble them with the marshmallow buttercream filling! Be sure to finish them off with some fun and festive toppings, like mini marshmallows and crushed peppermint candies. Make these for your next Christmas party for one festive, bite-sized treat that all of your friends and family will enjoy!
This post is sponsored by Rodelle. As always, all thoughts and opinions are my own. Thank you for supporting the brands that help make Buckets of Yum possible! This post also contains affiliate links. This means I may earn a commission should you choose to purchase using my link.
What is better than a hot cocoa themed dessert? Nothing, in my opinion! Make it mini and you have yourself one fun little Christmas treat.
These mini peppermint hot cocoa cakes are the perfect Christmas dessert to serve all holiday season long. They are easy to assemble and are extra tiny, making these little hot cocoa cakes the perfect option if you are looking for a dessert that is easy for guests to quickly grab.
Read on for how to make these mini peppermint hot cocoa cakes!
Ingredients Needed for Hot Cocoa Cakes
I’m willing to bet that, with all of the holiday baking going on, you already have a lot of the ingredients needed for these hot cocoa cakes on hand! But there are a few that you may need to pick up from the grocery store or order from Amazon. Trust me, it’s worth it for these
Here is a list of the important ingredients you’ll want to be sure to have, aside from the typical butter, flour, sugar, etc.
- Espresso Powder – TRUST me when I say that adding espresso powder to the chocolate cake portion of this recipe WILL NOT make your cake taste like coffee. I promise! Espresso powder has a magical way of bringing out the deepest, richest, and most chocolatey flavors in any chocolate dessert. If you’re a chocolate lover like me, I’d recommend having this on hand at all times. My favorite is this DeLallo Espresso Powder.
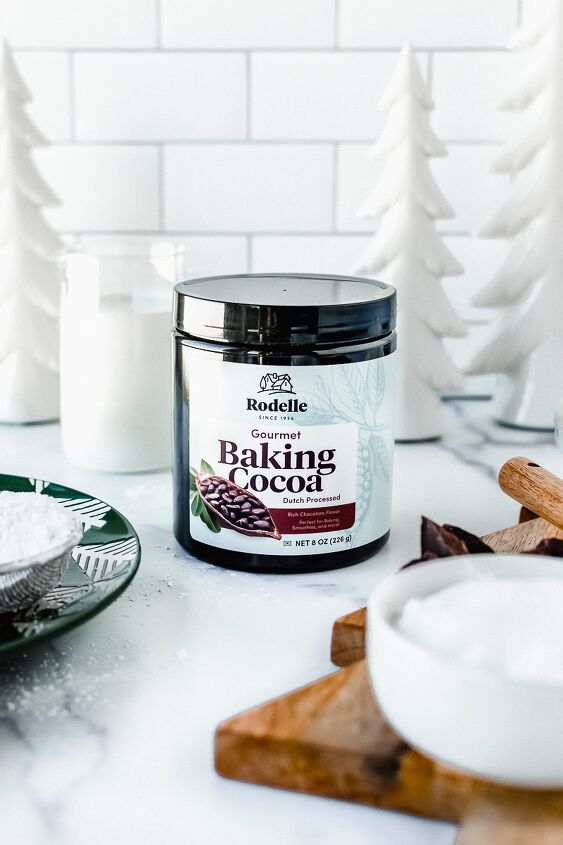
- Dutch Processed Cocoa Powder – This is also KEY to getting a super chocolatey cake! I always recommend Rodelle Gourmet Baking Cocoa – it’s my go-to for rich, chocolate desserts! Rodelle’s baking cocoa is Dutch-processed, meaning it is alkalized to reduce some of the sourness and bitterness of traditional cocoa powder. You’re then left with cocoa that is much darker and richer in flavor. Plus, did you know that Rodelle’s cocoa contains one of the highest levels of cocoa butter on the market? You’ll always get superior chocolate flavor when baking with this cocoa powder, so I highly recommend for all chocolate lovers!
- Buttermilk – Use full-fat buttermilk for an extra moist chocolate cake. If you don’t have buttermilk on hand, you can make your own homemade! Simply measure out 1/2 tablespoon of lemon juice or vinegar and then enough whole milk to create 1/2 cup total. Let it sit for a few minutes and it will begin to curdle. There you have it! Buttermilk.
- Marshmallow Creme – You will need a jar of marshmallow creme to make the marshmallow frosting for the filling on these mini hot cocoa cakes. I just used regular Jet-Puffed Marshmallow Creme for my frosting! The 7 oz. jar is perfect for this recipe.
How to Assemble
Now for the fun part – assembly! Once you have made the sheet cake, frosting, and ganache, these mini-stacked cakes come together super quickly.
Here’s what you’ll need to do:
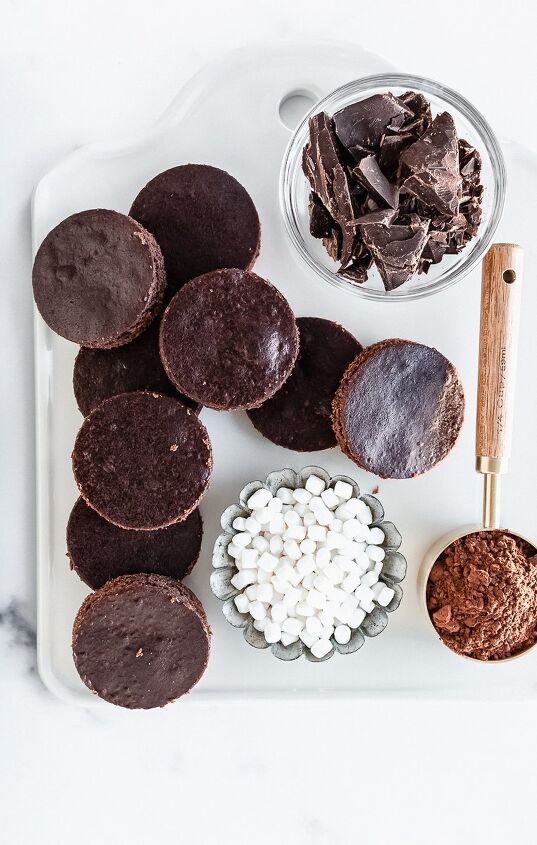
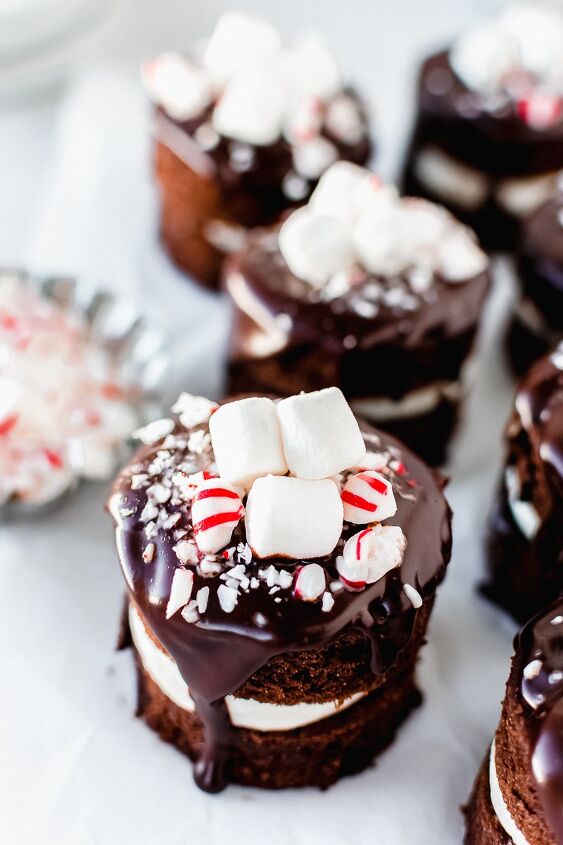
- Make the cake rounds – Using a biscuit cutter (I would recommend a 2.5 inch or 2.75 inch size), cut rounds from the chocolate sheet cake. I really like to save the cake scraps to top ice cream, or even just for snacking!
- Add the marshmallow frosting filling – Using a piping bag, pipe frosting onto one round of chocolate cake. Top with another round and repeat with the remaining cake rounds. Using a larger, round piping tip like this Wilton one is best, but you can always just place frosting in a large, gallon bag and cut a corner off to pipe frosting on!
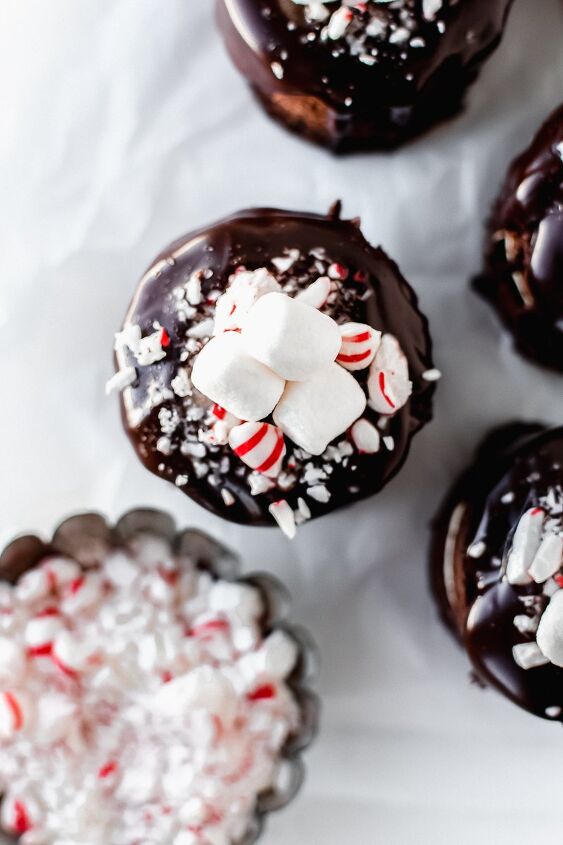
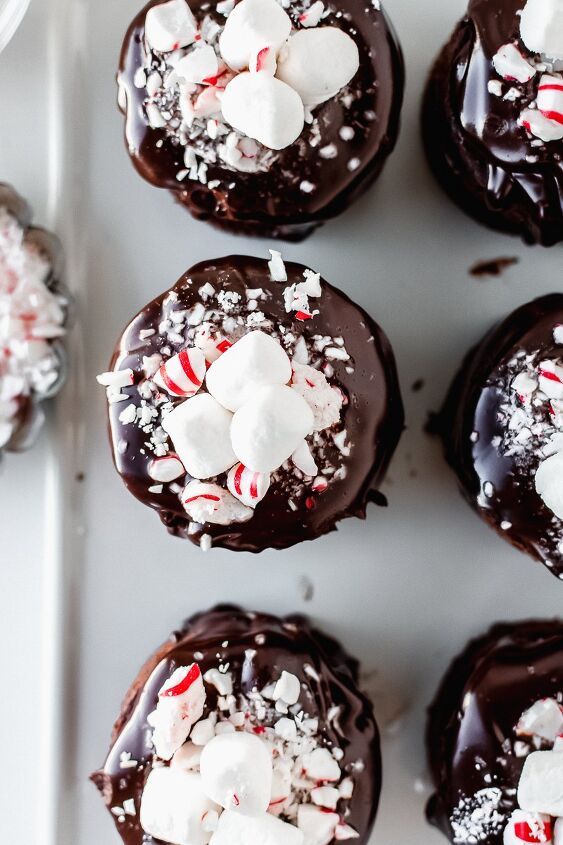
- Top with chocolate ganache – You can use a large ladle or even a glass liquid measuring cup to drizzle the ganache over the tops of the cakes. I topped my cakes with mini marshmallows and crusted peppermint candies, but you could do any kind of toppings that you want! Chocolate sprinkles or chocolate shavings would be a great option as well.
High Altitude Instructions for Hot Cocoa Cake
For reference, I live at 5,800 feet. These adjustments would likely give you the result that you are looking for if you live within a few hundred feet of where I am at. But high-altitude baking can be a lot of trial and error! I would also recommend checking out this guide here.
High Altitude Adjustments
- Flour – increase by 2 tbsp. Additional flour helps to strengthen the structure of the baked good so that it will rise correctly.
- Granulated Sugar – decrease by 1 tbsp. This should hold true at most high elevations. Always decrease your sugars by 1 tbsp. per cup.
- Baking Powder – decrease to 1/4 tsp. You can see this table on King Arthur’s website for how to adjust leavening agents for higher elevations (scroll down a ways to the “Leavening” section on their site). For my elevation, I typically cut all leavening agents in half. This allows for the right chemical reactions to happen between the other ingredients for the perfect rise. If there is too much leavening within the batter, not all of it gets used up (not all of it reacts with the other ingredients). You are then left over with a soapy bitter-tasting baked good due to the excess baking soda or baking powder in the batter.
- Baking Soda – decrease to 1/4 tsp.
- Eggs – use 3 eggs instead of 2. This will keep the baked good from drying out at a higher baking temperature and evaporation rate. If I am baking a cake or cupcakes, I like to add one more egg to increase the liquids in the recipe. This should hold true at most higher elevations, but experiment with it, of course!
- Increase oven temperature to 360° F. Since rising and evaporation proceed more quickly at higher elevations, you will want to use a higher baking temperature to set the structure of the baked goods so that they don’t sink in the middle and dry out on the edges. I recommend starting with increasing the baking temperature stated in the recipe by 10° F – 15° F and go up from there in small increments (all the way up to 25° F increase if needed).
- Decrease baking time by 5 or more minutes. This is because you will be baking at a higher temperature. You don’t want your cake to burn! I usually decrease by 5-8 minutes per 30 minutes of baking time and adjust from there. Keep a close eye on your dessert in the oven while you are experimenting with time and baking temps.
More Christmas Recipes
I hope that you enjoy these mini peppermint hot cocoa cakes this holiday season and for years to come!
As always, be sure to tag me in your photos on Instagram if you make my recipe! I love to see what you are baking.
Mini Peppermint Hot Cocoa Cakes
Recipe details
- 12 mini cakes
- Prep time: 1 Hours Cook time: 25 Minutes Total time: 1 hr 25 min


Comments
Share your thoughts, or ask a question!