


The Best No-Bake Tiramisu Cheesecake Cups (Mini Dessert in Jars)
No matter the time of year, I always keep a couple of no-bake desserts up my sleeve for late-night cravings and special gatherings. These silky No-bake tiramisu cheesecake cups with a dusting of rich cocoa powder are high on my list of favorites right now. Layers of lady finger biscuits soaked in strong coffee and fluffy mascarpone cream create a super dreamy dessert I always get compliments for.
Thank you for reading this post, don't forget to subscribe!
This Italian tiramisu cheesecake cups recipe is perfect for dinner parties, movie nights, birthdays, and even anniversaries. Served in individual cups, it's an easy-to-share twist on classic tiramisu. The first time I made these cheesecake cups, my husband devoured them all, and he loves traditional tiramisu so I'd say they passed the taste test and then some.
For more no-bake dessert ideas, try my RumChata Pudding Shots and Chocolate Mousse Cups. They're just effortless and make great desserts for all your gatherings. Now, let's whip some heavy cream!
Watch the full video tutorial to see how these No-Bake Tiramisu Cheesecake Cups come together step by step. From whipping the mascarpone cream to layering coffee-soaked ladyfingers in mini jars, this easy dessert is simple to follow and perfect for beginners.
These mini tiramisu cheesecakes in serving-size form are a hit with everyone! You'll understand why once you take your first spoonful. They're one of my most popular recipes, and here are a few reasons why:
Quick and easy: Prep and assembly time is only 20 minutes, the fridge does the rest of the work.
Great for beginners: It's an easy dessert recipe anyone can pull off because there's no baking or cooking required.
Versatile: Make it kid-friendly, add cream cheese, or assemble it in a springform pan.
Ideal for any occasion: A no-bake recipe like this one is great for special occasions as well as busy weeknights.
This classic Italian dessert uses super simple ingredients for layers of rich flavor and a velvety texture. Scroll to the bottom of the post for the full recipe with ingredient amounts.

- Brewed espresso: Any strong coffee (even instant coffee) works. It needs to be completely cooled.
- Granulated sugar: This is optional. It makes a sweet coffee base.
- Vanilla extract: I prefer pure extract, but artificial extract is okay as well.
- Mascarpone cheese: Make sure it's softened, not warm or runny to avoid a grainy texture in the mascarpone cream.
- Heavy cream: It must be cold. This is also called "whipping cream". Don't use half-and-half as it won't whip up at all.
- Powdered sugar: Avoid granulated sugar because it will make the whipped cream gritty. It's also called "confectioners' sugar."
- Ladyfinger cookies: You can also find them by the name of "savoiardi." There's no swap for these.
- Unsweetened cocoa powder: Any type of cocoa powder is fine. It's not the same as chocolate milk powder.
See recipe card for quantities.
Assembling these no-bake tiramisu cups is easier than you think. They're one of my favorite recipes for good reason. Scroll to the recipe card at the bottom of the post for full instructions.

- Step 1: In a small bowl, stir together the cooled coffee, sugar, and vanilla until combined. Set aside.

2. Step 2: In a medium bowl, whip the heavy cream until stiff peaks form. Set aside.

3. Step 3: In a large bowl, beat the mascarpone until smooth. Add the powdered sugar and vanilla, then mix until fully combined and creamy.

4. Step 4: Gently fold the whipped cream into the mascarpone mixture in batches until smooth and light. Do not overmix.

5. Step 5: Briefly dip the ladyfinger pieces into the coffee mixture (just a quick dip), then arrange them in an even layer at the bottom of each cup.

6. Step 6: Pipe or spoon a layer of the mascarpone cream over the ladyfingers. Repeat the layers once more with ladyfingers followed by cream.
One thing I love about no-bake desserts is that it's easy to get creative with them. Try these easy variations next time you're craving some no-bake tiramisu:
Make it kid-friendly: Since I don't want my daughter running around the house late into the night just because she had too much coffee (in a dessert), I let her make kid-friendly batches by swapping the coffee in the recipe for hot cocoa that's been completely cooled. It adds an extra chocolatey flavor most kids love.
Use instant pudding: We love instant vanilla pudding and sometimes I add ½-1 cup of it to the mascarpone mixture for extra richness and flavor.
Go vegan: You must swap the heavy cream for full-fat coconut cream and use vegan-friendly mascarpone cheese and ladyfinger cookies for a plant-based version.
Add cream cheese: Swap half of the mascarpone for room temperature cream cheese. It adds lovely tang and makes it taste much more like cheesecake.
Make a large batch: While serving cups are great for sharing, they're not always great for quick assembly. When you're expecting large crowds, sometimes the easiest thing to do is assemble this delicious dessert in a 6x6 or 8x8 baking pan. Don't forget to double the recipe and make several batches or simply use a larger pan.

Since these velvety no-bake cheesecake cups with coffee-soaked ladyfingers are so easy to whip up, they make an appearance in our kitchen at least once a month. Here are our favorite ways to enjoy them:
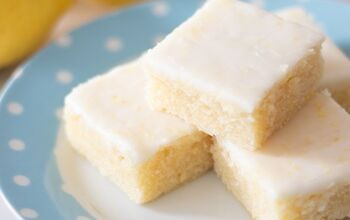
- Set on a dessert table along with my Easy Mexican Chocolate Cake and Lemon Sugar Cookie Bars.
- Prepare for special, romantic evenings along with White Chocolate Covered Strawberries and Brownie Batter Dip.
- Bring to dinner parties along with my Cookies & Creme Popcorn and Caramel Apple Pretzel Bites.
- Enjoy with a cup of coffee or tea for an afternoon treat.
This easy tiramisu no-bake cheesecake recipe is even better the next day! Here's how to keep it fresh for later:
Fridge
Cover tightly and refrigerate for up to 3 days. For best texture, enjoy within the first 24–48 hours. Keep it away from strong-smelling foods like onions to prevent the transfer of odors. Avoid freezing, as it can affect the cream's texture.

Even if you're new to tiramisu, these simple tips and tricks help you make sure this layered cream-and-biscuit coffee dessert will turn out perfect:
Temperature matters: Use cold heavy cream for proper whipping. Warm cream won’t hold peaks well. Beat the cream to stiff peaks so the layers hold their shape nicely in the cups.
Use Cool Whip: If you've never had much luck with successfully whipping cream, you can always skip it and use Cool Whip instead. Like with whipped cream, you also need to fold it in gently to keep the mixture light and airy.
Not hot coffee: The coffee you use needs to be completely cooled. It can't be even a little bit warm, otherwise it'll warm the whipped cream mixture and "melt" it.
Don't over-soak: Dip the ladyfingers very quickly (1–2 seconds max) in coffee, otherwise they'll be soggy and collapse the layers.
Let it sit: The longer you let the tiramisu cups chill in the fridge, the better flavor and structure they'll have when served. Chill for at least 4 hours or (ideally) overnight.
Add toppings: Dark chocolate shavings, chopped pistachios, and crushed wafer rolls add great flavor and texture. Add your favorite.
Here's what other no-bake dessert and coffee-lovers are asking about these tiramisu cups with fluffy mascarpone-vanilla cream:
Sure, as long as it's completely cooled, you can use decaf coffee to prepare this recipe.
Can I make it in advance?Absolutely! In fact, it tastes even better the next day.
Can I make it vegan?It's possible. Swap the heavy cream for full-fat coconut cream, and make sure to use vegan mascarpone and ladyfingers for a vegan-version.

Looking for other recipes like this? Try these:


Best Patriotic Monster Cookies Recipe (Easy Peanut Butter Cookies)
These are my favorite dishes to serve with this No-Bake Tiramisu Cheesecake Cups recipe:


Easy Tuna Chickpea Salad Sandwich Recipe (Protein-Packed Lunch)
These velvety no-bake tiramisu cheesecake cups are our favorite ways to add a little flair to our gatherings without spending too much time in the kitchen. Share your creations on Instagram with @HungryWhisk, and don’t forget to subscribe for more easy desert ideas and recipe cards!

The Best No-Bake Tiramisu Cheesecake Cups (Mini Dessert in Jars)
Recipe details
- 4 Cups
- Prep time: 20 Minutes Cook time: 0 Minutes Total time: 20 min


Comments
Share your thoughts, or ask a question!