


Gluten-Free Monkey Bread
These soft, pillowy bites are the ideal breakfast for Christmas morning!
What Is Monkey Bread?
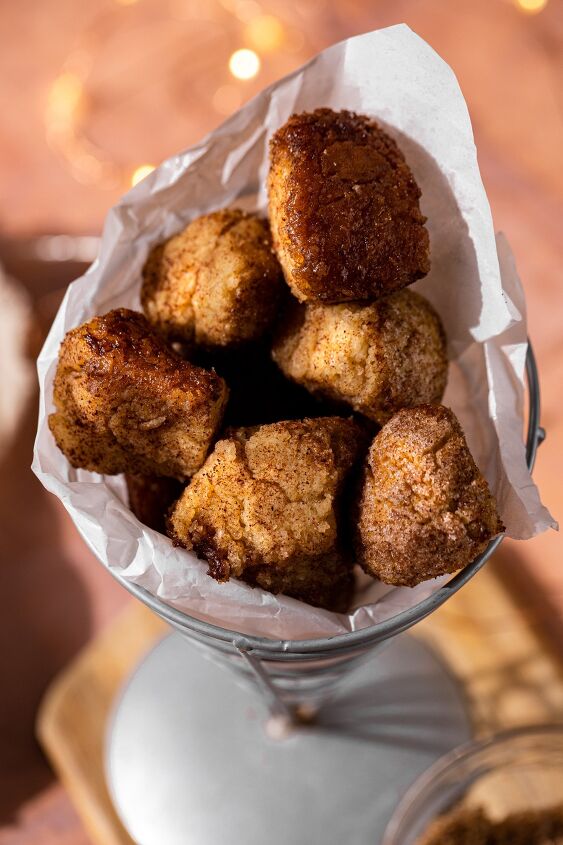
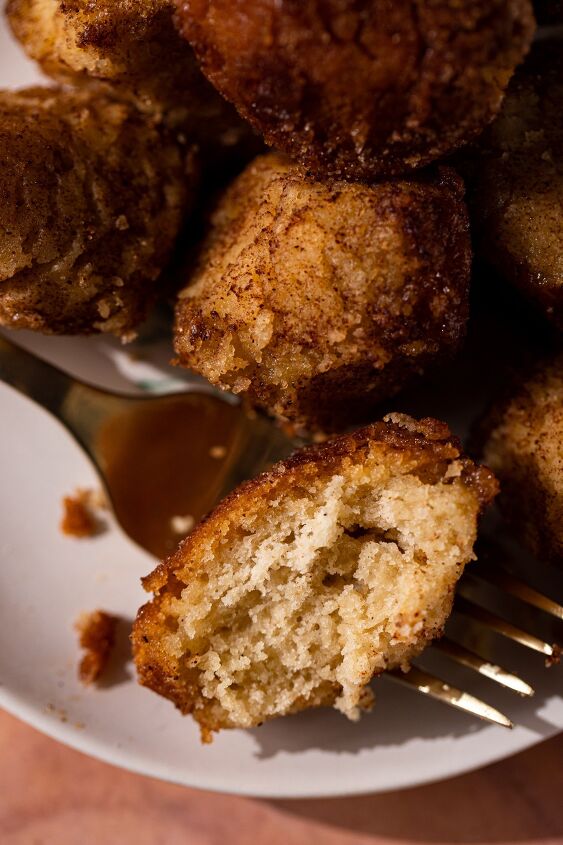
Up until a few years ago, I had never heard of monkey bread. But once I was introduced to it, I was hooked! These pillowy bites are coated in a cinnamon sugar mixture before being baked and glazed with (you guessed it) more sugar! Monkey bread is often baked in a bundt cake or loaf pan. The great thing about this dessert though is that it can be pulled apart and enjoyed by many! The individual bite-size pieces make it the perfect pastry to share.
Monkey bread is often served at festivals and fairs; however, many families have made a tradition out of serving this sticky pastry for the holidays. And for a good reason! This soft baked dough has all the classic flavors of cinnamon rolls with half the work. Unlike cinnamon rolls, there is no rolling or cutting dough into perfect spirals. In my opinion, monkey bread is a much more kid-friendly option when it comes to baking breakfast treats.
How Do We Make It Gluten-Free?
When it came to creating this recipe, there were multiple test runs. Gluten-free baking can be difficult. Ultimately, I developed a gluten-free dough that yielded the perfect monkey bread. There are many factors that go into the perfect gluten-free dough. The most important ones are…
- The Flour: If you’ve visited my blog before (thank you!), then you know I’m a huge fan of Bob’s Red Mill Gluten-Free 1-to-1 Baking Flour. However, that ending up not being the right flour for this recipe. Because baking flour has less protein, it is better for lighter baked goods. While this monkey bread is light, it needed a denser flour as a foundation. In the end, the King Arthur Gluten-Free All-Purpose Flour got the job done! This all purpose flour uses a blend of gluten-free flours that provides a beautiful texture!
- Xanthin Gum: Because the King Arthur flour does not have xanthin gum in it, a little bit was added to the dry ingredients. Xanthin gum is an effective thickening agent, emulsifier and stabilizer that prevents ingredients from separating.
- Psyllium Husk Powder: When it comes to gluten-free bread baking, this is a MUST. Psyllium Husk Powder acts as a binder; which, gives gluten-free bread dough the elasticity and flexibility that it needs to actually knead and shape without breaking.
- Yeast: For this recipe, I used Fleischmann’s Active Dry Yeast. This yeast is commonly used to make breads and has a richer flavor.
Active Dry Yeast vs. Other Yeast Forms
There are many different types of yeast that you can use. From rapid to instant, it can be confusing figuring out which kind you need. So, let’s talk about why active dry yeast was used for this recipe as opposed to others.
Active dry yeast is great for sweet bread recipes. As opposed to rapid rise instant yeast; which, is typically used to make pizza dough or quick bread recipes. The main benefit of rapid rise yeast is that it cuts down on the rise time. However, you end up tasting the difference in flavor as yeast plays a huge part in the final flavor profile.
As for fresh active yeast, this type of yeast is traditionally used for classic bread recipes. It’s used to leaven breads and requires two rises. This means that it not only takes longer to active; but also isn’t the best option for non-bread recipes. Because this recipe isn’t a bread and has a sweet flavor profile, active dry yeast is the best option.
Even if you have the perfect yeast for your recipe, if it doesn’t activate properly then it won’t work. While the instructions to activating yeast are straight forward, a small change can cause the yeast to fail to activate. The most important aspect here is ensuring your liquid is the right temperature. We’ll be using almond milk for this recipe. When the yeast is activated, the milk should be between 105-115 degrees Fahrenheit.
Before we can add the yeast, we first need the sugar. Yeast is a living organism and needs food to thrive. The sugar here provides the perfect food for the yeast to thrive off of and activate. Start by pouring the almond milk into a glass container and warming it in the microwave for roughly 40 seconds. Once warm, add the tablespoon of cane sugar. Stir to dissolve the sugar in the milk, then allow the milk to cool to the desired temperature. Add the packet of active dry yeast (2 1/4 teaspoons) and stir. Now, allow the yeast to sit and activate for at least eight to ten minutes.
How will I know when the yeast has activated? As the yeast sits, it’ll begin to bubble and look like foam. It will take a few minutes for the yeast to begin working, so don’t fret if it doesn’t look foamy at first. Activated yeast will also have a wheat-like aroma to it, or smell like beer. After 10 minutes, the active dry yeast should be fully activated! If it hasn’t, it may be because the milk was not warm enough or too hot. If the milk is too hot, it’ll kill the yeast. That being said, the yeast also needs a warm environment to thrive in. If you’re unsure about what temperature the milk is, using a thermometer is the easiest way to avoid a problem with the yeast.
The Perfect Gluten-Free Dough
Now that we’ve covered the basics of the dough ingredients, let’s get into the logistics of making gluten-free dough. I like to start with the yeast first, as it needs ten minutes to activate, and then combine the dry ingredients while it’s sitting. Combine the dry ingredients in a bowl and mix together before pouring into a stand mixer. For this recipe, a stand mixer will save you from having to knead the dough yourself; furthermore, it cuts down on time! Add the dry ingredients to the bowl of the stand mixer, then make a crater for the other ingredients.
Pour the sugar, eggs, butter and apple cider vinegar into the crater of the dry ingredients. Then, use the paddle attachment on medium speed to combine the ingredients for one minute. Once the yeast has activated, you can pour that into the bowl and continue mixing for five minutes. Once a soft dough has formed, switch the paddle attachment for the dough hook. This attachment will knead the dough and help it form. Use the dough hook for five minutes on medium-low speed until the dough has thickened. The dough should be slightly sticky but not overly so.
The next step is allowing the dough to proof. Proofing is when the dough rests and rises before being baked. But first, there’s a few tricks to ensuring the dough will rise properly. First, wash a medium-sized glass bowl under warm water. This will ensure the bowl is warm, but not too hot when the dough is transferred. Then, grease the bowl to prevent the dough from sticking to it. Finally, transfer the dough from the stand mixer to the prepared bowl. Cover the bowl with a tea towel or plastic wrap, then place in a warm area for the dough to rise for one hour.
Making the Monkey Bread
After one hour, the dough should have doubled in size. Before you begin working on the dough, first dust a workspace (cutting board or marble counter) with flour to prevent the dough from sticking. Then, oil your hands to transfer the dough to the prepared work space. If the dough is sticking to your hands, add one tablespoon at a time to the dough. Work the added flour into the dough until it no longer sticks. Just make sure that you’re not adding too much flour at once or the dough will become too thick. Once the dough has the desired consistency and has been knead, it’s time to divide the dough into balls. Use a small, greased cookie scoop to create 30-40 dough balls. Then, roll each ball in your hands to create a similar sized ball.
Now, it’s time for the fun part! Melt one stick of unsalted butter in a shallow bowl. All the melted butter to reach room temperature. Before dipping the dough balls in the melted butter, take a silicone brush and grease a bundt cake pan with the butter. Then, combine cane sugar, brown sugar, cinnamon and a pinch of salt in another shallow bowl. Mix together before sprinkling over the creased bundt pan. After the pan is prepared, it’s the doughs turn. Take each piece of dough and dip it in the butter before rolling it in the cinnamon sugar mixture. Once coated, place the uncooked pieces of monkey bread in the bundt pan. Repeat this process with all the dough until each piece is coated and in the pan.
After, you should have some leftover butter and cinnamon sugar. Combine the two and drizzle over the dough balls in the bundt pan. Before we can bake the monkey bread, it needs to rise for another thirty minutes. Cover the pan again with a tea towel or plastic wrap. Place in a warm area to rise for thirty minutes. During the last ten minutes of the proofing, preheat the oven to 350 degrees Fahrenheit. Finally, after the dough has risen, place the bundt pan in the oven to bake for 30-35 minutes.
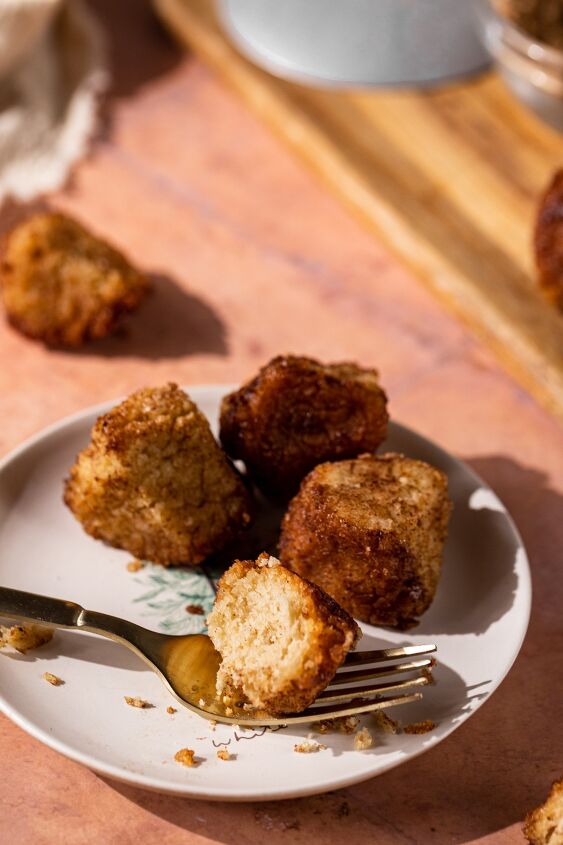
Once the monkey bread has baked, allow it to cool in the pan for 15 minutes. Then, run a clean knife along the edges to gently release it. To take the monkey bread out of the pan, place a plate on top of the bundt pan. Carefully grab the pan with oven bits on and holding the pan and plate, turn the bundt pan over. The monkey bread should release with no problem!
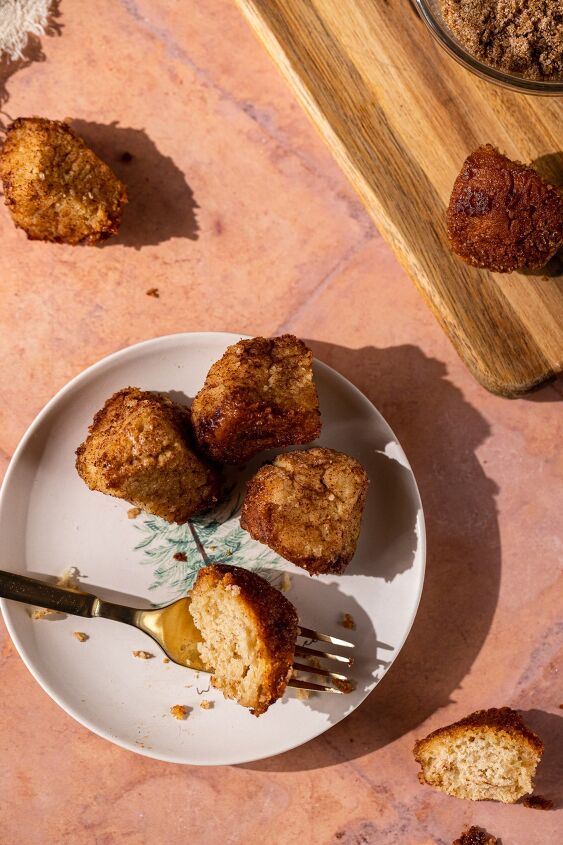
Before the monkey bread can be devoured, there is one final step…. the glaze! In a small bowl, sift in a cup of powdered sugar. Then, add a splash of milk and dash of vanilla extract. Whisk the ingredients together until smooth. Finally, pour the glaze over the monkey bread. Now you can dig in!
If you have any leftovers, store the monkey bread in an air tight container. To warm up the monkey bread, add a tablespoon of milk for every five pieces. Then heat in the microwave for thirty seconds. This will ensure that the monkey bread stays soft and doesn’t harden in the microwave!
Gluten-Free Monkey Bread
Recipe details
- 8 servings
- Prep time: 20 Minutes Cook time: 35 Minutes Total time: 55 min


Comments
Share your thoughts, or ask a question!