


Traditional Holiday Brisket
Secure a fan favorite with this recipe. This beef brisket is the perfect main course to serve for a family gathering, no matter the holiday!
An Easy Main Course for Holiday Dinners
Needless to say, there’s a lot of stress around the holidays. Whether it’s Christmas, Hanukkah, or Easter, the last thing you need to worry about is cooking a strenuous main dish for dinner. This year, skip the hassle and opt for brisket. This beef brisket is an easy recipe that won’t disappoint. The tender beef yields a rich, deep flavor that melts in your mouth and pairs beautifully with roasted vegetables.
This straight forward recipe will save you time in the kitchen and cut your stress in half. Plus, did I mention that any leftovers are great in sandwiches? Just check out my Brisket Sliders here!
Holiday History Featuring the Brisket
Besides Thanksgiving, many holidays have roughly three to five main courses that are the most popular amongst American families. For example, many American families serve roasted rack of lamb or glazed ham for Easter. Prime rib is often served for Christmas. So, where does the beef brisket fall in this holiday line up?
Beef briskets are most commonly served during Hanukkah, but are also associated with Passover and Rosh Hashanah. Brisket is a popular Ashkenazi Jewish dish; furthermore, it has been eaten by Ashkenazi Jews in Europe for special occasions since around the 1700’s. It became popular because it was traditionally a cheaper cut of meat. Today it is considered one of the most iconic Jewish main courses. Beef brisket is typically served alongside latkes, kugel or matzo ball soup.
While the beef brisket is most prominent amongst Jewish holidays, it also commonly made on Christmas and Easter. Smoked Easter briskets are becoming increasingly popular, especially in Texas and other parts of the south.
Preparation: Step One
Beef briskets are surprisingly easy to make and the most work comes in the preparation; however, even that is very simple. First, we’ll start with preparing the baking dish. The beef brisket will be cooked in the oven, so what’s in the dish will impact the flavors of the brisket. To enhance the brisket, we’ll be using a mirepoix blend. Mirepoix comes from French cooking and refers to a blend of finely diced carrots, onions, and celery. A mirepoix is commonly used as the start to many soups or stews. Here, we will be using the mirepoix as the foundation for the beef. To make the mirepoix, combine a cup of diced carrots, onions, and celery to a greased, nine by thirteen inch baking dish.
You may be asking, “Doesn’t the mirepoix need to be cooked first?” The vegetables are not being cooked before being added to the baking dish because they will roast in the oven alongside the brisket. Once the vegetables are evenly dispersed across the bottom of the backing dish, add three to five fresh sprigs of thyme and two bay leaves. The thyme and bay leaves are wonderful herbs that will help flavor the brisket!
Next, it’s time to prepare the beef. This recipe calls for a two and a half pound cut of beef brisket. Start by allowing the meat to rest at room temperature. Meat should always come to room temperature before cooking because it will 1) help it cook evenly 2) allow the meat to come back to its original Tate and aroma. Once the brisket reaches room temperature, pat dry with paper towels before seasoning. This will give the brisket a deep brown, flavorful crust; which is crucial for a good sear.
Next, combine two teaspoons of pepper, two teaspoons of dried oregano, and one teaspoon of salt in a small bowl. Sprinkle evenly over both sides of the brisket, and use your hands to rub the seasonings into the meat. Then, add a tablespoon of olive oil to a large skillet over medium heat. Once hot, use tongs to place the brisket in the pan. It should immediately sizzle, if it doesn’t then the pan isn’t hot enough. Remove the meat and allow the oil to heat further to ensure a proper sear. Sear each side of the brisket until a brown crust forms, roughly 30 to 45 seconds. Searing the brisket before cooking it will lock in moisture and help ensure a tender, melt in your mouth end result.
Once seared, carefully place the brisket on top of the vegetables in the baking dish. Make sure the brisket is placed fat side up. This will help add moisture to the meat because when the fat heats it will begin to melt. This process is known as rendering and an important aspect of cooking brisket properly. The rendered fat will trickle down the meat, which will make the beef more tender with crispy edges.

The Sauce
One of the keys to making a perfect beef brisket is ensuring it doesn’t dry out. Traditionally, ketchup or a tomato based sauce is spread over the brisket to aid in this effort. This recipe uses the later to create a simple recipe that is as delicious as it is easy to make!
Start by adding a tablespoon of olive oil to the same skillet that the brisket was seared in. Over medium-low heat, cook down three cloves of grated or minced garlic. Stir the garlic for two minutes to prevent it from burning. Then, add a fourth cup of your favorite dry red wine. Personally, I like to use a Merlot but cook’s choice! Use the spatula to deglaze the pan by scraping any burnt pieces from the pan. Do not toss these pieces though as they are full of flavor and crucial to the sauce. Then, add half a cup of vegetable stock and two tablespoons of tomato paste. Whisk in the tomato paste until smooth.
Next, add two teaspoons of horseradish and one teaspoon of Worcestershire sauce. Horseradish is very pungent. Its strong and spicy taste will add a bit of heat to the sauce, while the Worcestershire sauce is tangy, sweet and salty. The two will balance each other out; furthermore, the end result will be a flavorful sauce with a bite to it and beautiful umami flavor. Once the two condiments are well integrated in the sauce, remove from heat. Pour the sauce over the brisket and into the baking dish. It should almost cover the vegetables and the brisket should have a good layer of sauce over the top. If it doesn’t, use a silicone brush to distribute the sauce over the top. Finally, cover the baking dish with a lid before cooking.
Slow & Steady Wins the Race
Brisket is a tough cut of meat, so when it comes to cooking it’s important to use the slow-and-low method. This refers to both the time and temperature at which you cook the brisket. The long, slow cooking will leave the brisket with that famous fall apart consistency. While you can cook the brisket fast, you won’t be left with that same consistency. The meat will still be very tough and may not be as flavorful.
You can cook a brisket in the oven anywhere from 225 degrees Fahrenheit to 300 degrees. As for cook time, it depends on the size of the brisket. A simple rule of thumb is to allot roughly 60-75 minutes per pound when cooking at 250 degrees Fahrenheit. For this recipe, we’ll be cooking the brisket for a little under three hours at 250 degrees Fahrenheit. The brisket will be covered for the majority of the cooking. Once the brisket has been in the oven for two hours, you can uncover it and do a temperature check. If the temperature is between 145-160 degrees Fahrenheit, leave the meat uncovered and cook for another 20 minutes. The beef brisket should be cooked between 180-200 degrees Fahrenheit. Anymore, and you risk overcooking the brisket.
Using a good meat thermometer is crucial when cooking brisket because it is easy to overcook it. To make sure you get a good read, insert the meat thermometer into the thickest part of the brisket when checking the temperature.
Cooling and Slicing
Rest time is equally as important to ensuring the best results. Once the beef brisket is cooked between 180-200 degrees Fahrenheit, remove from the oven and allow to cool for roughly 20 minutes. Allowing the brisket to sit during this time yields the best texture by allowing the juices to reabsorb and redistribute. When the brisket is cooking, the juices constrict and cutting the meat too soon will cause the liquids to release. This will result in a very dry cut of meat.
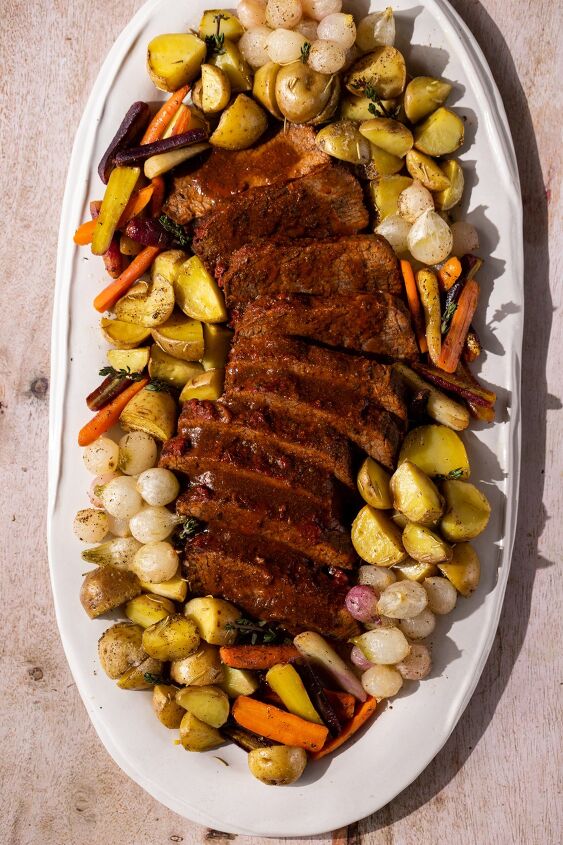
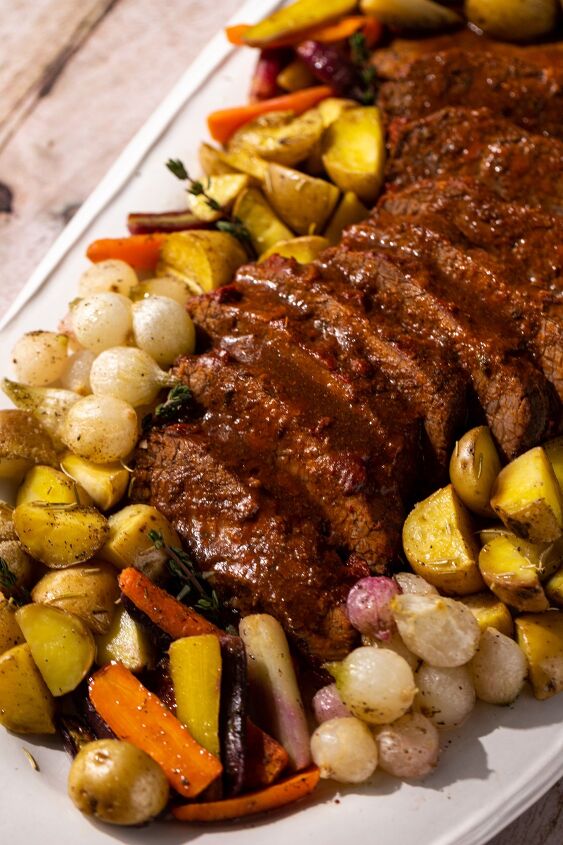
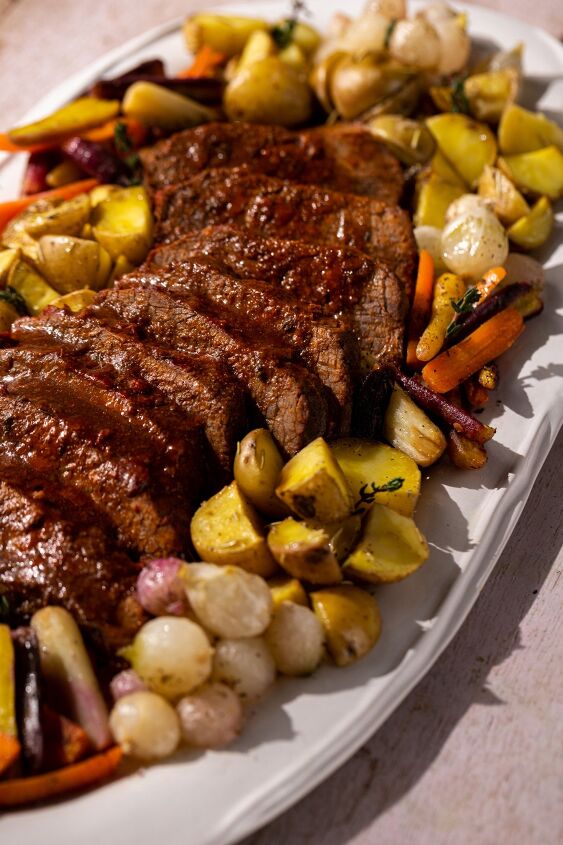
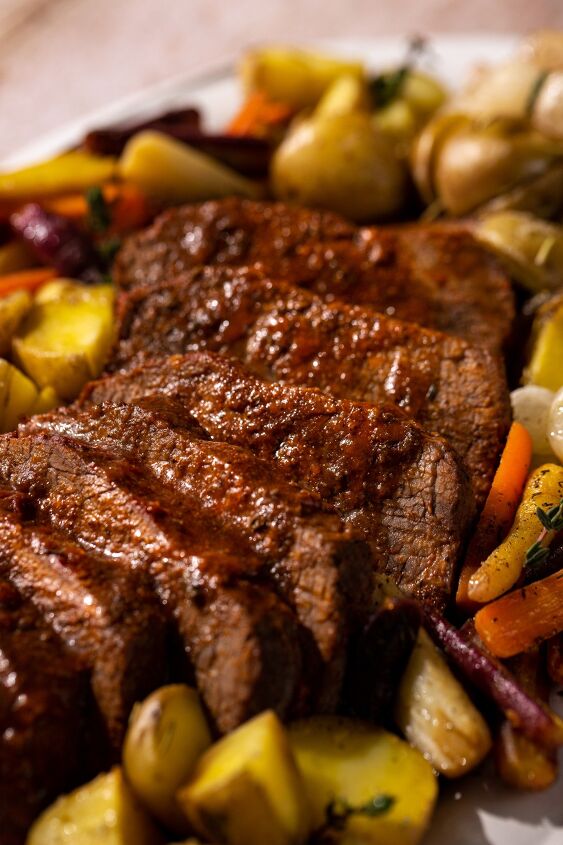
After resting for the allowed time, the brisket is ready to be cut. Place the brisket on a cutting board and use a sharp knife to first remove any pieces of fat. Then, slice against the grain of the meat. Slicing this way makes the beef more tender and easier to chew.
Brisket drippings are often used to make a flavorful gravy. We can apply the same method here with the leftover vegetables and sauce that the brisket was cooked in. The sole purpose of the mirepoix in the baking dish was to be used as a flavoring element. The vegetables are not meant to be served alongside the brisket. Instead, you can take the vegetables and remaining sauce from the dish and blend it. This creates a flavorful sauce that can be serve with the brisket. Just remember to discard of the thyme sprigs and bay leaves before blending.
Traditional Holiday Brisket
Recipe details
- 8 servings
- Prep time: 30 Minutes Cook time: 3 Hours Total time: 3 hr 30 min


Comments
Share your thoughts, or ask a question!
is it better to freeze the meat before smoking or after? I have a very big pace of meat, and I cut it into 6 nice briskets should i freeze the ones I am not cooking or cook them all and freeze the others after they have been cooked ?