


How To Make Cake Popsicles (Cakesicles)
This post may contain affiliate links. Please read my Privacy Policy for details.
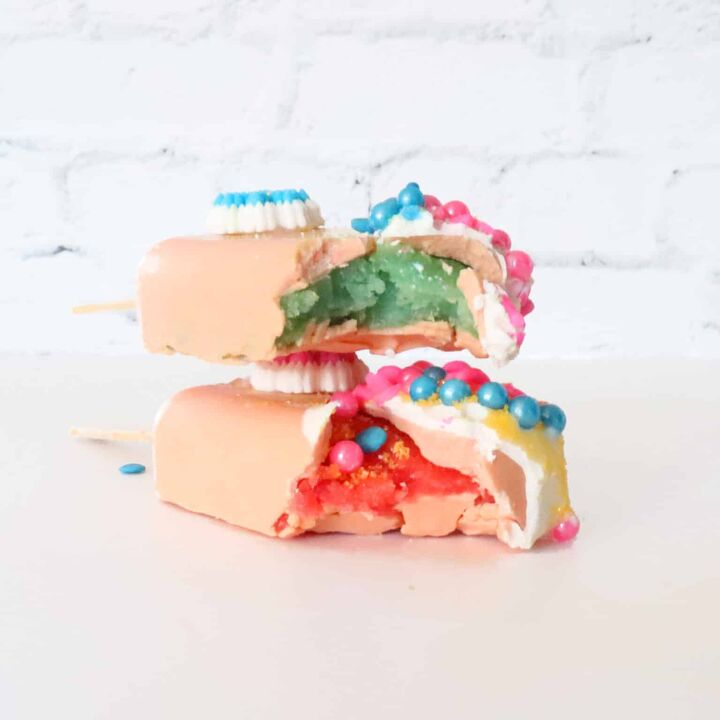
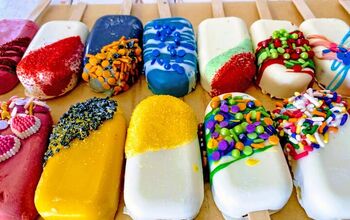
Cake popsicles, also known as cakesicles, are a larger version of cake pops. Make them at home using a cakesicle silicone mold, cake, and chocolate shell. They are excellent party favors that bring a WOW factor to every celebration!
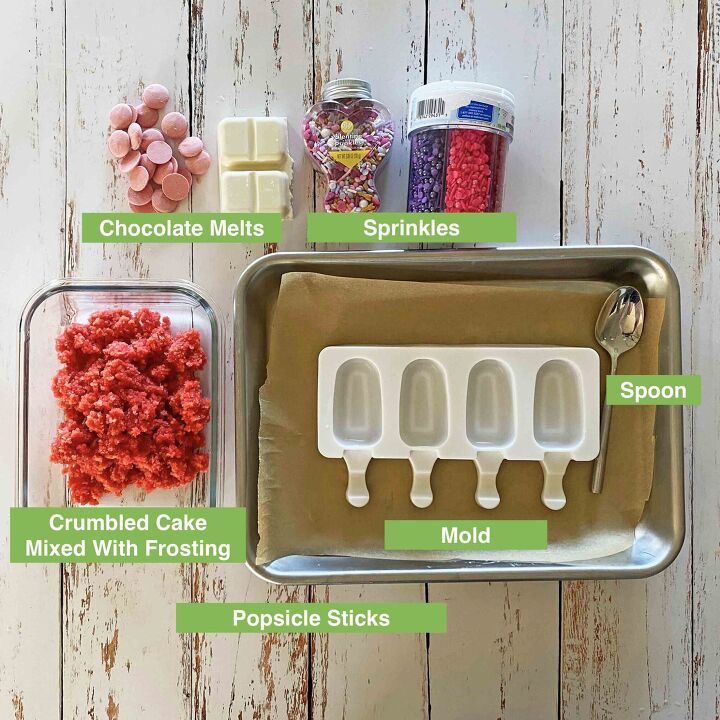
Frosting
Frosting bonds the cake crumbles together. As a general rule, use two tablespoons of frosting for one box of cake crumbles (the equivalent of a 13x9 baking sheet).
Adjust the amount of frosting according to the amount of cake crumbles you are using. (Hint: A little goes a long way)
A quick and easy option is a glaze. Mix ½ cup of powdered sugar and one tablespoon of milk. Work it into the crumbs a small amount at a time. If too much is added, the cakesicle will become oily.
Shell
There are four basic shell options. Melt it in a microwave-safe bowl or a double boiler whenever making a shell. Set to 50% power when using a microwave and cook for 30-second intervals, then stir. Repeat until the chocolate is 80% melted.
- Candy Shell - Purchased melts are easy and can come in a variety of colors. By using color melts, the color will always remain consistent. I prefer this when making a large batch of the same color. These can be purchased at Party City, Walmart, Amazo, or most hobby stores.
- Chocolate Melts - Ghiradelli chocolate melts come in white, milk and dark chocolate and are available at most grocery stores. Ghiradelli melts are made with cocoa butter and have shine similar to tempering. Use food coloring with white chocolate to achieve a specific color. (These are my preferred choice!)
- Ganache - Creates a sinfully rich coating. Click here for my ganache recipe.
- Homemade Shell - Create a hard shell from scratch by combining 2 cups of baking chips and ⅔rds cup coconut oil (lower to ½ cup if using white chocolate). Microwave at 50% power in 30 second intervals. Stir between each interval. Repeat until smooth.
Coating Methods
Below are the three most common ways to coat a cakesicle mold. Always be sure to thoroughly coat the inside of the mold and the sides of the mold.
Painting - Using a pastry brush, spoon, or even your fingers, move the melted chocolate within the mold cavity. Hold up and if any light shines through, add more chocolate to create an even coat.
Swirl - Run hot water over the mold and dry thoroughly. Place melted chocolate in each cavity. Using your hands, tilt the mold around, allowing the chocolate to coat thoroughly.
Dipping - Tightly pack cake into the mold, insert the stick and freeze for 30 minutes. Melt chocolate in a deep container. Unmold the cake and dip it into the chocolate. Allow excess chocolate to drip off, then place the cake popsicle on a baking rack or parchment paper-lined baking sheet to dry.
Steps to Make Cakesicles
Time needed: 1 hour.
How to Make Cakesicles
- Prepare the CakeStart with a baked cake or cake scrapes. Break the cake into crumbs using your hands or a mixer. Add two tablespoons of frosting and mix until the cake becomes a ball.
- Note: This recipe assumes two tablespoons of frosting to one box of cake (the equivalent of a 9x13 sheet cake). If using a different amount of cake, adjust the frosting accordingly.
- Prepare the Cake MoldMelt the chocolate according to the directions. Coat 1 - 2 tablespoons of chocolate in each cavity. Insert a popsicle stick into each cavity and move it around a few times. This step creates space, so the shell does not crack later. Place mold in the freezer for 5 to 10 minutes.
- Two Coat Option: Thinly coat each cavity and insert the popsicle stick. Place the mold in the freezer for 5 - 10 minutes. Repeat with a second coat.
- Set CakeFill each cavity with ⅓ of the cake. Move the popsicle stick halfway into the cavity and pack in the rest of the cake. Use your fingers to pack the cake tightly and ensure no air gaps. Leave a 1/16 space between the top of the mold and the cake.
- Set The BackPlace about a tablespoon of chocolate on top of the cake, forming the back of the popsicle. Spread chocolate evenly. Use an offset spatula or icing smoother to scrape off any excess chocolate. Freeze for 5 - 10 minutes.
- UnmoldingGently unfold the cakesicles one at a time. I recommend starting at the top of each sicle and gently pulling the mold back. Then gently push the popsicle stick through the cavity to release the cakesicle.
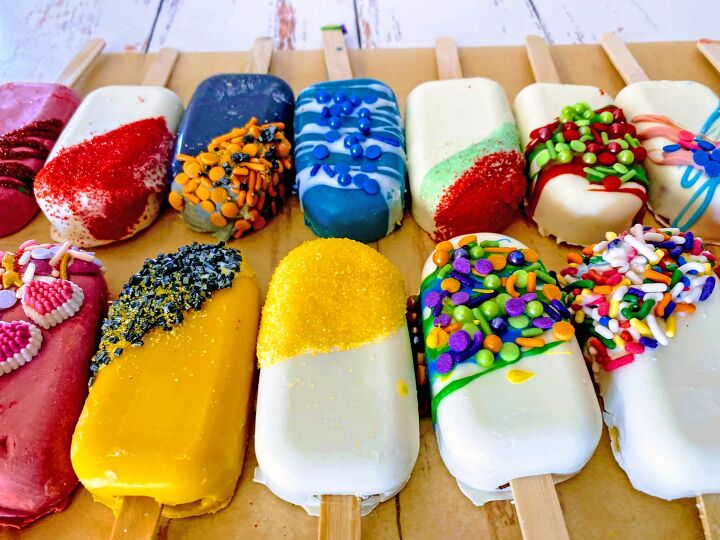
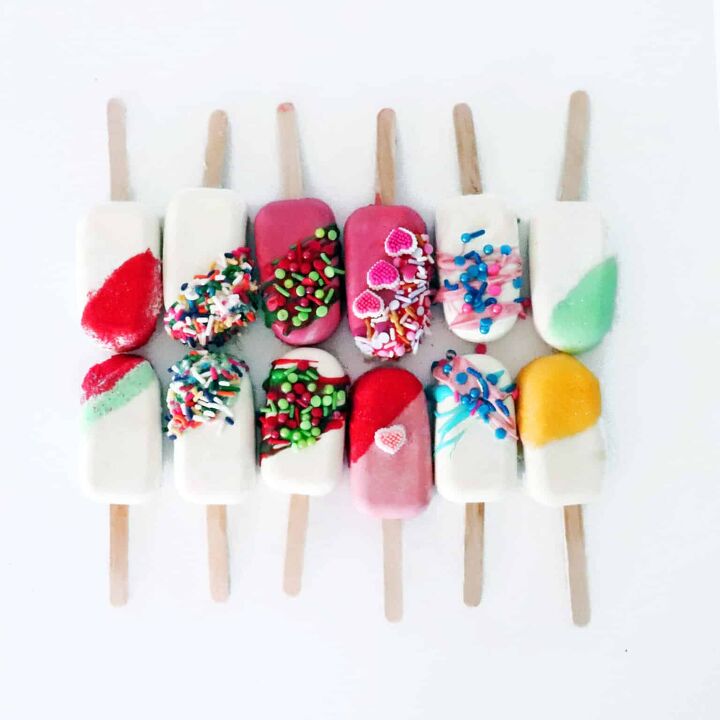
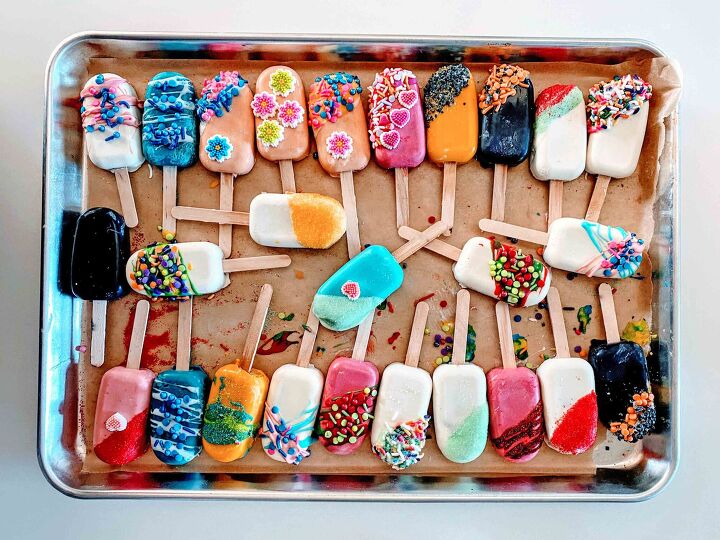
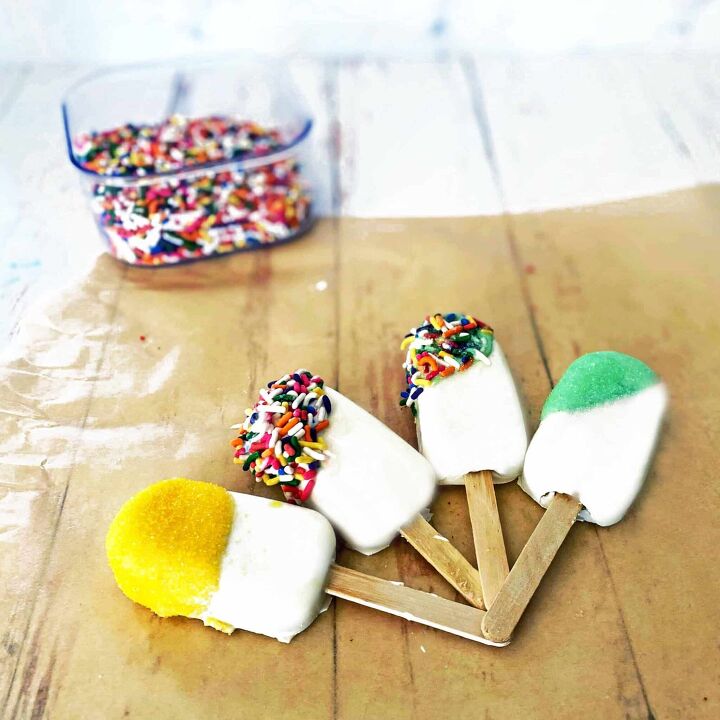
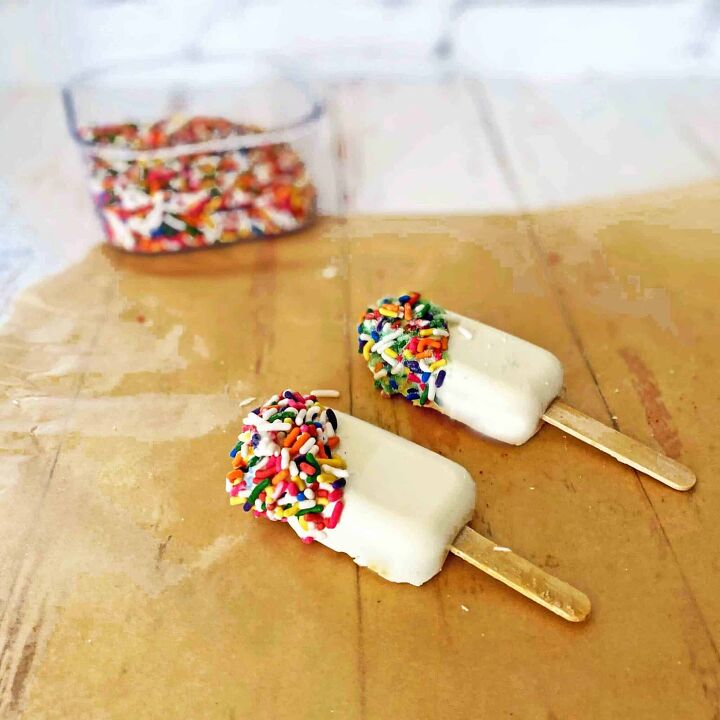
- DecorateDecorate as desired. I recommend melted chocolate and sprinkles. For a professional look use a piping bag with a small round tip (Wilton round
Decorations
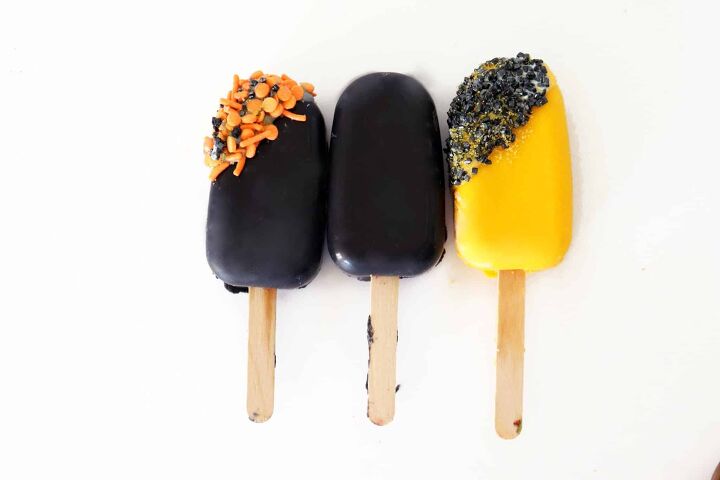
The decoration options are endless. The least expensive decorations I have found are at Walmart or Target. The largest selection is at craft stores.
I like to have fun with decorations and not take them too seriously. This relaxed style is fun to create and serve. My favorite decoration is to dip the cake popsicle into melted chocolate at an angle and cover it with dust-style sprinkles. I also drizzle melted chocolate with a spoon and apply sprinkles. For a professional look, fill a piping bag and use a small round tip (Wilton
If you are looking for detailed inspiration, I recommend this post from Bored Panda. Ray Ray is a self-taught baker from Melbourne, Australia. He is truly an artist and has created some fantastic cakesicles.
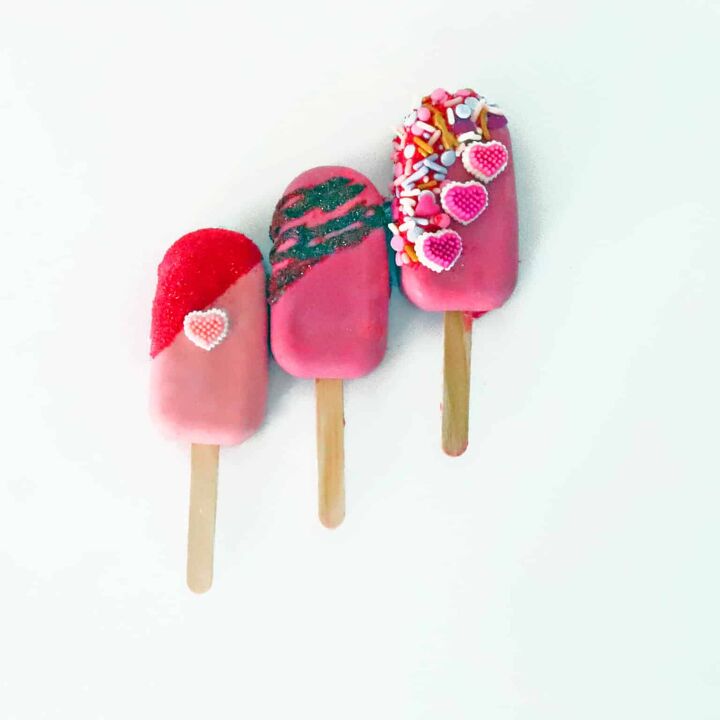
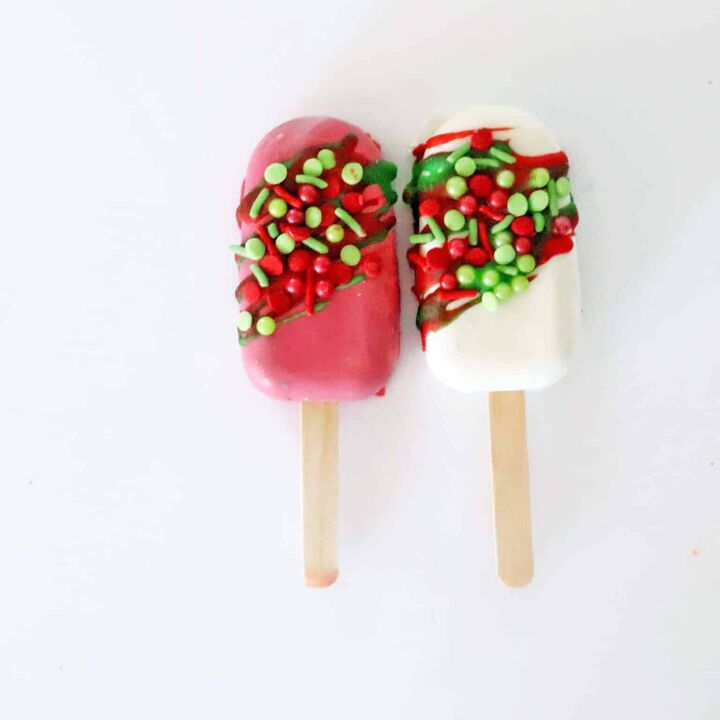
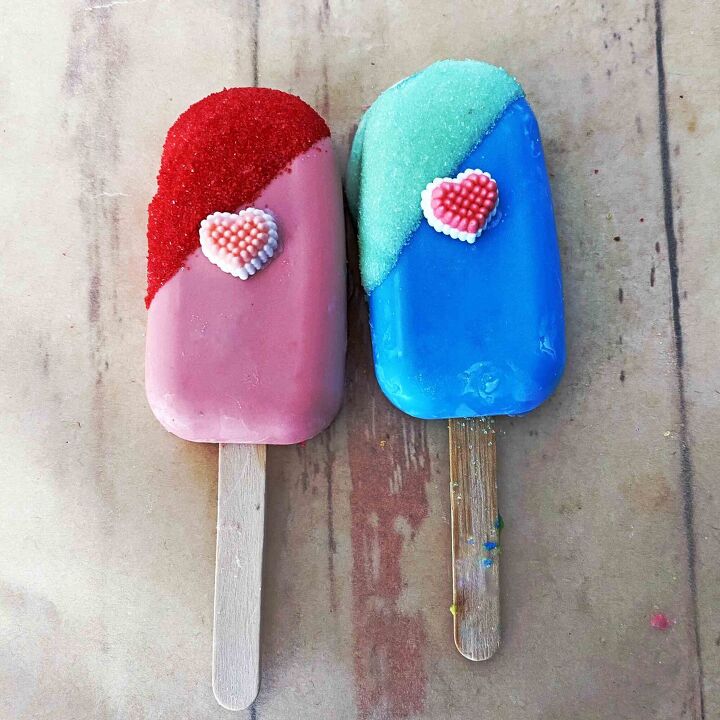
Holiday and Celebration Variations
Cakesicles are perfect for any special occasion. Below is a list of some decorating ideas.
- Baby Shower - Coat each cakesicle in pink or blue depending on the gender. If the gender is not known, make both pink and blue sicles. Decorate with sprinkles. Tie pink or blue bows on each stick.
- Birthday - Coat each sicle in the desired color. Once the candy or chocolate coating has set, dip the top corner in melted chocolate. Roll in funfetti sprinkles.
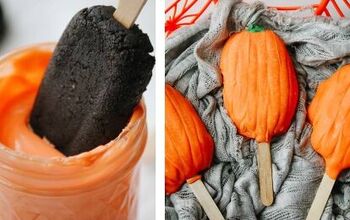
- Christmas - Coat each sicle in white, red, or green colored chocolate. Drizzle with red and green chocolate. Top with sprinkles as desired.
- Easter - Melt white chocolate and use pastel gel food coloring to create Easter colors. Dip a top corner in the same color as the shell. Sprinkle using dusk sprinkles in a different pastel Easter color.
- Fourth of July - Start with a white shell and then drizzle in red and blue melted chocolate. Top with sprinkles as desired.
- Gender Reveal - Use food coloring to create a pink or blue cake (you can use a strawberry cake for pink). Coat the cakesicle in a color that will not reveal the inside color. Decorate as desired.
- Hanukkah - Use white chocolate and blue food coloring to medium blue. Decorate with white drizzle. Top with Hanukkah sprinkles.
- Saint Patrick's Day - Use white chocolate and green food coloring to medium green. Decorate with white drizzle. Top with Saint Patrick's Day sprinkles.
- Valentine's Day - Melt white chocolate and use red food coloring to create a red shell. Melt enough white chocolate to drizzle and then top with sprinkles as desired.
Expert Tips
Microwaving Chocolate - Chocolate can go from melted to burned very quickly. To avoid this, microwave at 50% power in 30-second intervals. Stir between each interval until chocolate is 80% melted. Continue to stir until the other 20% melts. The warmth will melt the remaining chocolate.
Cake Packing - My preferred method is to insert the stick just into the opening. Then move it around to create room; this helps prevent the shell from cracking. Pack the bottom ½ with cake, holding the cake in place inserting a stick to the midway point. Tightly pack the rest of the cake.
Chocolate Melts - Ghirardelli melts are made with cocoa butter, which results in a tempered-like shine. This chocolate is very easy to work with and creates the best look.
FAQ
What Are Cake Popsicles Made Of?Cake popsicles are made from cake crumbles that have been mixed with frosting. The cake is then packed into a chocolate-covered mold. A chocolate backing is applied to create a full shell. Cake popsicles are very easy to make, and the ingredients are affordable.
Will Popsicles Sticks Work for Cake Popsicles?Yes, absolutely. I use popsicle sticks.
How Long Do Cake Popsicles Last?They will last 3 - 5 days in the refrigerator or up to four weeks in the freezer. For best results, store in an air-tight container.
Why Does My Stick Keep Falling Out?The cake was not packed tightly into the mold, or too much frosting was added. Try repacking the cake. If that does not work, remove the cake, sprinkle a little flour into the cake, and remix.
What Is The Difference Between Cake Pops and Cake Popsicle?The ingredients are the same. However, the technique is slightly different. Cake pops are dipped in melted chocolate and then rolled in sprinkles.
How Do I Make One Without A Mold?Use your hands to shape the cake into a popsicle shape. Pack the cake as tightly as possible. Insert a stick and place it in the freezer for 30 minutes. Remove and dip into melted chocolate or candy. Decorate as desired.
The key to success is to make the cake as tightly as possible. If there are air gaps, it will cause the sicle to expand and crack the shell at room temperature.
Make Ahead, Storing and Packaging
Make-Ahead Instructions: I recommend making cake pops at least one day in advance. Always plan on making a few extra; the shell can be fragile.
Counter Instructions: If using non-dairy frosting, store in an air-tight container on the counter for up to three days. If using dairy frosting, store in the refrigerator.
Refrigerator Instructions: Place in an air-tight container and store for three to five days.
Freezer Instructions: Separate each cakesicle with parchment paper, ensuring no two shells are touching—place in an air-tight container and store in the freezer for up to four weeks.
Packaging: Place each in a bakery box side by side. If giving as an individual, place inside a treat bag and decorate curling ribbon to seal. Individual bags specifically for cake popsicles are available on Amazon.
Try One of These Fruit Popsicles
How To Make Cake Popsicles (Cakesicles)
Recipe details
- 32 12
- Prep time: 45 Minutes Cook time: 15 Minutes Total time: 1 hr


Comments
Share your thoughts, or ask a question!