


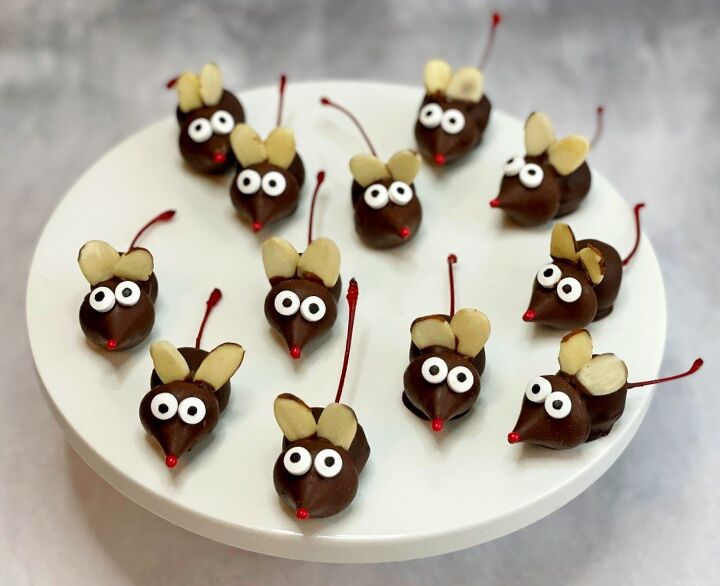
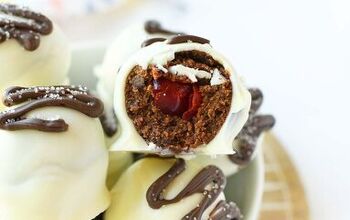
Chocolate Covered Cherry Mice
These Chocolate Covered Cherry Mice are one of the cutest and easiest treats to make! You only need a few ingredients and a little creativity and you can make this fun character treat that is perfect for the holidays, as a school treat, or just for fun!
I love these Chocolate Covered Cherry Mice because they remind me of my Mom at Christmas time. She used to make these for her work every year. As kids, we loved it because we got to eat a few too.
They are also just stinkin’ cute and so fun and easy to put together. My son and I had fun making these as a fun treat and they don’t just have to be for Christmas. You can make these for a holiday, a party, or just because.
If you are looking for more fun holiday recipes check out my Reindeer Rice Krispies or my Peppermint Cake Pops!
Chocolate Cherry Mice
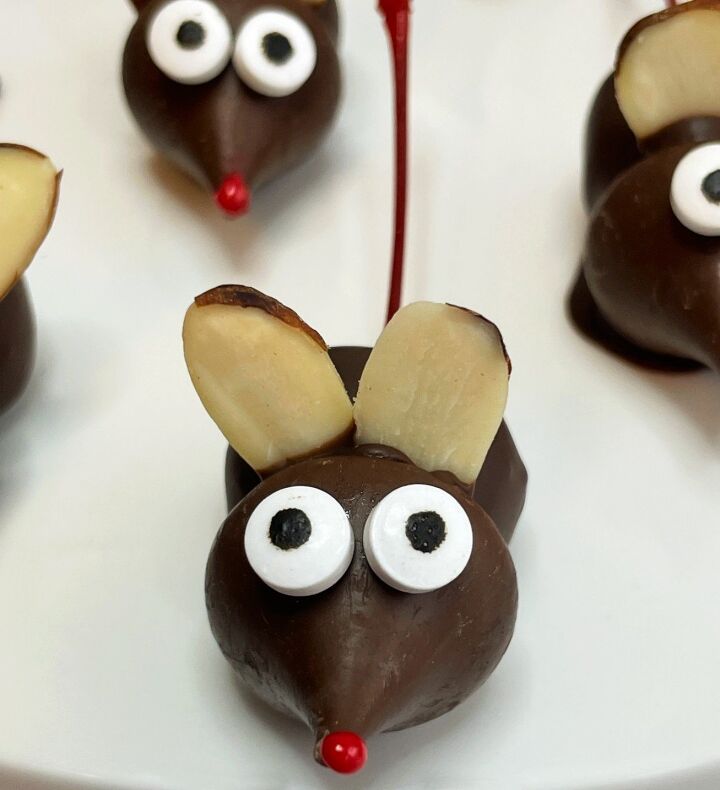
Mouse made of a cherry and chocolate kiss
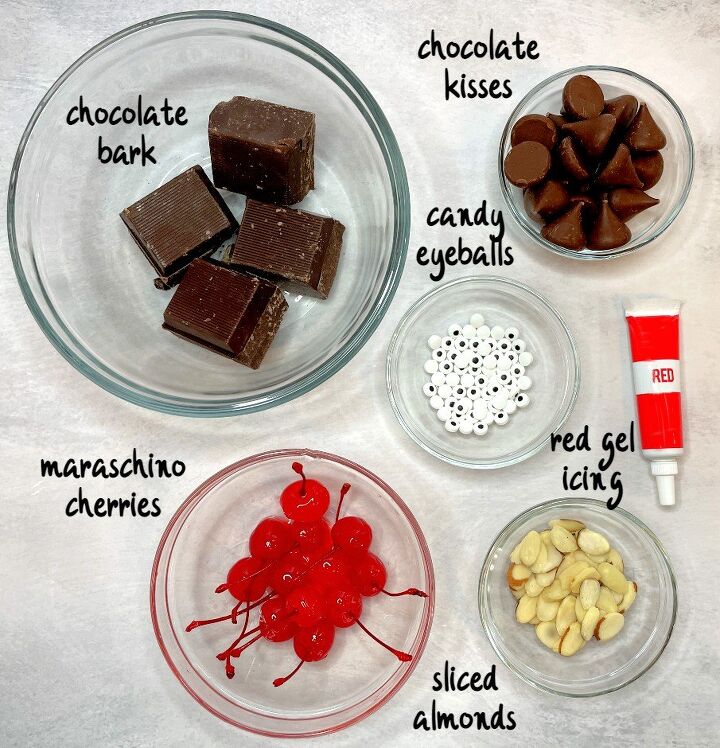
Ingredients needed to make Chocolate Cherry Mice
Chocolate Covered Cherry Mice
Recipe details
- 20 mice
- Prep time: 30 Minutes Cook time: 0 Minutes Total time: 30 min


Comments
Share your thoughts, or ask a question!