


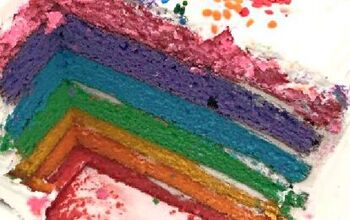
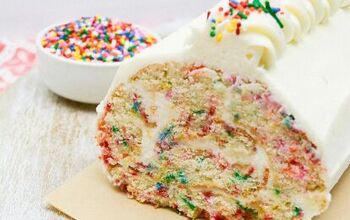
Rainbow Funfetti Vanilla Layer Cake
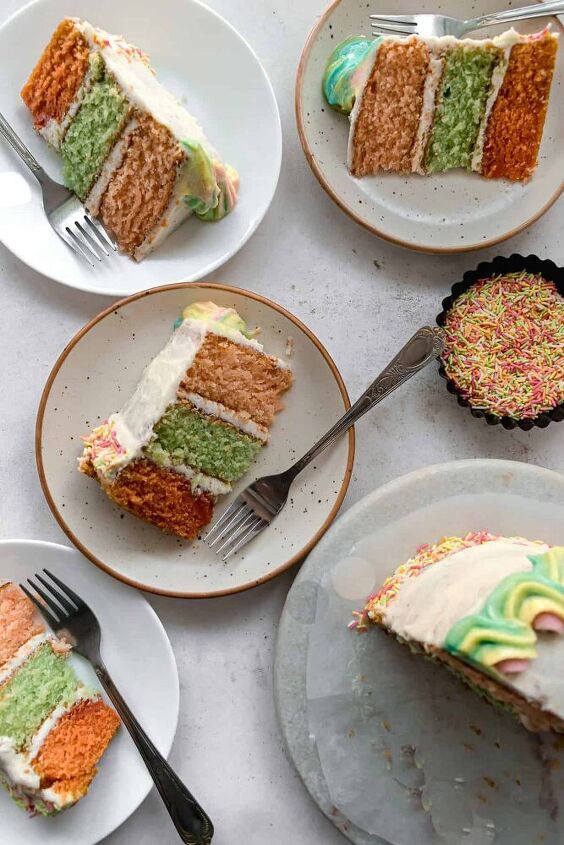
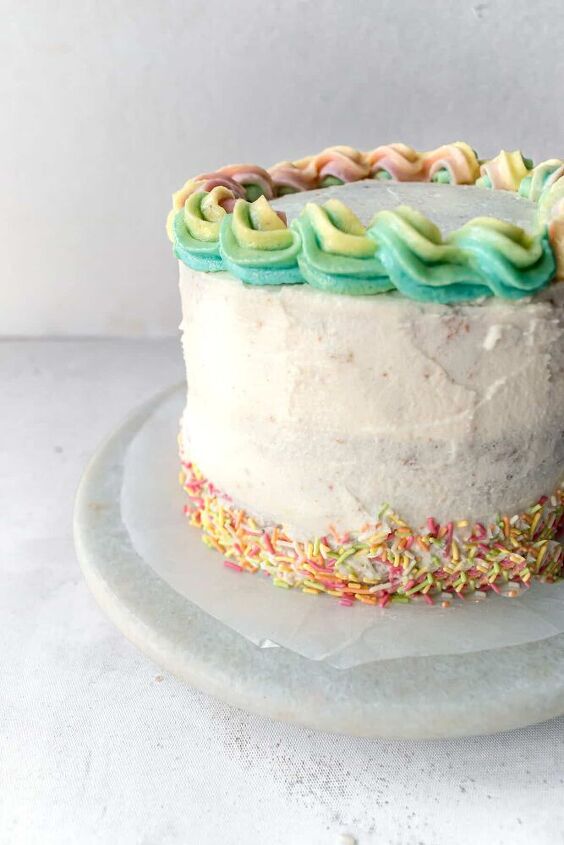
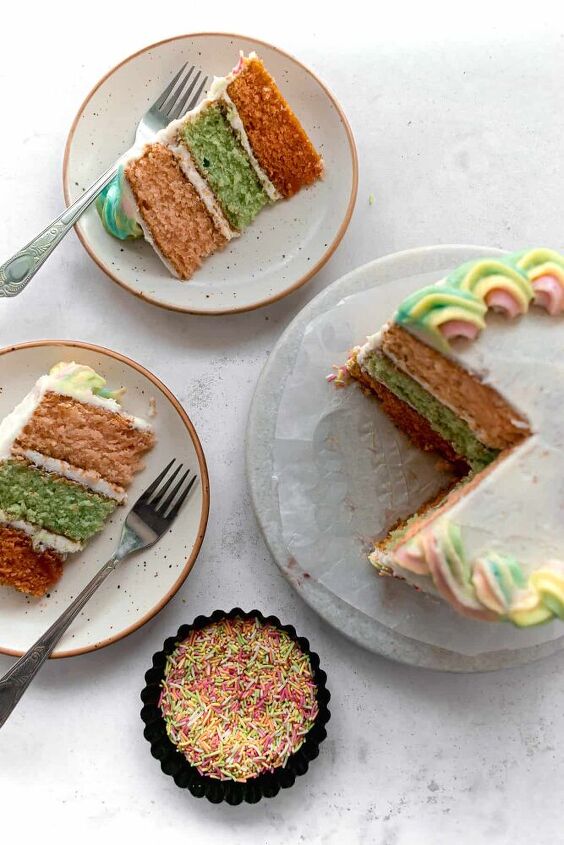
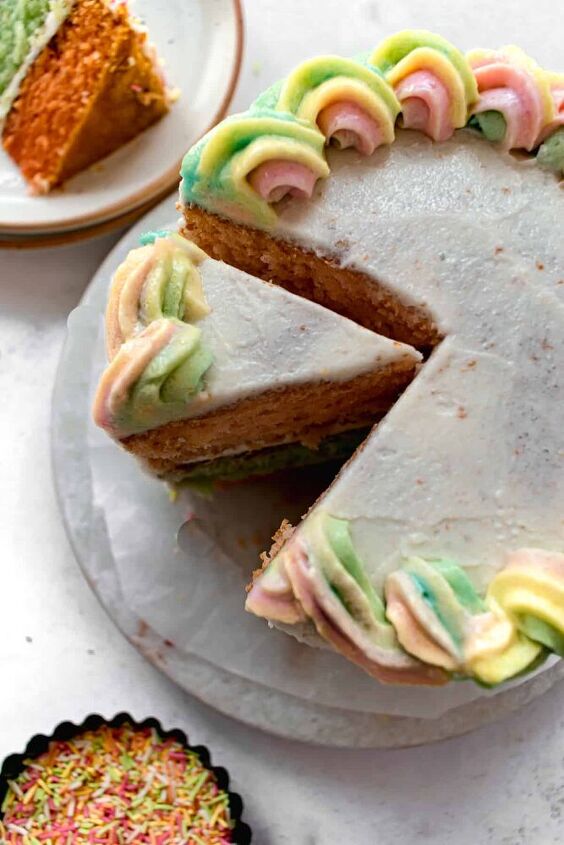
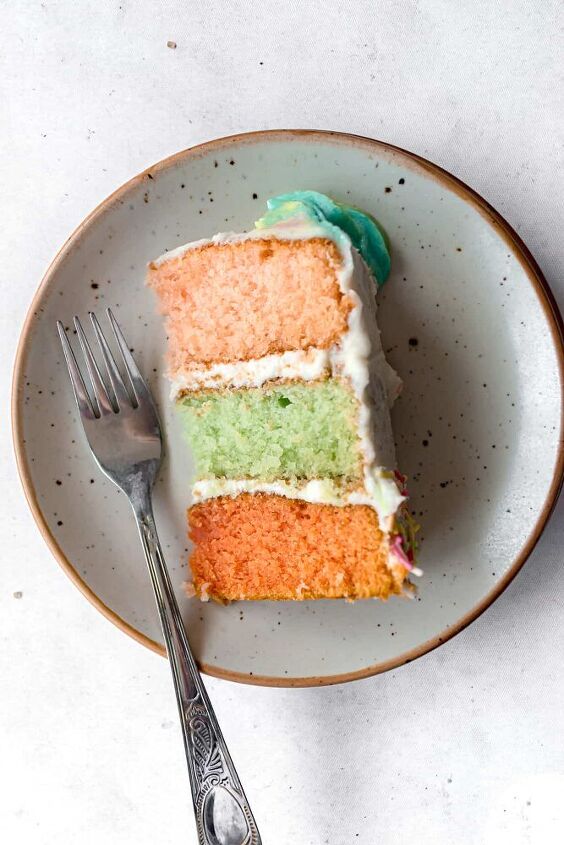
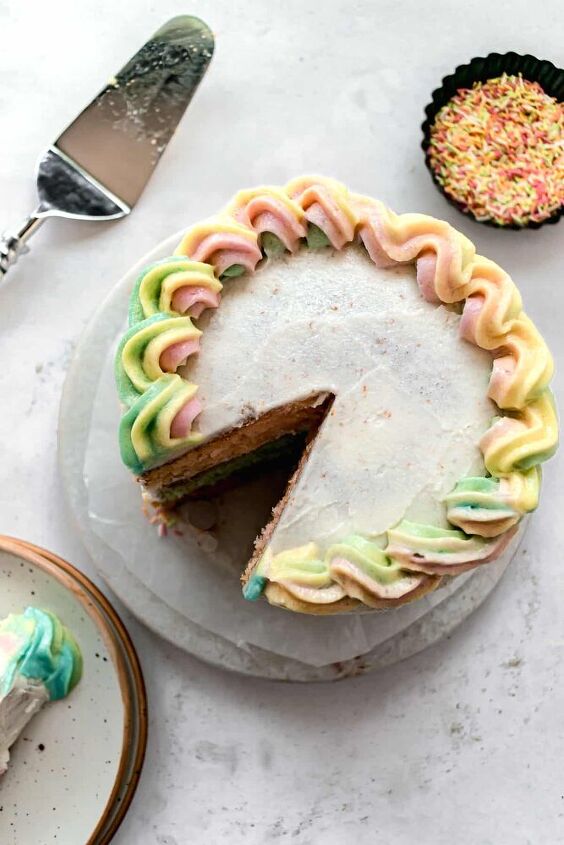
This rainbow funfetti vanilla layer cake is the ultimate birthday cake for you, your kids and family! You’ll be proud to make and serve a cake that’s as much fun as this one and also surprisingly so easy to create. It consists of three colorful vanilla cake layers with vanilla buttercream frosting & is topped with funfetti sprinkles and a rainbow colored vanilla buttercream. This is a fail-proof, buttermilk vanilla layer cake recipe that’s extremely delicious and downright impressive!
- All-purpose flour: I highly recommend weighing all your ingredients using a kitchen scale for accurate recipe results. If you’re using cups, don’t scoop your cup into the flour. Spoon the flour into your cup and level it off with the back of a knife.
- Cake flour: Cake flour has a lower protein content than all-purpose flour, and is finer, lighter, and softer. When it comes to cakes, we want them to be light, soft, and tender, with a fine, close crumb. And that is exactly what you will get if you use cake flour! A mixture of both of them gives the best results in my opinion.
- Unsalted butter: It is very important to have your butter at room temperature. You can ensure this by lightly pressing your finger on the block of butter. It should slightly leave an imprint. I also prefer to use unsalted butter because salted butters have varying amounts of salt content in them and it is always a good idea to add it on your own and avoid your bakes from being too salty.
- Granulated Sugar: You’ll need only granulated sugar for this cake. Even though brown sugar adds more moistness, I wouldn’t recommend adding it as food coloring doesn’t mix very well with it. The extra egg yolk and oil make up for the moistness from brown sugar.
- Eggs: Use large eggs and bring them to room temperature before mixing in. Eggs strengthen the binding of your cake and also add moisture. Having your eggs at room temperature makes it easier to incorporate them and allow them to mix thoroughly in your cake batter. A good way of doing this is by letting them sit in a bowl filled with room temperature water for around 10 minutes or until they come down to room temperature.
- Egg yolk: This cake is truly so soft and moist. One of the secret to that is this extra egg yolk which adds more moisture to it along with also being a binding agent.
- Oil: You can use either vegetable oil or canola oil. This is one of the secrets resulting in this cake being ultra soft and moist. Oil reduces the gluten formation in your batter, which makes the cake more moist as compared to using butter as a fat. I do not recommend using olive oil, as it adds a strong flavor of it’s own and changes the taste.
- Vanilla: You must use a high quality pure vanilla extract in your recipes. This helps to add a rich flavor to your baked goods. Pure vanilla extracts are typically dark brown in color. This enhances the flavor of all ingredients and you should never leave this out.
- Buttermilk: Buttermilk is more acidic and has a higher fat content than whole milk too. Both of these things help it cut through the sweetness of the cake, giving them a better flavor overall. It also helps to add moisture to your bakes.
- Powdered Sugar: This will help add sweetness and stability to your frosting. Add only a few spoons at a time and beat until completely incorporated. Don’t use granulated sugar as it will not dissolve in your frosting as powdered or confectioners’ sugar will.
Whether you’re making a layer cake or a single layer cake, flat tops are always desirable. The reason why cakes dome that your cake pan heats up much faster than the rest of the cake causing the edges to set before the cake has risen fully, and as the rest of the cake cooks the centre rises and creates a dome. To avoid this from happening you want to protect the edges of your cake pan. To do this, you can wrap cake strips, foil, or a damp cloth around the edges of your cake pan. Be careful with the damp cloth as it might start burning after it completely dries out. This trick will ensure you get flat tops always!
How to perfectly frost a cake?In order to evenly frost your cake, use a cookie scoop to add the prepared buttercream on top. Start by adding around 1 large scoop or ½ cup of frosting on top of the first layer. Using an offset spatula, spread the frosting evenly on top of the cake. Repeat with the other two cake layers. Add around another or ½ cup of frosting around the cake using an offset spatula. This will be the crumb coat of the cake. Make sure not to put too much pressure and remove crumbs from the cake. Refrigerate for around 30 minutes t0 allow the crumb coat to set on your cake. Add around another ½ to 1 cup of frosting around the cake using an offset spatula to form a thick layer along the edges of the cake. You can use a bench scraper or an icing scraper to smooth out the walls of the cake. Smooth the top and edges using an offset spatula to form sharp corners. Chill the cake in the refrigerator for another 20 minutes to let it set.
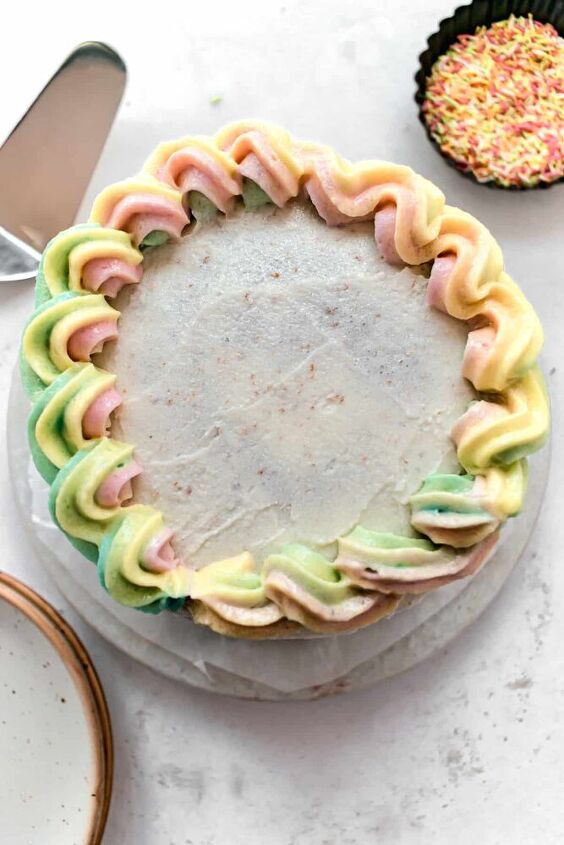
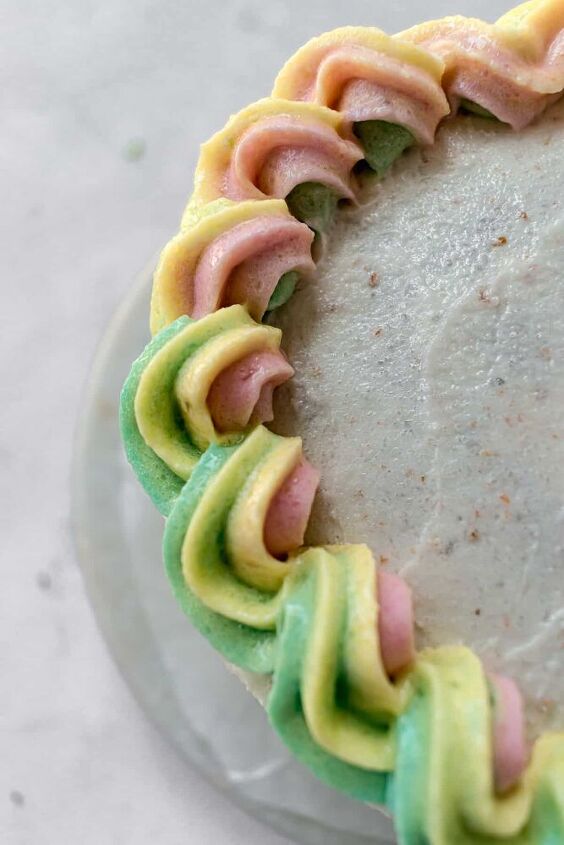
How to make the rainbow frosting?Divide your buttercream evenly into 4 parts. You will need around 180g of buttercream with each part being 45g. Add in the liquid/gel coloring to each part respectively. Take one piping bag and cut it open. Add thick strips of each frosting color in the order you desire using a spoon or by piping them. Fold the piping bag like a log from one edge to the other. Transfer this piping bag to another one fitted with a 1M Wilton Star Tip. Keeping your piping bag perpendicular to the top of the frosted cake, pipe circles to get a rope shaped rainbow border on the cake.
- Ultra Soft Brown Butter Orange & Cinnamon Layer Cake
- Single Layer Chocolate Ganache Buttermilk Cake
- Ultra Moist S’mores Buttermilk Cupcakes
- If you’re out of cake flour, I have a substitute for you. Take one cup of all purpose flour, remove 2 tablespoons from it and replace with 2 tablespoons of cornstarch/cornflour. Sift the mixture twice & discard any remaining lumps. Your cake flour is ready!
- If you’re in a pinch and don’t have buttermilk in hand, I have a DIY substitute for this as well. Add 1 teaspoon of lemon juice in half cup. You can double or half this as required. Fill that cup with whole milk to the top. Mix and let it sit for 5 minutes. That’s it, your buttermilk is ready. Your muffins may not turn out marvellous, but they will still be delicious!
- I highly recommend investing in an oven thermometer and a kitchen scale. Baking at accurate temperatures and weighing your ingredients correctly ensure that you can replicate the recipes perfectly and enjoy the best flavors.
Happy Baking!
Rainbow Funfetti Vanilla Layer Cake
Recipe details
- 1 Layer cake
- Prep time: 1 Hours Cook time: 30 Minutes Total time: 1 hr 30 min


Comments
Share your thoughts, or ask a question!
Beautiful and delicious!