


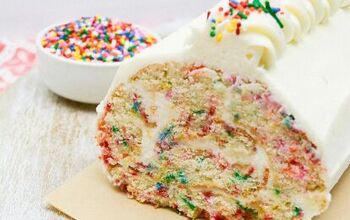
Make This Daffodil Cake Recipe for Spring!

Daffodil cake is the perfect dessert for all of your springtime and warm weather celebrations!
I love serving floral-themed desserts for spring and summer!
Warmer days are here and with them come all the special occasions – Mother’s Day, graduations, bridal and baby showers. And a floral themed dessert is just the perfect ending to any of these events! My lavender lemon shortbread bars were a big hit last year, so I thought I’d keep the theme going with this pretty daffodil cake!
what is a daffodil cake?
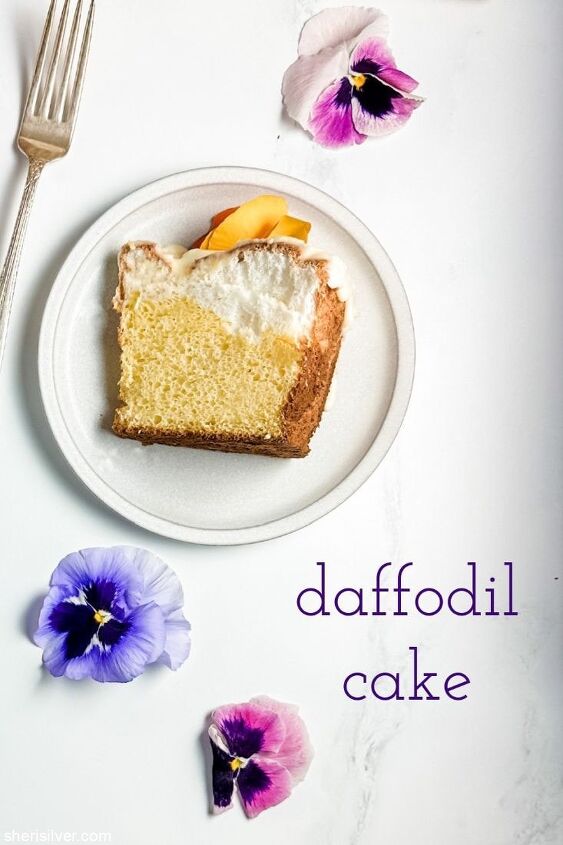
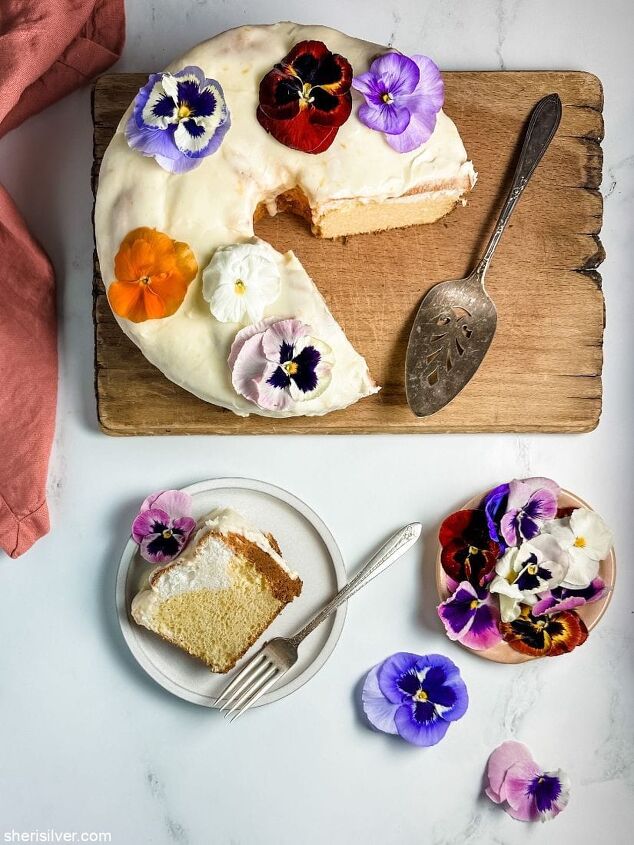
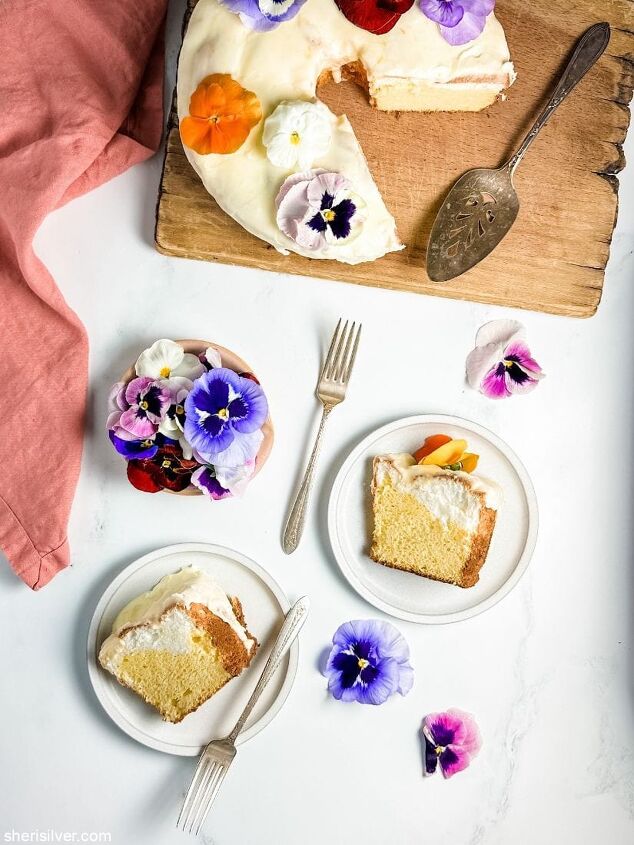
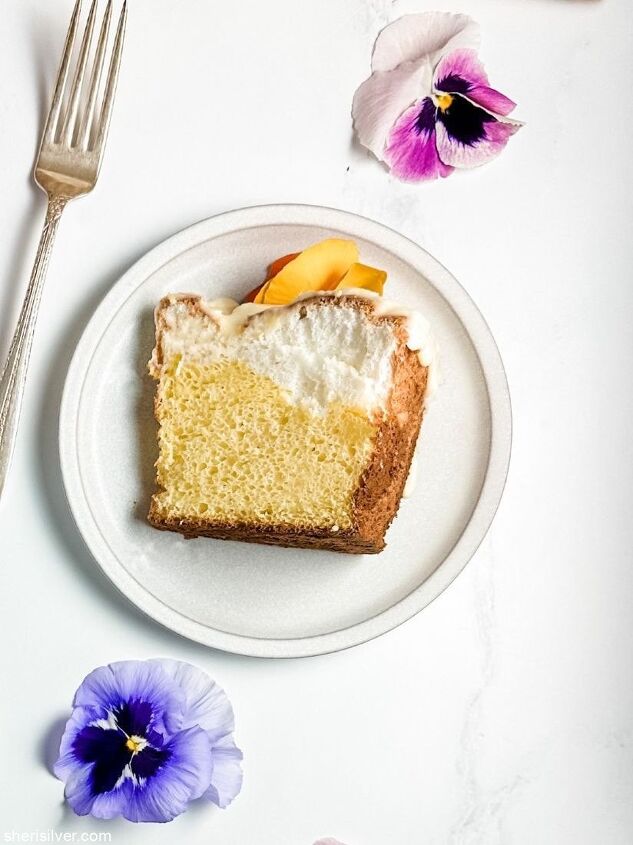
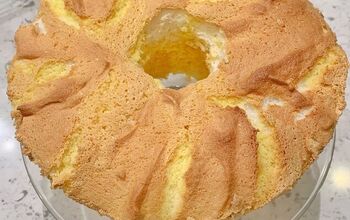
This old-fashioned daffodil cake recipe dates to the 1930’s (I believe this vintage cake recipe originally appeared in a Better Homes & Gardens cookbook), and was developed to make use of the egg yolks left over when making an angel food cake. The yolks are used to make a yellow batter, which is then layered with a traditional angel food white batter, resulting in a pretty two-toned cake that resembles its namesake flower. Lots of fresh lemon and orange zest and juices add the most lovely flavor, and the cake is topped with a citrusy glaze. I decorated with fresh flowers before serving.
It’s like eating an angel cake and citrus sponge cake all in one!
what ingredients do you need?
To make this cake you’ll need the following ingredients:
cake or all purpose flour
granulated sugar
kosher salt
eggs
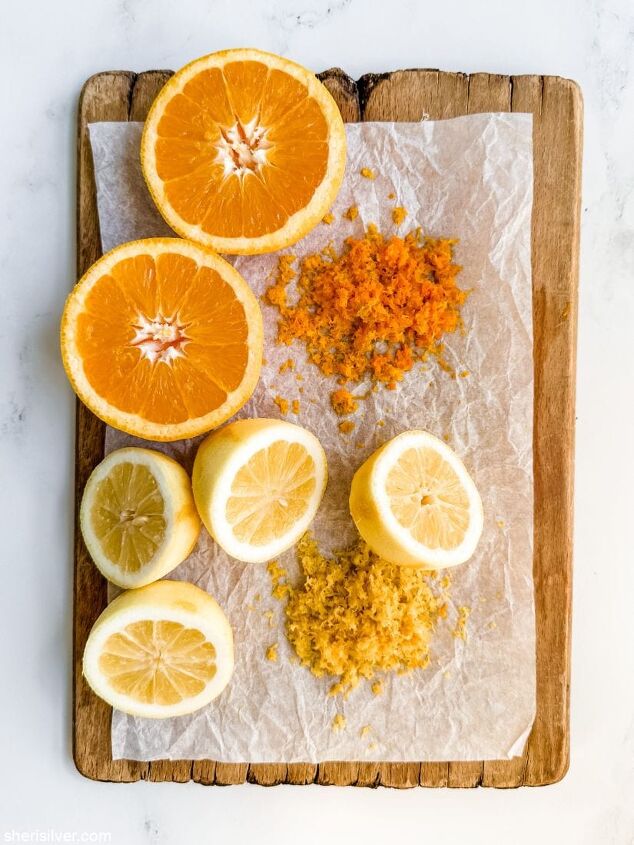
lemons
oranges
cream of tartar
confectioner’s sugar
butter
edible flowers
how do you make it?
Sift the flour, some of the granulated sugar and salt onto a piece of parchment. I normally don’t feel the need to sift, but in the case of an angel food cake sifting will yield the best results.
Beat the yolks and some of the granulated sugar on high speed till pale yellow, then add the citrus zests and juices and beat again. Transfer to a large bowl and clean out the mixer bowl and whisk. Beat the egg whites, granulated sugar, salt and cream of tartar to stiff peaks (read this post on how to perfectly beat egg whites!). Transfer the meringue batter to a larger bowl. Add the flour mixture in three additions, folding in each time to fully incorporate. Transfer half of the batter into the egg yolk mixture and dollop into an ungreased angel food pan. Top with remaining egg white mixture.
Run a knife through to release any bubbles and bake for 35 – 40 minutes or till the top springs back.
Invert and let cool 1 hour. Remove from the pan and place on a wire rack or piece of waxed paper.
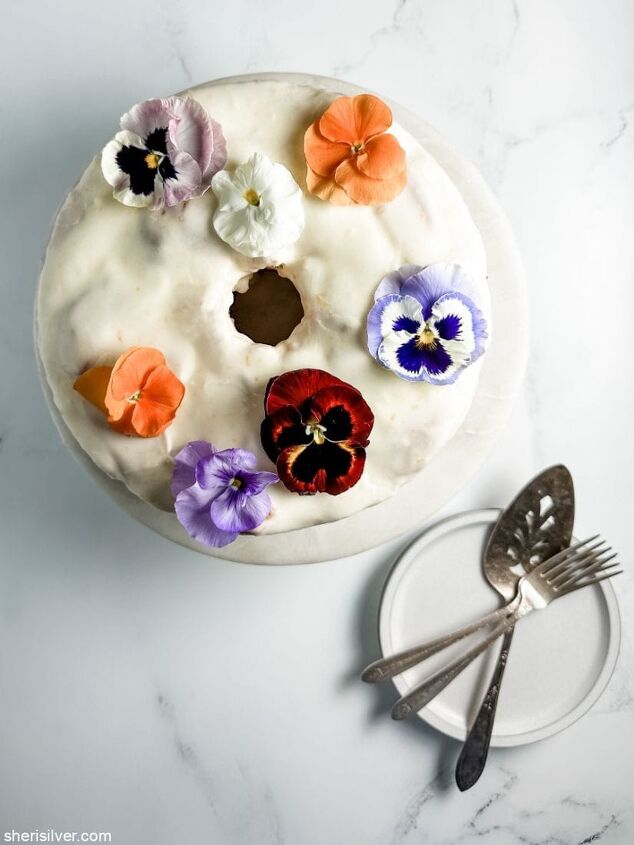
Make the glaze by whisking confectioner’s sugar, citrus juices and zest along with some melted butter, till a thick but pourable glaze is achieved. Pour the glaze over the cake, let set and garnish with edible flowers.
no angel food cake pan? no problem!
If you’ve never used an angel food pan you may be wondering what it is and if you need one. An angel food pan looks similar to a bundt pan or tube pan, with two differences. The first is a removable bottom. This is necessary because you don’t grease the pan when making an angel food cake, so the removable bottom makes for an easier process when it’s time to take the cake out of the pan.
The second difference is the addition of three “feet” on the sides of the pan. When an angel food cake comes out of the oven you turn it upside down to cool. The feet elevate the pan to allow air to circulate underneath the cake, preventing it from getting soggy. Angel food cakes are made primarily from egg whites, resulting in a delicate structure – cooling the cake upside down preserves the structure and keeps the cake from collapsing (which would result in a dense, rather than light, texture).
If you are using a bundt or tube pan, simply place the pan upside down over the neck of a wine bottle. For best results I’d place a piece of parchment at the bottom to help the cake release cleanly from the pan once it’s cooled.
let’s talk edible flowers!
I love decorating with flowers – it’s a foolproof technique for achieving a professional looking cake with zero special skills or equipment needed. That said, it’s essential that you either use flowers that you’ve grown yourself, or purchase from a reliable source so that there is no chance of pesticides or other chemicals having come in contact with the blooms. I love Gourmet Sweet Botanicals. They ship overnight, the flowers are fresh and pristine, and their standards are impeccable.
this delicious cake is to be enjoyed quickly!
Unlike most cakes, which can be made several days in advance and/or freeze well for even longer storage, daffodil cake should be served within a day or two of making. I’ve read that you can freeze angel food cake, but I have done it myself and feel like there is a diminished quality in taste and texture. If you want to get a head start, make the cake a day or two in advance, and wrap it well in plastic wrap. On the day you plan to serve, glaze the cake and decorate with your flowers once the glaze has set.
one more tip!
Did you know that you should always use a serrated knife when slicing an angel food cake? A regular knife will not cut cleanly through, and will actually compress the cake as you cut it. A serrated knife – and a sawing motion – will give you perfectly clean and fluffy slices!
Let me know if you try it!
Make This Daffodil Cake Recipe for Spring!
Recipe details
- 10 servings
- Prep time: 25 Minutes Cook time: 35 Minutes Total time: 1 hr


Comments
Share your thoughts, or ask a question!