


Cheesecake Cups Recipe With Oreo Thin Cookies Crust

I have been craving cheesecake lately - probably because its my favorite comfort food when I have cabin fever. I wanted to find a simple cheesecake cups recipe that would be quick to whip up and I found one that I gave a little twist to. Instead of a traditional graham cracker crust, I decided to use Oreo Thin cookies as crusts. In my personal opinion, I'm not sure who wants to eat Oreo Thins by themselves - the filling is the best part!!!!! Why would you decrease the amount of filling???? I'm not sure. But, in this case, Oreo Thins are perfect as a crust for these Cheesecake cups that you will be sure to love!
Ingredients needed for this Cheesecake Cups Recipe:
(affiliate links)
- 1 pkg of Oreo Thins
- 3 pkg. of 8oz cream cheese, softened
- 3/4 cup of sugar
- 1 tsp. vanilla extract
- 3 eggs
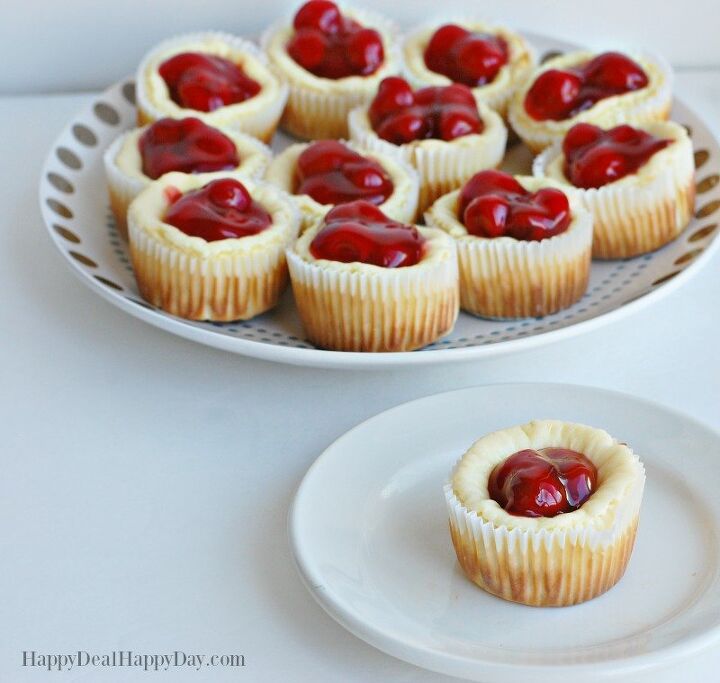
- Cherry pie filling (or a fruit pie filling of your choice)
- Cupcake liners
- Cupcake baking pan
- Electric hand mixer
- melting chocolate (optional)
- Spoon Mold to make chocolate spoons (optional)
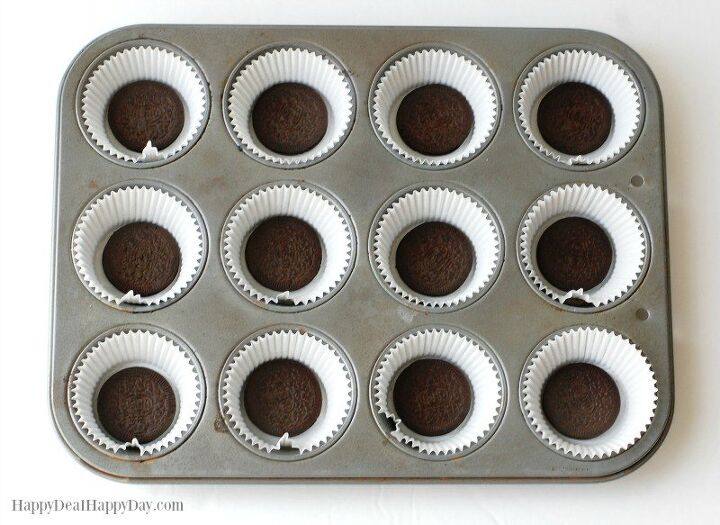
1. Pre-heat oven to 325°. Place cupcake liners in your cupcake baking pan and place one Oreo Thin at the bottom of each cupcake liner.
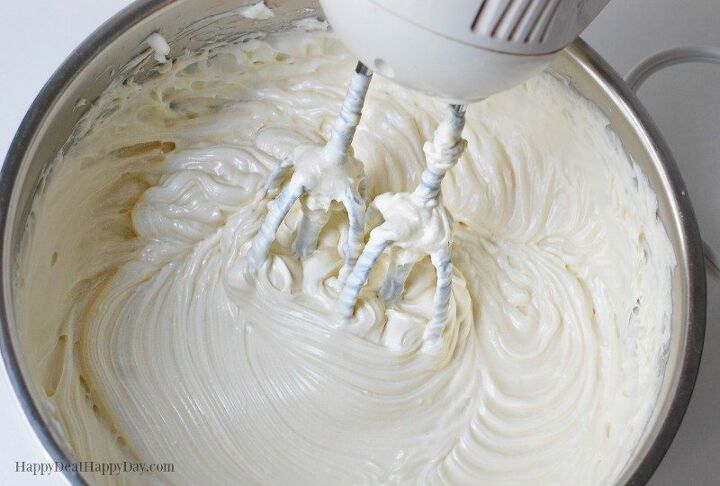
2. Beat the cream cheese, vanilla, sugar with electric hand mixer until smooth.
3. Add eggs, 1 at a time, mixing on low speed after each just until blended.
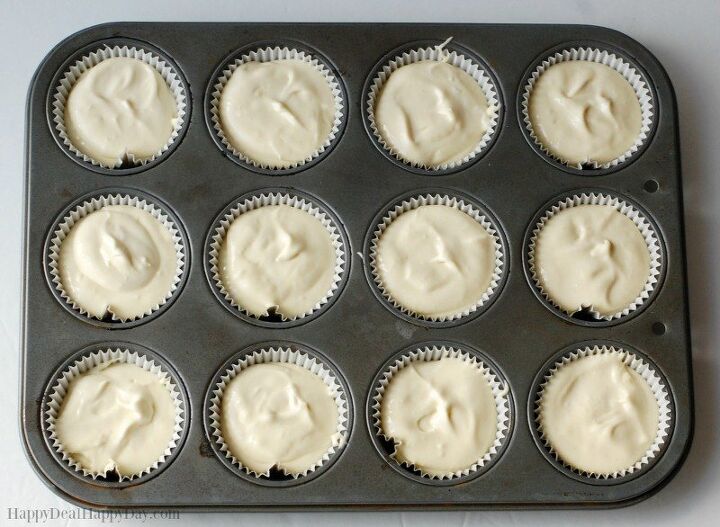
4. Spoon your batter over the crusts. Bake 25-30 minutes or until centers are almost set. These will puff up quite a bit during baking, but will shrink back down upon cooling. As they cool, they will form an indent in the center, perfect for holding pie filling. Refrigerate for at least 2 hours before adding pie filling.
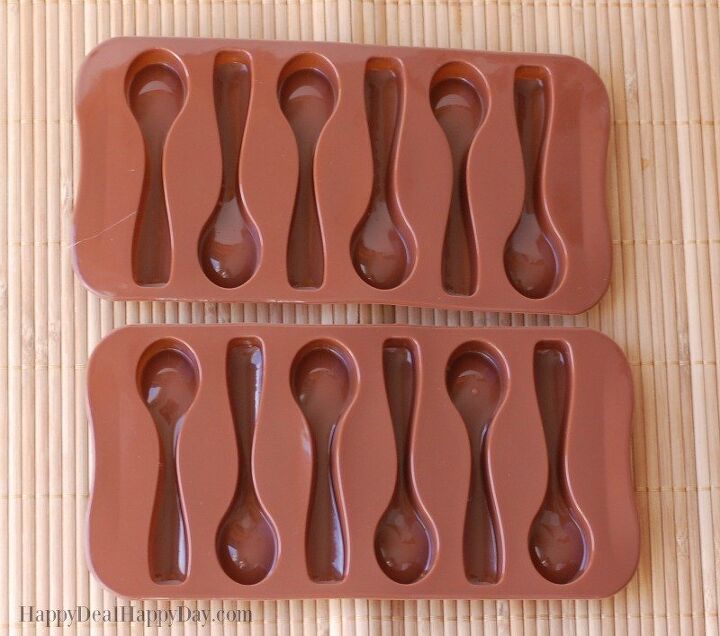
5. If you'd like a sweet chocolate spoon accent to serve these with, then put 1 cup of melting chocolate into a microwave safe glass measuring cup and microwave on high for 30 seconds. Stir and microwave again, doing this until the chocolate is melted. Pour the melted chocolate into the spoon mold. This can get a bit messy, and to ensure you get a smooth bottom, you'll need the straight edge of a butter knife to scrape the chocolate to make it smooth and even.
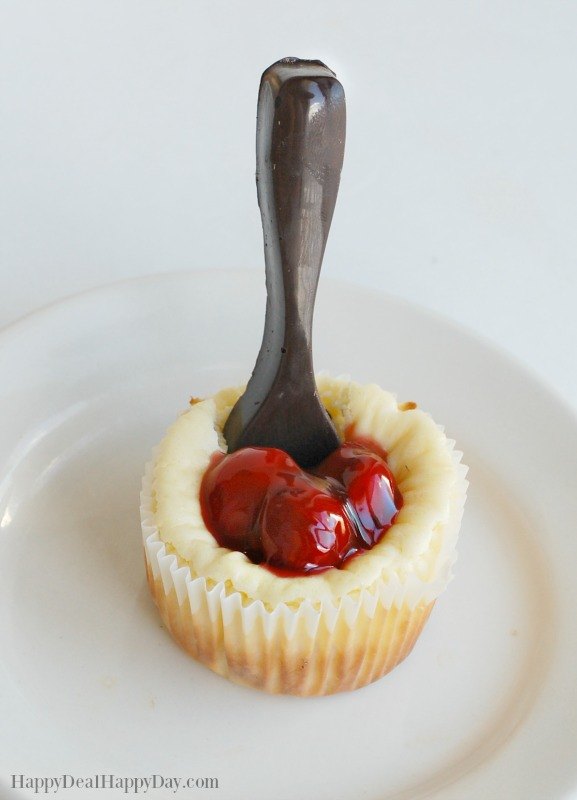
6. You can let your chocolate spoons cool via room temperature or refrigerator. They will obviously harden faster in the refrigerator. When you pop them out of the mold, you may need to break off a bit of extra chocolate off of the edges so that it is smooth.
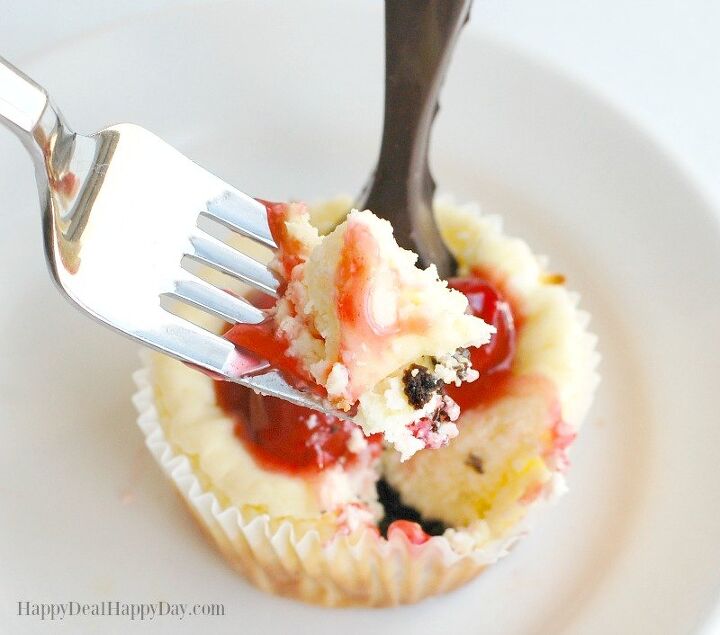
You can't really eat the cheesecake with these chocolate spoons. They really are just a bonus garnish - and will be a fun discussion piece if you brought these to an event like a wedding shower. Everyone will also be surprised by the Oreo cookie crust. This recipe is a crowd pleaser for sure!

Cheesecake Cups Recipe With Oreo Thin Cookies Crust
Recipe details
- 12 Servings
- Prep time: 20 Minutes Cook time: 30 Minutes Total time: 50 min


Comments
Share your thoughts, or ask a question!