


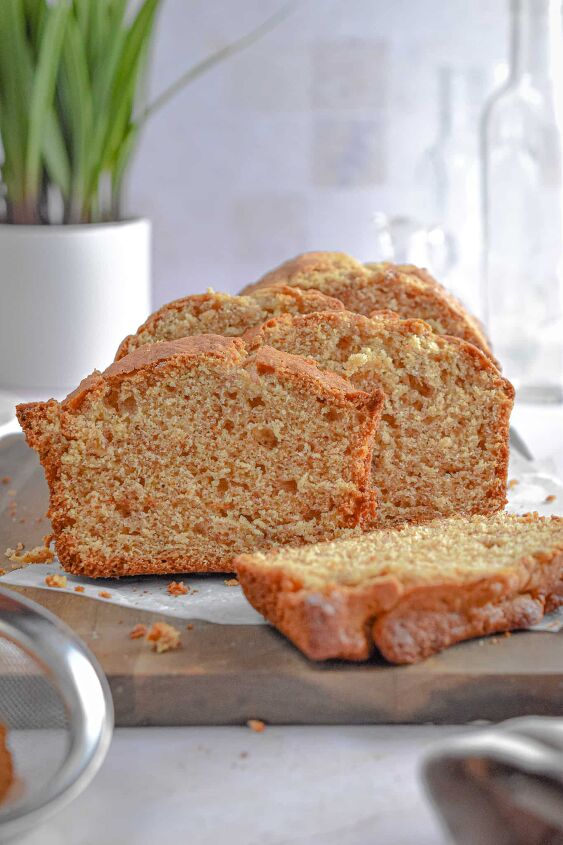
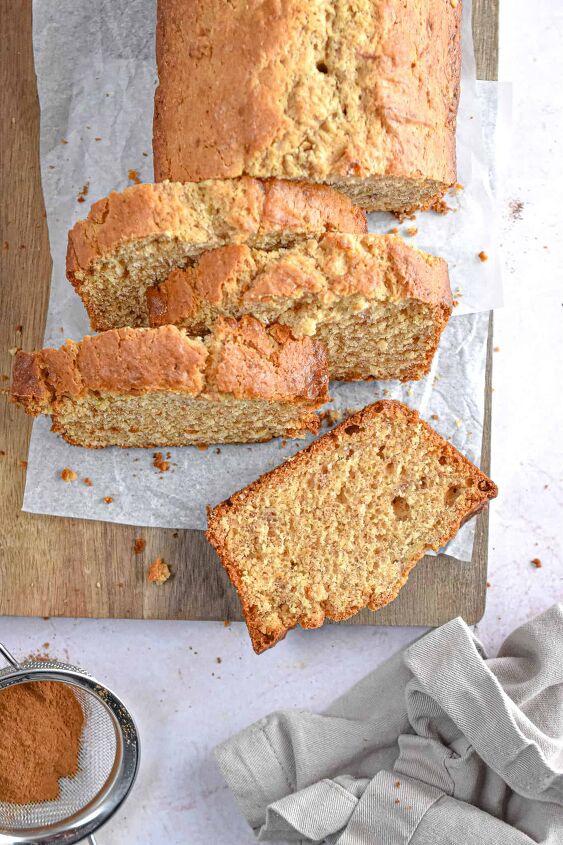
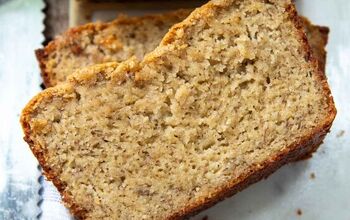
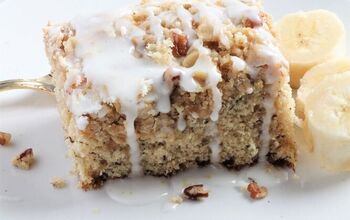
Banana Bread Recipe With Self-Rising Flour
An easy, one bowl quick bread, this Banana Bread Recipe with Self-Rising Flour is a delicious use for your ripe bananas! It's the best banana bread recipe you'll ever make, and it is full of banana flavor!
Disclosure: This post may contain affiliate links. As an Amazon Associate, I earn from qualifying purchases. however this is at no cost to you. Read my affiliate links full disclosure policy here.
Homemade banana bread is so fun to make and so easy! There are also so many different variations of it! You can make sourdough banana bread, one bowl chocolate chip banana bread, double chocolate banana bread, banana bread without baking soda, and cinnamon streusel banana bread!
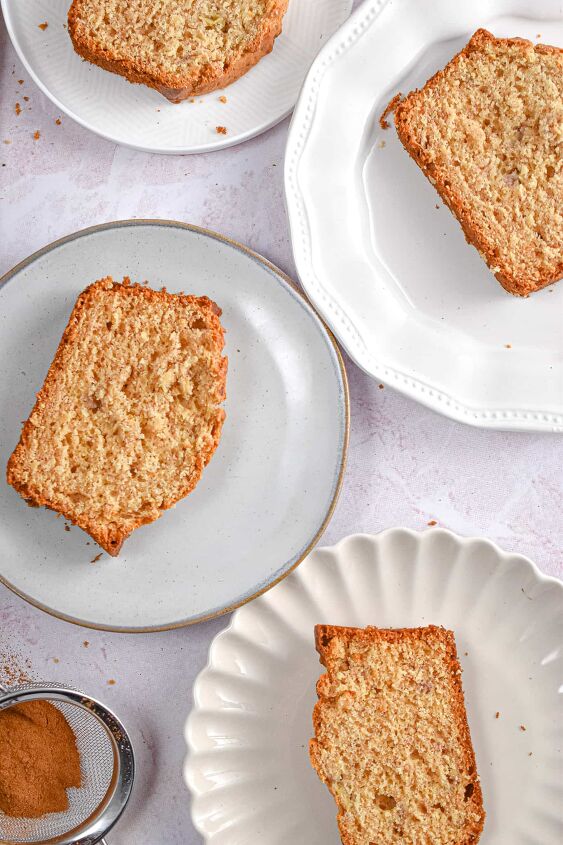
Enjoy this easy banana bread recipe at room temperature or slightly toasted topped with some high-quality butter! A perfect snack or breakfast!
- It's a great use for your old bananas! We all have that extra banana that we think we will eat, and then ends up going brown on our counter. Use them for banana bread!
- No need for leavening agents! Self-rising flour has baking powder already in it, so there's no need for baking soda (bicarbonate of soda) or extra baking powder. You'll get a nice rise just from the flour, believe it or not!
- No electric mixer needed! This recipe is mixed by hand, so you don't have to worry about breaking out the hand mixer or the stand mixer.
This moist banana bread recipe is made with simple ingredients you probably already have in your house.
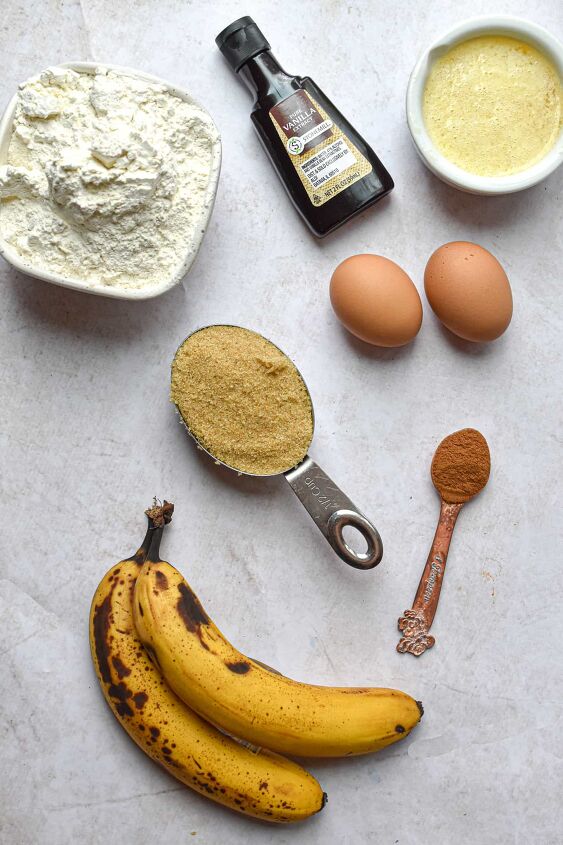
- Overripe Bananas. They should be brown and spotty.
- Brown Sugar. White sugar can be used instead of brown sugar.
- Large Eggs. To hold the bread together.
- Melted Butter. To give the bread texture.
- Vanilla Extract and cinnamon. For added flavor.
- 1 ¾ cup of Self-Rising Flour.
Self-rising flour is all purpose flour that has baking powder and a small pinch of salt already in it. Classic southern recipes usually use self-rising flour instead of plain flour. Even though some people may think it is self-raising flour, it is actually self-rising flour. I love making pancakes with self-rising flour too!
King Arthur is my favorite variety of self-rising flour. If you don't have a bag of it in your pantry, you can make your own self-rising flour really easily!
Cake Flour is used to make cakes. It is a finer flour so the cakes stay nice and light and airy. It usually has a lower protein content as well so cakes don't get tough.
Bread flour is used to make breads like sourdough bread. It has a higher protein content which helps develop the gluten in bread. Bread flour is also made from a harder grain, so it holds up better to making bread and the kneading process.

- Mixing Bowl
- Measuring Spoons
- Measuring Cups
- 9x5 inch Loaf Pan
- Wire Baking Rack
Preheat the oven to 350 degrees.
Grease a loaf pan with cooking spray or melted butter.
In a large mixing bowl, peel the bananas and mash them until there are no big chunks left.
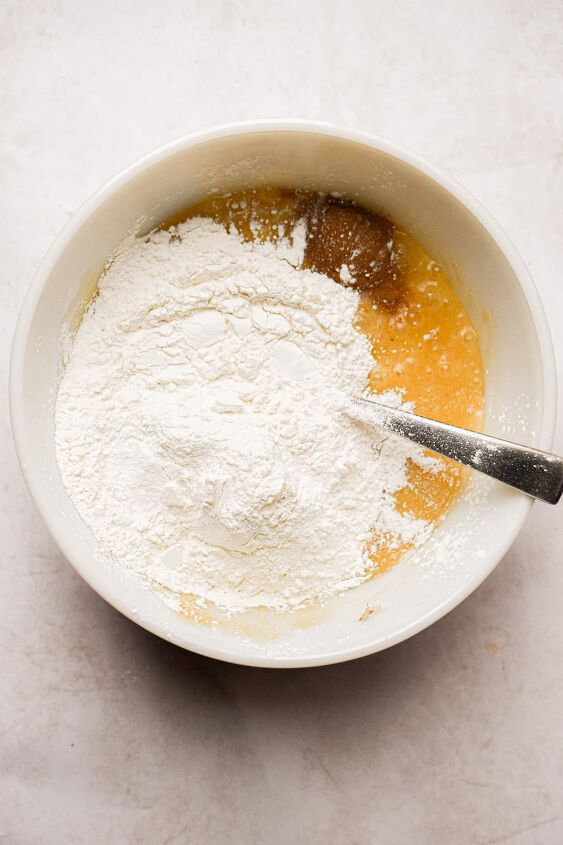
Place the butter and vanilla in the bowl and mix until all the ingredients are fully combined. Add the sugar and eggs to the large bowl with the mashed bananas and mix well.


Add the flour and salt to the wet ingredients. Fold the dry ingredients into the wet ingredients. Mix well but do not overmix at this point. You want to incorporate all the flour, but you don't have to get all the lumps out.
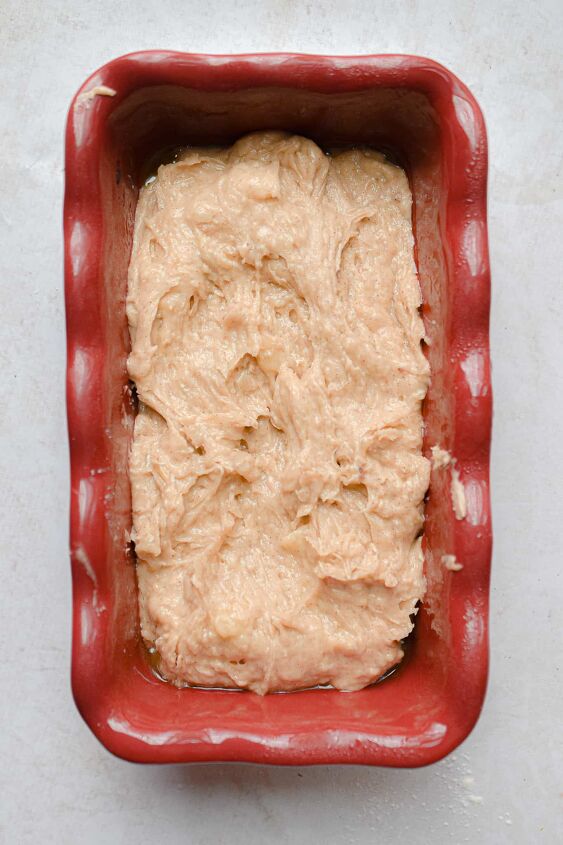
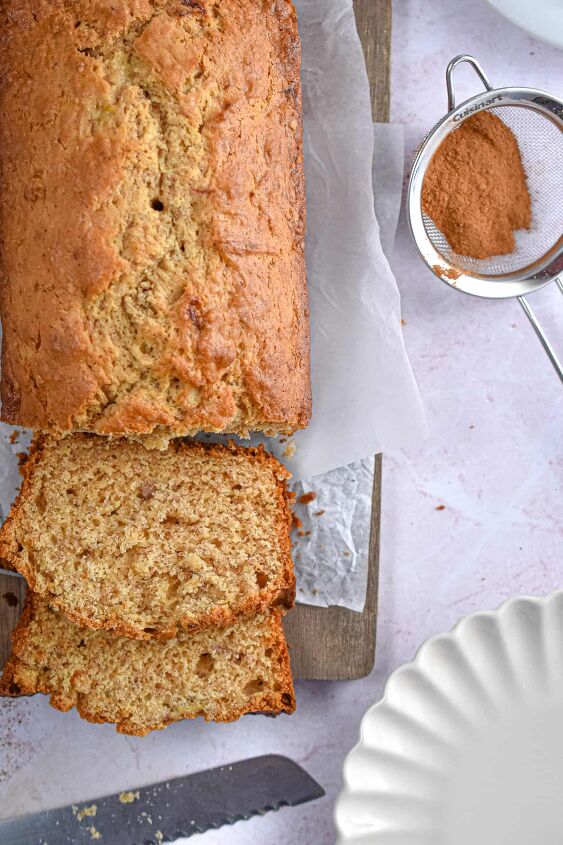
Pour the banana bread batter into the prepared loaf pan and bake for 50 minutes depending on your oven. After 50 minutes, check the bread for doneness by sticking a toothpick into the middle of the bread and taking it out. If there is no batter on the toothpick, the bread is done!
Allow the banana bread loaf to cool on a wire rack completely before cutting into it.
Cook's Note: To ensure the banana bread does not stick to the loaf pan, line the loaf pan with parchment paper.
- Make sure your butter the loaf pan well. The bananas have a lot of sugar in them, plus there is brown sugar in the recipe, so it might stick. Butter is the best to use. I find that cooking spray causes the banana bread to stick.
- If you are in a pinch and want to ripen bananas quickly, preheat the oven to 300 degrees. Place the whole banana on a baking sheet and place them in the oven for 15 minutes. When the skins turn completely black they are ready! Carefully peel the banana and let it cool, then proceed with the recipe.
- If the top of the bread starts to brown too quickly, tent aluminum foil over the top of the bread. This will slow the browning of the bread.
- This recipe makes one loaf, but you could separate this into mini loaves if you have small loaf pans.
- Add 1 cup of chocolate chips to make a chocolate chip banana bread.
- Mix in one cup of chopped walnuts for banana nut bread.
- Substitute ½ cup of coconut oil or light olive oil for the butter to make a dairy free banana bread.
- Swirl in ½ cup of peanut butter for a peanut butter banana bread.
- Add ½ cup of white chocolate chips or cinnamon chips for added sweetness!
Yes! Banana bread freezes beautifully. Allow the banana bread to cool, wrap the bread in plastic wrap, and then place the loaf of bread in a Ziploc bag. Freeze for up to 3 months. To defrost, take the banana bread out of the freezer and allow it to defrost on the counter.
Can I make this batter into muffins instead of bread?Yes! Line a muffin tin with muffin liners. Scoop the batter into the muffin tin and bake for 18-20 minutes.
How long will banana bread last?Place the leftover banana bread in an airtight container and it will stay fresh on the counter for up to 4 days. You can also keep the banana bread in a Ziploc bag on the counter.
Did you love this Banana Bread with Self-Rising Flour Recipe? If you did, don't forget to tag me on social media on Instagram or Facebook and share this recipe on Pinterest! Thanks for sharing this journey with me and enjoy these delicious recipes!
Did you make this recipe? Please RATE THE RECIPE below with a 5 star rating! It will help other hungry readers find my recipe!
Banana Bread Recipe With Self-Rising Flour
Recipe details
- 8 Slices
- Prep time: 5 Minutes Cook time: 50 Minutes Total time: 55 min


Comments
Share your thoughts, or ask a question!
Thank you!
We used our Pampered Chef tools to mix up a batch and baked them in our camper oven in our PC Large Muffin Pans!